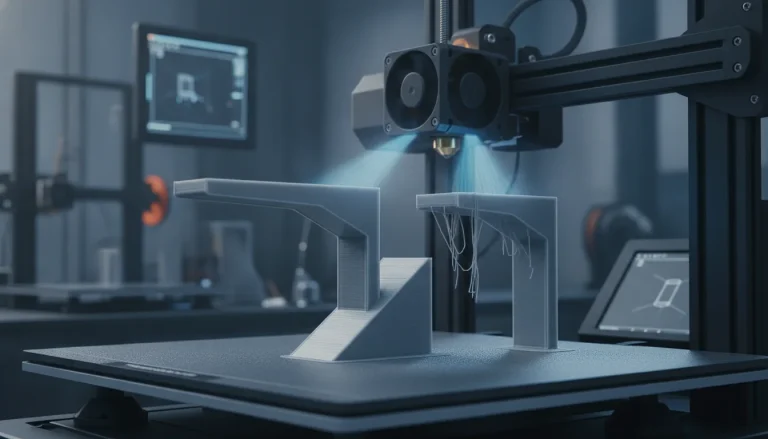
A bridge is a line of filament stretched between two supported points with nothing underneath; an overhang is a wall that steps a little further outward on every layer. Both sag for the same reason: the plastic stays soft for too long in open air. The fixes live in the slicer: more part cooling on those features, a lower bridge and overhang speed, the right bridge flow, and a nozzle at the cool end of the filament’s range. As a reference point, Cura’s built-in bridge settings run the fan at 100% and print bridge walls at 15 mm/s with 50% flow, and Prusa’s PLA profile forces the fan to 100% on bridges.
This guide covers the slicer side: how PrusaSlicer, Cura, Bambu Studio and OrcaSlicer detect bridges and overhangs, which settings to change, how layer height and line width matter, and how materials differ. Changing the model itself is covered in the companion guide on designing for support-free printing. Values come from the slicer defaults, Prusa profiles and Bambu Lab documentation linked at the end; where a value is a starting point, we say so.
The consumer toolchanger 3D printer: the SnapSwap 4-toolhead system swaps heads in 5 seconds for true multi-color and multi-material printing, with smart calibration and auto filament loading.
- 4 toolheads · 5 s swap
- Up to 500 mm/s · 20,000 mm/s²
- 270 mm cube build volume
- Multi-color & multi-material

Fix sagging bridges and overhangs in six steps
- Make sure the slicer actually treats the feature as a bridge or overhang (in Cura, bridge settings are off by default).
- Raise the bridge/overhang fan speed. For PLA, 100%.
- Lower the bridge speed and turn on overhang slowdown. Start around 15–30 mm/s for bridges.
- Drop the nozzle 5–10 °C, staying inside the filament’s range.
- Only then tune bridge flow, using a bridge test print and changing one value at a time.
- If a feature still fails, change the geometry, the orientation or add supports.
How slicers decide what is a bridge or an overhang
Slicers do not look at the angle of your model. They compare each wall line with the layer below and measure how much of its width is unsupported. The catch is that two families of slicers count in opposite directions:
- PrusaSlicer uses overlap: 100% is full overlap (no overhang), 0% is a floating extrusion, i.e. a bridge. Its dynamic overhang speed and dynamic fan speed settings are set at 0%, 25%, 50% and 75% overlap, with linear interpolation in between.
- Bambu Studio and OrcaSlicer use overhang degree: 0% is no overhang, 100% is an overhanging wall that is effectively a bridge. Their overhang speed brackets run from 10–25% up to 75–100%.
- Cura only applies its bridge settings when Enable Bridge Settings is on (off by default). An unsupported wall counts as a bridge wall once it is longer than the Minimum Bridge Wall Length (default 5 mm), and a skin area counts as a bridge when less than 50% of it is supported.
So “slow down 25% overhangs” means almost the opposite thing in PrusaSlicer and in Bambu Studio. Check which scale your slicer uses before copying a profile from someone else.
Read the underside: symptom, cause, fix
| What you see | Likely cause | Fix first |
|---|---|---|
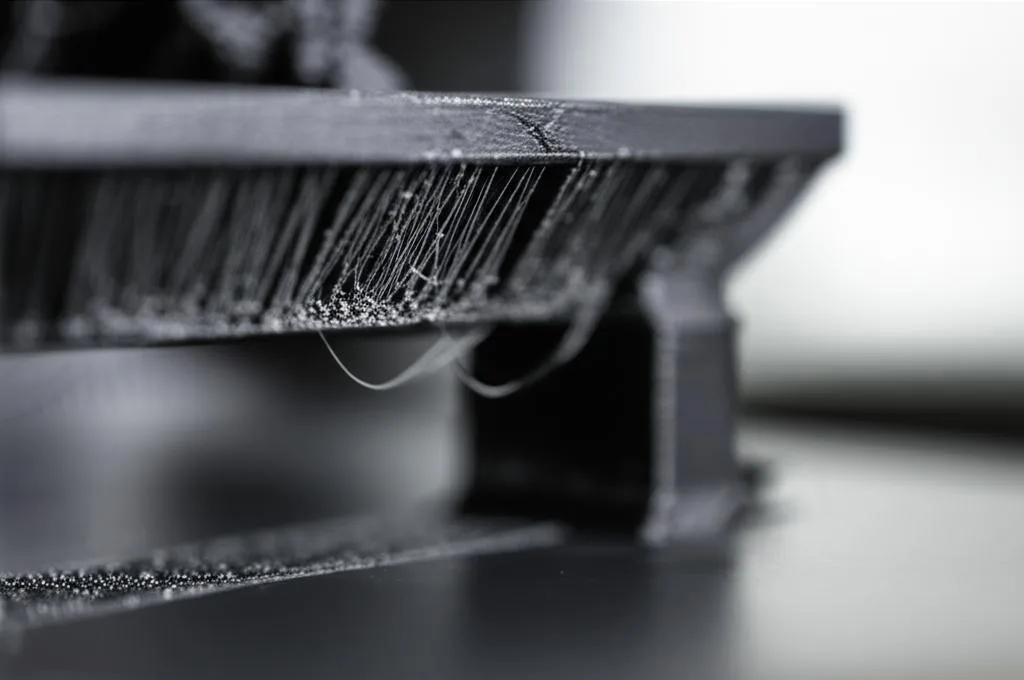
| Bridge lines hang in a smooth curve, sagging most in the middle | Too little cooling, too much material per line, or a long span | Bridge fan up, then bridge speed down; shorten the span or support it halfway |
| Round, separate strands with gaps between them | Bridge lines too thin to touch each other | Raise bridge flow or bridge density (see the bridge flow section) |
| Lines snap or pull away from the anchor walls | Too little flow for a thin layer, or speed too high to anchor | Enable thick bridges or raise bridge flow; lower bridge speed |
| First bridge layer fine, top surface above it bumpy or pillowed | Layers above the bridge still printed with bridge-like settings, or too few of them | Add solid layers over the bridge; in Cura check the second and third bridge skin settings |
| Overhang edge curls up and the nozzle catches it | Overhang printed too fast or too hot for the cooling available | Turn on overhang slowdown, more fan on overhangs, 5–10 °C cooler |
| Rough, drooping underside only on the steepest part of a curve | Overhang past what your layer height and line width can carry | Thinner layers in that zone, or supports |
| Weak, splitting layers after raising the fan | Too much cooling for the material (typical for PETG, ABS) | Use a bridge/overhang-only fan override instead of a higher general fan speed |
Fan settings for bridges and overhangs
Cooling is the first thing to change, and every major slicer lets you raise the fan only on bridges and overhangs, so the rest of the print keeps its normal layer bonding.
- PrusaSlicer: Bridges fan speed (Filament settings, Cooling) is enforced during all bridges and overhangs. Prusa’s PLA profile sets it to 100%; newer profiles also use Enable dynamic fan speeds, which raises the fan as overlap drops.
- Bambu Studio / OrcaSlicer: a Cooling overhang threshold and a Fan speed for overhangs (in OrcaSlicer, Overhangs and external bridges fan speed) force the fan up once a line is unsupported beyond the threshold. Bambu Studio can also start the fan shortly before the overhang, because a fan needs time to reach speed.
- Cura: Bridge Fan Speed defaults to 100% for bridge walls and the first bridge skin, and 0% for the second and third bridge skin layers.
Minimum layer time matters for small parts. If a layer prints in a few seconds, the next layer lands on plastic that is still soft, and overhangs droop even with the fan at full speed. Cura’s Minimum Layer Time defaults to 5 seconds and stops slowing down at a Minimum Speed of 10 mm/s, because, as its description puts it, nozzle pressure gets too low at very slow speeds. In PrusaSlicer the equivalent is Slow down if layer print time is below; Prusa’s own profiles mostly set it between 10 and 20 seconds.
For PLA, PETG and TPU, Bambu Lab also suggests opening the front door and top lid of an enclosed printer to improve cooling; for high-temperature filaments it warns this can cause warping and poor layer adhesion. If the fan is already at 100% and bridges still sag, the limit is the fan and duct, not the slicer; see part cooling fan upgrades.
Bridge and overhang speed
Slower printing gives each line more time under the fan. Bambu Lab adds a caveat: slower is not always better, because extrusion becomes less stable, so tune bridge speed per printer and filament. Reference values:
| Slicer | Bridge speed | Overhang speed |
|---|---|---|
| Cura (defaults) | 15 mm/s for bridge walls and first bridge skin (half the outer wall or top/bottom speed, never below the minimum speed); 25 mm/s for the second skin layer | Overhanging Wall Angle is 90° by default, which disables it; set an angle and speed factors such as 75, 50, 25% |
| PrusaSlicer (Prusa profiles) | Mostly 20–40 mm/s; 25 mm/s in the base profile | Dynamic overhang speed at 0/25/50/75% overlap |
| Bambu Studio | Tested between 10 and 50 mm/s in Bambu Lab’s bridge guide | Slow down for overhangs is on by default; overhang speeds are generally 10–60 mm/s |
Bridge flow: why Prusa says lower and Bambu says higher
Advice on bridge flow looks contradictory until you know how the slicer sizes a bridge line.
- Thick bridges on: the bridge line is extruded as a round strand as wide as the nozzle, so a 0.4 mm nozzle lays a 0.4 mm cylinder. Bambu Lab describes these bridges as more reliable and able to span longer distances, but they can sag. Here, reducing flow slightly helps: Prusa’s knowledge base suggests a lower bridge flow ratio to “pull” the strand behind the nozzle so it drops less.
- Thick bridges off: the bridge flow is calculated from the normal layer height and line width. In mid-air the strand is not pressed flat and turns round, so its diameter can be smaller than the line spacing: lines do not touch, gaps appear and the surface sags. At low layer heights the strand can even break. Here, raising flow helps. Bambu Lab’s bridge guide, based on test prints by MakerWorld user Make Wonderful Things, suggests testing bridge flow between 1.4 and 1.7 for materials such as PLA; in that test 1.5 at 40 mm/s and 1.6 at 10–20 mm/s gave the best bridges.
Check your profile before changing anything. PrusaSlicer’s bridge flow ratio is 1 in the Prusa profiles, and the base Prusa print profile has thick bridges off. Cura goes its own way: bridge wall flow defaults to 50% and first-layer bridge skin flow to 60%, followed by 100% and 110% on the second and third skin layers, which rebuild a solid surface above the bridge. Whatever the slicer, change flow in steps on a bridge test and keep the bridge speed you plan to use, since more flow needs more time to cool.
Bridge flow is not the fix for general over-extrusion. If walls and top surfaces also look fat, calibrate the flow rate first.
How layer height and line width change overhangs
On a slope, each layer steps outward by layer height × tan(angle), with the angle measured from vertical. The part of the line that still rests on the layer below is what the slicer reports as overlap. The table shows that geometry for a 0.45 mm line, a typical wall width for a 0.4 mm nozzle. It is simple arithmetic that ignores the rounded edge of a real line, not a measured result.
| Wall angle from vertical | 0.10 mm layers | 0.20 mm layers | 0.30 mm layers |
|---|---|---|---|
| 30° | 87% supported | 74% supported | 62% supported |
| 45° | 78% supported | 56% supported | 33% supported |
| 60° | 62% supported | 23% supported | 0%, printed as a bridge |
- Thinner layers help steep overhangs. The same 60° wall goes from barely supported to mostly supported when you halve the layer height. The cost is print time, so use variable layer height only where the overhang is.
- Wider lines help too, narrower lines hurt. A wider line keeps more of its width on the layer below, so a small nozzle with narrow lines reaches a lower angle before the overhang turns into a bridge.
- Bridges behave differently. A bridge has no layer below, so layer height only matters through the flow calculation: with thick bridges off, a thin layer means a thin strand that can snap.
PLA, PETG, ABS and TPU: cooling differences
The more a material needs warmth for layer bonding, the less fan it can take, and the worse it bridges. Prusa’s filament profiles show that pattern clearly:
| Material (Prusa base profile) | Normal fan | Bridges fan | Fan off for first layers | Notes |
|---|---|---|---|---|
| PLA | 100% | 100% | 1 | Bambu Lab: for overhangs, try about 205 °C with the overhang fan at 100% |
| PETG | 30–50% | 50% | 3 | Less fan means more sag; long spans often need supports |
| ABS | 20–30% | 25% | 3 | Needs an enclosure; too much fan weakens layers |
| Flexible (TPU) | 70–90% | 80% | 3 | Slow printing; see the profile for your printer |
Bambu Lab’s filament data sheets also list a maximum overhang angle and bridging length; for PLA Basic they are 55° and 30 mm. The sheet does not say how the angle is measured or with which settings, so read it as the manufacturer’s rating on its own printers, not a limit for yours. For material-specific tuning, see the PETG settings guide.
Temperature works together with the fan. Bambu Lab’s overhang guide recommends staying inside the recommended range and going about 5–10 °C lower if needed; for an unknown filament, print a temperature tower and look at the overhang section as well as the layer bonding.
Common mistakes
- Raising the general fan speed instead of the bridge fan. On PETG and ABS this weakens every layer to fix a few bridges.
- Tuning bridge flow first. Bambu Lab warns that blindly adjusting bridge flow rarely improves bridges; get cooling and speed right, then test flow.
- Copying overhang percentages between slicers. PrusaSlicer counts overlap, Bambu Studio and OrcaSlicer count overhang.
- Forgetting Cura’s bridge switch. With Enable Bridge Settings off, bridges are printed as normal walls and skin.
When slicer settings are not enough
- Long bridges: Prusa suggests placing a support enforcer halfway across so the printer bridges two short spans instead of one long one.
- Change the model or its orientation. Prusa calls reorienting the object to remove the bridge the most effective fix. Chamfers, teardrop holes and sacrificial bridges are covered in design for support-free printing.
- Use supports where they belong. Tree supports suit steep, scattered overhangs that no setting will save.
Frequently asked questions
What is the best fan speed for bridges?
For PLA, 100%: that is the Cura default and the value in Prusa’s PLA profile. Materials that need warmth for layer bonding take less; Prusa’s profiles use 50% for PETG and 25% for ABS on bridges. Set it as a bridge-only override so the rest of the print keeps its normal cooling.
Should I increase or decrease bridge flow?
It depends on how your slicer builds bridge lines. With thick bridges, where each strand is as wide as the nozzle, a slightly lower flow reduces sag. With thick bridges off, the strands can be too thin to touch, and Bambu Lab’s bridge guide suggests testing values of 1.4–1.7. Tune cooling and speed before flow in either case.
How long a bridge can a 3D printer print?
There is no universal limit; it depends on material, cooling and settings. Bambu Lab rates its PLA Basic at a maximum bridging length of 30 mm on its own printers. For longer spans, put a support enforcer in the middle or change the design.
Does a lower layer height help overhangs?
Yes, for sloped overhangs. Each layer steps out by less, so more of each line rests on the layer below; at 60° from vertical, going from 0.2 mm to 0.1 mm layers raises the supported part of a 0.45 mm line from about 23% to 62%. It does little for flat bridges, which have nothing beneath them.
Sources
- Prusa Knowledge Base: Poor bridging
- PrusaSlicer 2.9.2: Prusa Research print and filament profiles (PrusaResearch.ini)
- UltiMaker Cura: setting definitions and defaults (fdmprinter.def.json)
- Bambu Lab Wiki: How to improve bridge quality in Bambu Studio
- Bambu Lab Wiki: How to print overhangs
- Bambu Lab: PLA Basic technical data sheet