In the intricate world of 3D printing, achieving flawless results often hinges on a multitude of finely tuned parameters. Among these, effective part cooling stands out as a critical, yet frequently underestimated, factor, particularly when tackling challenging geometries such as overhangs and bridges. A well-chosen and properly installed part cooling fan can be the linchpin between a failed print and a pristine object, directly influencing surface finish, dimensional accuracy, and overall structural integrity. This guide delves into the nuances of part cooling, offering an objective comparison of various fan types, their associated costs, and the considerations necessary for an informed upgrade decision.
Understanding the role of part cooling in 3D printing
The consumer toolchanger 3D printer: the SnapSwap 4-toolhead system swaps heads in 5 seconds for true multi-color and multi-material printing, with smart calibration and auto filament loading.
- 4 toolheads · 5 s swap
- Up to 500 mm/s · 20,000 mm/s²
- 270 mm cube build volume
- Multi-color & multi-material

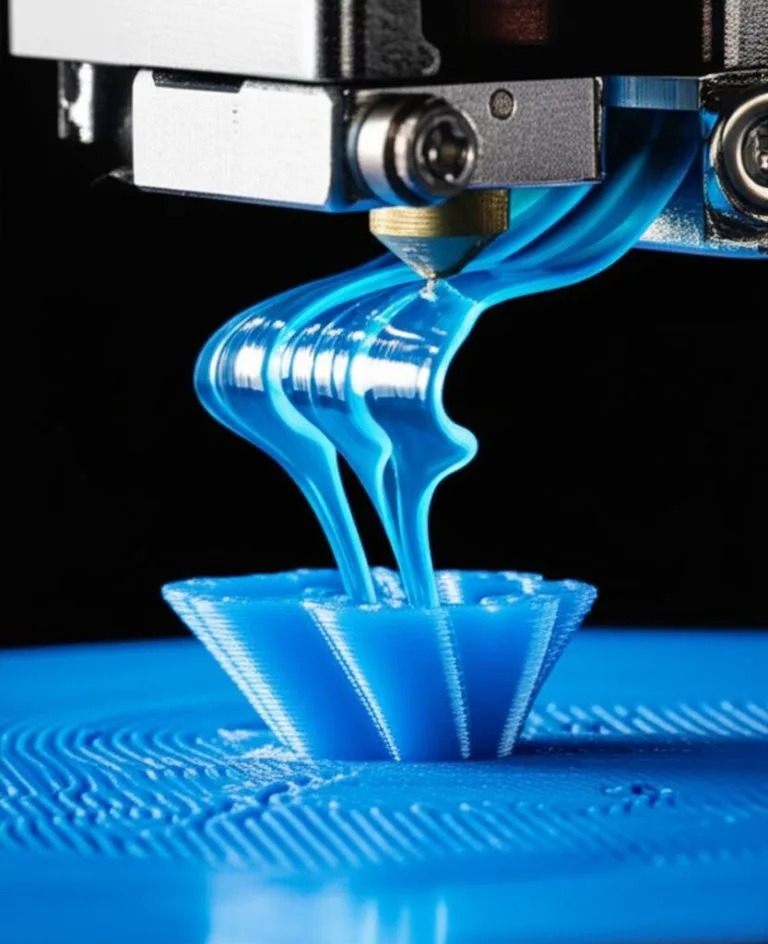
Part cooling refers to the directed airflow used to solidify extruded filament rapidly after it leaves the hotend nozzle. This rapid cooling is essential for several reasons. Firstly, it prevents the molten plastic from deforming under its own weight or being dragged by subsequent layers. This is especially vital for features that extend outwards without direct support from below, known as overhangs. Without adequate cooling, these sections can curl upwards, sag, or delaminate, leading to unsightly and structurally weak prints.
Secondly, part cooling is indispensable for successful bridging. A bridge is a horizontal span of filament printed in mid-air between two anchor points. When a bridge is laid down, the filament needs to cool almost instantly to maintain its straight line and prevent sagging. Insufficient cooling can cause significant drooping, resulting in stringy, uneven, or collapsed bridges. Beyond these specific challenges, consistent part cooling contributes to sharper corners, smoother surfaces, and better overall aesthetic quality, mitigating issues like ghosting and ringing by allowing each layer to set firmly before the next is applied.
Exploring common part cooling fan types and their characteristics

When considering a part cooling fan upgrade, understanding the fundamental differences between fan types is crucial. The two primary categories encountered in 3D printing are axial fans and radial (blower) fans, each with distinct operational principles and performance profiles.
Axial fans: The ubiquitous cooling solution
- Description: Axial fans move air parallel to the fan’s axis of rotation. They are common in electronics for general airflow, such as cooling power supplies or mainboards.
- Characteristics: They typically provide a high volume of airflow (CFM – cubic feet per minute) but generate relatively low static pressure. Static pressure is the fan’s ability to push air against resistance, such as through a restrictive duct or nozzle.
- Application in 3D printing: While some stock 3D printers might use small axial fans for part cooling, their effectiveness is often limited. Their low static pressure makes them less ideal for directing a focused, high-pressure stream of air precisely where it’s needed, especially through complex fan shrouds. They tend to dissipate air rather than concentrate it.
- Common sizes: 30x30x10mm, 40x40x10mm.
Radial (blower) fans: The preferred choice for part cooling
- Description: Radial fans, often referred to as blower fans or centrifugal fans, draw air in axially and expel it radially (at a 90-degree angle to the intake). They are designed to move air through a scroll housing that converts velocity into pressure.
- Characteristics: Blower fans excel at generating high static pressure, making them exceptionally well-suited for pushing air through restrictive ducts and focusing a precise stream onto the print. While their raw CFM might be lower than some axial fans of comparable size, their ability to deliver that air efficiently and effectively to the print area is paramount.
- Application in 3D printing: These are the workhorses of effective part cooling. Their high static pressure allows for intricate fan shroud designs that channel airflow directly to the nozzle tip, ensuring rapid and targeted cooling of the freshly extruded filament.
- Common sizes: The 5015 fan (50x50x15mm) is a widely popular upgrade, offering a significant boost in performance over smaller stock blower fans (e.g., 4010 – 40x40x10mm). Other sizes include 4020 (40x40x20mm) or even larger 6020 fans for more bespoke setups.
Key considerations for selecting a part cooling fan

Choosing the right part cooling fan involves more than just picking the largest available. Several technical specifications and practical aspects warrant careful evaluation to ensure compatibility and optimal performance for your specific 3D printer and printing needs.
- Airflow (CFM): While higher CFM generally means more air movement, it’s crucial to remember that raw CFM doesn’t tell the whole story for part cooling. The fan’s ability to deliver that airflow under pressure is equally important.
- Static Pressure: This is arguably the most critical metric for part cooling. A fan with high static pressure can overcome the resistance of a restrictive fan duct, ensuring a concentrated and powerful stream of air reaches the print. This is where radial fans shine.
- Noise Level: Measured in decibels (dB), noise can be a significant factor, especially if your printer operates in a living space. Performance often comes with increased noise, so finding a balance is key. Quality fans may offer better performance for similar noise levels, or provide higher performance at a slightly increased but tolerable noise.
- Size and Compatibility: The physical dimensions of the fan must fit within your printer’s carriage or hotend assembly. Upgrading to a larger fan like a 5015 fan often necessitates printing a custom fan shroud or mount, which adds an extra step to the upgrade process.
- Voltage (12V vs. 24V): Most 3D printers operate on either 12V or 24V systems. It is imperative to match the fan’s voltage to your printer’s power supply to avoid damage. Connecting a 12V fan to a 24V system will likely destroy the fan, while a 24V fan on a 12V system will run at half speed, if at all.
- Bearing Type: The type of bearing affects fan longevity and noise.
- Sleeve bearings: Inexpensive, quieter when new, but can wear out faster, especially in high-temperature or horizontally mounted applications.
- Ball bearings: More durable, longer lifespan, can be slightly noisier, and typically more expensive. They handle various orientations well.
- Hydraulic/Fluid Dynamic Bearings (FDB): A hybrid offering a good balance of quiet operation and longevity, often found in higher-quality fans.
Comparing cost structures and features of part cooling fan solutions

The landscape of part cooling fan solutions ranges from basic stock components to advanced, high-performance upgrades. Each option presents a distinct balance of cost, performance, and installation complexity, allowing users to align their choice with their specific budget and printing ambitions.
Stock part cooling fans: The baseline
- Cost: Effectively zero, as they are included with the printer. Replacement costs are typically low, often under $10 for a generic equivalent.
- Features: Usually smaller radial (e.g., 4010 blower) or sometimes axial fans. They provide adequate cooling for simpler prints and common filaments like PLA at moderate speeds.
- Performance: Often the weakest link for demanding prints. They may struggle with aggressive overhangs, long bridges, or faster print speeds, leading to noticeable print quality degradation.
- Installation: Direct replacement, plug-and-play.
Direct replacement or minor fan upgrades: Enhanced reliability
- Cost: Modest, typically ranging from $10 to $25 per fan.
- Features: These are often higher-quality versions of the stock fan size (e.g., a premium 4010 blower fan from a reputable manufacturer). They might offer improved bearings, better airflow, or quieter operation compared to generic stock fans.
- Performance: Provides a marginal but noticeable improvement in reliability and longevity. It can slightly improve cooling performance for some scenarios without requiring significant modifications.
- Installation: Generally straightforward, direct replacement.
Performance fan upgrades: Stepping up to a 5015 fan and beyond
- Cost: Higher initial investment, ranging from $15 to $40+ per fan for quality units. Additional costs may include filament for printing custom fan shrouds (negligible for most) or purchasing pre-made shrouds.
- Features: This category typically involves upgrading to a larger, more powerful radial fan like the 5015 fan, or even a 4020 fan if space permits. These fans are chosen for their significantly higher static pressure and airflow capabilities.
- Performance: Offers a substantial leap in cooling power. This directly translates to dramatically improved print quality for challenging overhangs, pristine bridges, and the ability to print faster with better results. It also opens up possibilities for printing with materials that require more aggressive cooling.
- Installation: More involved. Requires designing and printing a custom fan shroud or finding a compatible design online. Wiring may need modification if the new fan uses a different connector or if implementing a dual-fan setup.
Dual part cooling fan setups: Maximum cooling potential
- Cost: The highest investment, as it involves two performance fans (e.g., two 5015 fans) and potentially more complex wiring components. Expect $30 to $80+ for the fans alone, plus materials for a specialized dual-fan shroud.
- Features: This configuration maximizes cooling by directing airflow from two separate fans onto the print, often from opposing sides.
- Performance: Provides the ultimate in part cooling, ideal for very large or complex prints with extreme overhangs, or for users pushing the boundaries of print speed and material capabilities.
- Installation: The most complex. Requires a custom-designed dual-fan shroud, potentially more advanced wiring (e.g., Y-splitter, voltage step-down if mixing fan voltages), and possibly firmware adjustments if the printer’s mainboard doesn’t natively support dual part cooling fans.
The impact on print quality and informed decision-making
The consumer toolchanger 3D printer: the SnapSwap 4-toolhead system swaps heads in 5 seconds for true multi-color and multi-material printing, with smart calibration and auto filament loading.
An optimized part cooling fan system directly addresses common frustrations in 3D printing. With sufficient and well-directed airflow, issues like curling, warping, and sagging on print overhangs are significantly reduced. Bridging issues transform from messy filament droops into clean, straight spans. The overall print quality sees a marked improvement, characterized by smoother surfaces, sharper details, and enhanced layer adhesion. When evaluating these options, consider your primary printing needs: are you an occasional hobbyist printing simple models, or a power user frequently tackling intricate designs and pushing print speeds? By objectively weighing the features and cost structures presented, alongside the installation effort required, you can make an informed decision that aligns with your specific goals and budget, ultimately unlocking a higher level of precision and reliability from your 3D printer.
Frequently asked questions
Can I install a 5015 fan on my printer without printing a new duct?
No. A 5015 fan is physically larger than common stock fans like a 4010 blower, so its mounting holes and dimensions will not align with the original fan shroud. You must print a custom fan shroud designed for a 5015 fan that is compatible with your printer’s hotend carriage.
What happens if I connect a 12V fan to a 24V printer?
Connecting a 12V fan to a 24V system will deliver twice the rated voltage, which will almost certainly destroy the fan immediately, often with a visible puff of smoke or a burnt smell. Always check your printer’s power supply voltage before purchasing a replacement fan.
Is upgrading to a dual 5015 fan setup worth the extra cost and effort?
For most users printing PLA at moderate speeds, a single high-quality 5015 fan provides a substantial improvement over stock cooling. Dual 5015 setups offer the maximum cooling potential for extreme overhangs, very high print speeds, or large complex parts, but require a custom dual-fan shroud and more complex wiring, making it best suited for experienced users pushing performance limits.