PETG prints well on most machines at a nozzle temperature of 230–260 °C and a bed temperature of 65–90 °C, with the part cooling fan somewhere between off and 60%. Those ranges come from the data sheets of Prusament, Bambu Lab and Polymaker PETG. Retraction on a direct-drive printer is short: Bambu Lab lists 0.8–1.4 mm for its PETG HF, Polymaker 1–3 mm for PolyLite PETG. Dry the spool before printing, and never print PETG straight onto a bare smooth PEI sheet, because it can bond hard enough to damage the surface.
Most PETG problems come from three settings: temperature too high for the speed (stringing), too much fan (weak layers) and wet filament (stringing, bubbles and a rough surface). This guide gives the manufacturer values side by side, explains which way to adjust each one, covers blobs, gaps and sagging bridges, and includes a symptom table. Where we give a starting point rather than a published figure, we say so.
The consumer toolchanger 3D printer: the SnapSwap 4-toolhead system swaps heads in 5 seconds for true multi-color and multi-material printing, with smart calibration and auto filament loading.
- 4 toolheads · 5 s swap
- Up to 500 mm/s · 20,000 mm/s²
- 270 mm cube build volume
- Multi-color & multi-material

PETG settings in 60 seconds
- Dry the filament: 65 °C for 6–8 hours in a filament dryer or forced-air oven.
- Start with your filament brand’s printer profile, or the middle of its data sheet range.
- Use a textured or powder-coated sheet; on smooth PEI, apply glue stick as a release layer.
- Keep the fan off for the first few layers, then run it at up to about half power.
- Stringing with dry filament: lower the nozzle temperature in 5 °C steps.
- Weak or splitting layers: raise the temperature and reduce the fan.
PETG print settings from three manufacturers
PETG formulations differ, so the most reliable baseline is the data sheet for the spool you actually own. These three show how much the recommendations overlap, and where they don’t.
| Setting | Prusament PETG | Bambu Lab PETG HF | Polymaker PolyLite PETG |
|---|---|---|---|
| Nozzle temperature | 250 ± 10 °C | 230–260 °C | 230–260 °C |
| Bed temperature | 80 ± 10 °C | 65–75 °C | 70–80 °C |
| Part cooling fan | 50% | 0–60% | Off to 20% |
| Print speed | Up to 200 mm/s | Under 300 mm/s | 50–100 mm/s |
| Retraction length | Not listed | 0.8–1.4 mm | 1–3 mm |
| Retraction speed | Not listed | 30–60 mm/s | 20–40 mm/s |
| Build surface | Satin or powder-coated sheet; smooth PEI with glue stick | Smooth or textured PEI, with glue | PC or textured PEI, glue when needed |
| Drying | Not listed | 65 °C, 8 h (forced-air oven) | 65 °C, 6 h |
The speed figures assume printers and hotends that can melt plastic that fast, such as the machines these profiles were written for. On an older or slower printer, keep the speeds from its own PETG profile. Prusa’s Knowledge Base gives slightly different numbers for generic PETG on its printers: 230 °C for the first layer and 240 °C after, with the bed at 85 °C and then 90 °C.
Nozzle temperature: layer strength vs stringing
Temperature is a trade-off. Prusa notes that a higher filament temperature improves bonding between layers and gives better mechanical resistance, while stringing can be reduced with a lower nozzle temperature and more retraction. You can’t max out both, so decide what the part needs.
Print speed changes the right temperature too. Bambu Lab explains that at high speed the nozzle has to melt more plastic per second, so it needs more heat. At lower speed or a lower maximum volumetric flow, the same temperature leaves the plastic too runny, and you get stringing, oozing and material building up on the nozzle. If you slow a profile down, lower the temperature with it.
A practical approach (our suggestion, not a published figure): start in the middle of the data sheet range, print a temperature tower, and move in 5 °C steps. The PETG temperature tower guide shows how to set one up and read it.
PETG bed temperature and build surface
PETG sticks very well, and that is the risk. Prusa warns against printing it on a bare smooth PEI sheet because the adhesion can be strong enough to damage the sheet. It recommends a powder-coated (textured) or satin sheet, or glue stick on smooth PEI as a separating layer. Bambu Lab lists glue as bed preparation for PETG HF on both its smooth and textured PEI plates.
- Clean the sheet before printing. Fingerprints cause patchy adhesion.
- Brim: Prusa says a brim is not generally necessary for Prusament PETG. Bambu Lab, which finds PETG more prone to warping than PLA, suggests glue and a brim for parts that lift at the corners.
- Removal: let the bed cool before flexing the sheet. If parts still come off with bits of the surface attached, use more release agent or switch to a textured sheet.
A first layer squashed as hard as you would for PLA makes over-adhesion worse. If removal is a fight, check your Z offset before blaming the plate.
PETG cooling fan settings
Prusa’s advice covers most cases: print the first few layers with the fan off to prevent deformation, then run it at half power. Cooling keeps detail sharp and reduces stringing and oozing. If you need the part as tough as possible, Prusa suggests turning the print fan off, at the cost of worse overhangs and bridges.
The data sheets agree that PETG wants less fan than PLA: 50% for Prusament, 0–60% for Bambu PETG HF, and off to 20% for PolyLite PETG. Even with good cooling PETG bridges poorly. Bambu Lab rates PETG HF at an overhang of about 70° and bridges of about 30 mm, so add supports beyond that.
Retraction settings and fixing PETG stringing
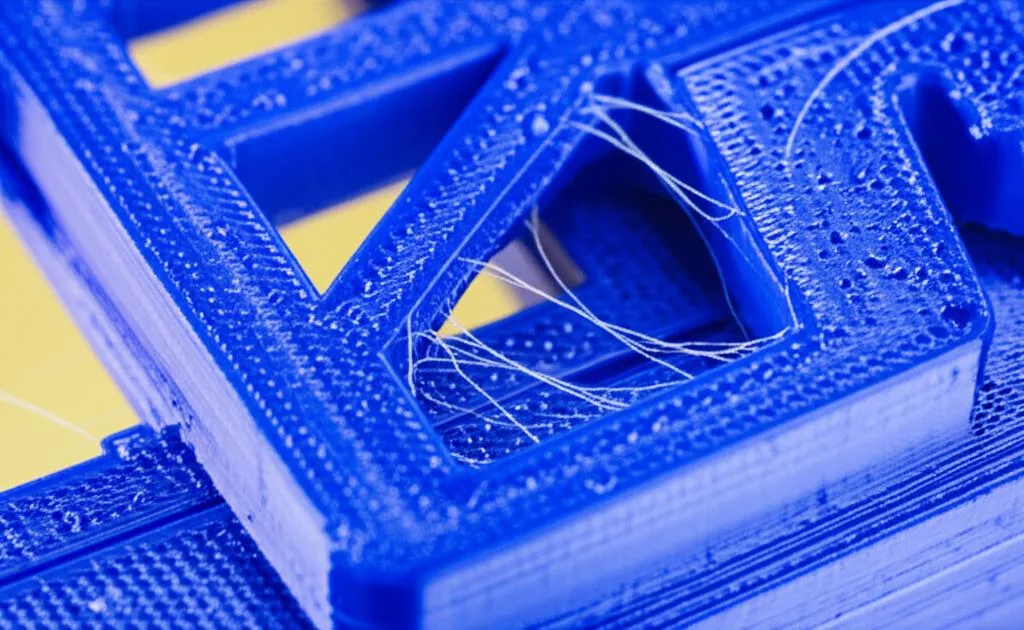
The published retraction values are for direct-drive printers: 0.8–1.4 mm at 30–60 mm/s (Bambu PETG HF) and 1–3 mm at 20–40 mm/s (PolyLite PETG). Bowden printers need noticeably longer retraction because of the tube between extruder and hotend. None of the manufacturer sources above gives a Bowden figure, so start from your printer maker’s PETG profile and tune from there with a retraction test. The method is the same as in our retraction tuning guide for PLA.
Before touching retraction, rule out moisture. Bambu Lab says obvious stringing on PETG usually means the filament is damp. Water in the filament turns to steam in the nozzle, which makes the melt expand and flow faster, and leaves pores, stringing and weak parts.
| Symptom | Likely cause | Fix |
|---|---|---|
| Stringing plus bubbles, popping or a rough, pitted surface | Wet filament | Dry at 65 °C for 6–8 h, then store sealed with desiccant |
| Fine strings, filament known to be dry | Nozzle too hot for the speed, or too little retraction | Lower the temperature 5 °C at a time; increase retraction in small steps |
| Plastic collecting on the nozzle, blobs, clogs | Flow too high | Bambu Lab recommends a flow ratio of 0.93–0.96 for PETG; try 0.93–0.94 |
| Layers split or the part snaps along a layer line | Too cold or too much cooling | Raise the nozzle temperature, reduce the fan |
| Corners lifting | Layers cooling and shrinking too fast | Glue on the plate, add a brim, reduce the fan on lower layers |
| Thin walls or missing lines on fast sections | Speed beyond the hotend’s melt rate | Cap volumetric speed; Prusa’s PETG profile uses 8 mm³/s |
| Bump or dent in the wall just above an overhang | Sudden jump in flow rate | Slow down to about 90 mm/s, smooth the speed changes |
| Blobs lined up on an overhanging face | Seam placed on the overhang | Move the seam or keep it away from overhangs |
| Print pulls chunks out of the sheet | Over-adhesion on smooth PEI | Glue stick as a separator, or a textured sheet |
For persistent clogging with dry filament, Bambu Lab also suggests narrower lines: 0.36–0.40 mm on a 0.4 mm nozzle, if the part doesn’t need maximum strength.
PETG blobs, gaps and sagging bridges
Once the filament is dry and the stringing is under control, the remaining PETG failures are mostly about flow: too much plastic in one place, too little in another, or plastic laid in mid-air before it has set. Prusa’s own PETG profile shows how differently the material has to be treated from PLA.
- Gaps on fast sections. Prusa’s PrusaSlicer profiles cap PETG at a maximum volumetric speed of 8 mm³/s, against 15 mm³/s for PLA. With a 0.45 mm line at 0.2 mm layers, 8 mm³/s works out at roughly 90 mm/s (our arithmetic, not a published speed). A PLA speed profile run with PETG asks the hotend for more than it can melt, and thin walls or missing lines follow.
- Bumps and dents after overhangs. Bambu Lab describes local under-extrusion where an outer wall jumps from low to high flow, for example straight after an overhang or bridge. Its fix is to slow down, keeping print speed around 90 mm/s, and to set the smoothness coefficient in Bambu Studio to 0.1 so the speed changes gradually.
- Blobs at the seam. Bambu Lab singles out seams placed on an overhang as a PETG surface defect; move the seam or use the option that keeps it away from overhangs. Blobs elsewhere usually mean too much flow, which the table below covers. The guide to Z-seam placement shows the options in each slicer.
- Corner bulges and thin line starts. Prusa’s profiles use a higher linear advance value for PETG than for PLA on the same printer, which tells you pressure compensation is material-specific. Rerun a pressure advance test when you switch from PLA to PETG.
- Sagging bridges. Prusa’s PETG profile keeps the fan off for the first three layers, runs it at 30-50% after that, and uses 50% for bridges where its PLA profile uses 100%. If bridges droop, raise the bridge fan first; Prusa notes PETG bridges and overhangs worse than PLA whatever you do, so long spans still need supports.
Drying and storing PETG
Bambu Lab calls PETG highly hygroscopic: stored at 50–60% relative humidity it keeps absorbing water, and the longer it sits the worse it gets. Its drying recommendations for PETG are 60–65 °C for 8 hours in a convection oven, and its PETG HF data sheet asks for storage below 20% RH in a sealed container with desiccant. Polymaker specifies 65 °C for 6 hours for PolyLite PETG.
Use a dedicated filament dryer or a forced-air oven with even heat, and keep the spool away from the heating element. Bambu Lab states that a microwave or kitchen oven is not suitable and can damage the filament.
Settings for stronger PETG parts
- Walls before infill. Prusa recommends adding perimeters rather than more infill for solid parts. Bambu Lab suggests staying at or below 6 walls and 50% infill, because more solid plastic shrinks more and raises the risk of warping.
- Orientation. Layer bonds are the weak direction. In Bambu Lab’s PETG HF tests, tensile strength was 34 MPa along the layers and 23 MPa across them. Orient the part so the main load does not pull layers apart.
- Heat limits. Prusament PETG has a heat deflection temperature of 68 °C (ISO 75), and Prusa describes PETG parts as suitable for use below 80 °C. For parts under load in a hot car or near a motor, compare it with ABS in our ABS vs PETG guide.
Common PETG mistakes
- Using PLA cooling. A fan at 100% all the time gives weak layer bonds.
- Tuning retraction on wet filament. You end up chasing stringing with ever longer retractions while the real cause, moisture, stays.
- Printing on bare smooth PEI. The part may take part of the surface with it.
- Slowing down without lowering the temperature. Less plastic per second at the same heat means more oozing.
- Picking PETG where PLA would do. If the part isn’t exposed to heat or impact, PLA is easier. See PLA vs PETG: when to use which.
If PETG under-extrudes or clogs even with dry filament and sensible settings, clean the nozzle with a cold pull before changing anything else.
Frequently asked questions
What temperature should I print PETG at?
Most PETG data sheets give a nozzle range of 230–260 °C and a bed range of about 65–90 °C. Start in the middle of your brand’s range and adjust in 5 °C steps: hotter for stronger layers, cooler for less stringing. If you print slowly, stay toward the lower end.
Should the cooling fan be on for PETG?
Use some fan, but less than for PLA. Prusa recommends the fan off for the first few layers and then about 50%; data sheets range from off to 60%. Turn it down if layers split, up if overhangs sag or strings get worse.
Why is my PETG stringing so much?
The most common cause is moisture in the filament, so dry it first (65 °C for 6–8 hours). If dry PETG still strings, the nozzle is probably too hot for your print speed: lower it in 5 °C steps, then increase retraction slightly.
Can you print PETG on a PEI sheet?
Yes on textured PEI, which is the usual recommendation. On smooth PEI, apply glue stick as a release layer first, because PETG can bond strongly enough to damage the surface. Let the sheet cool before removing the part.