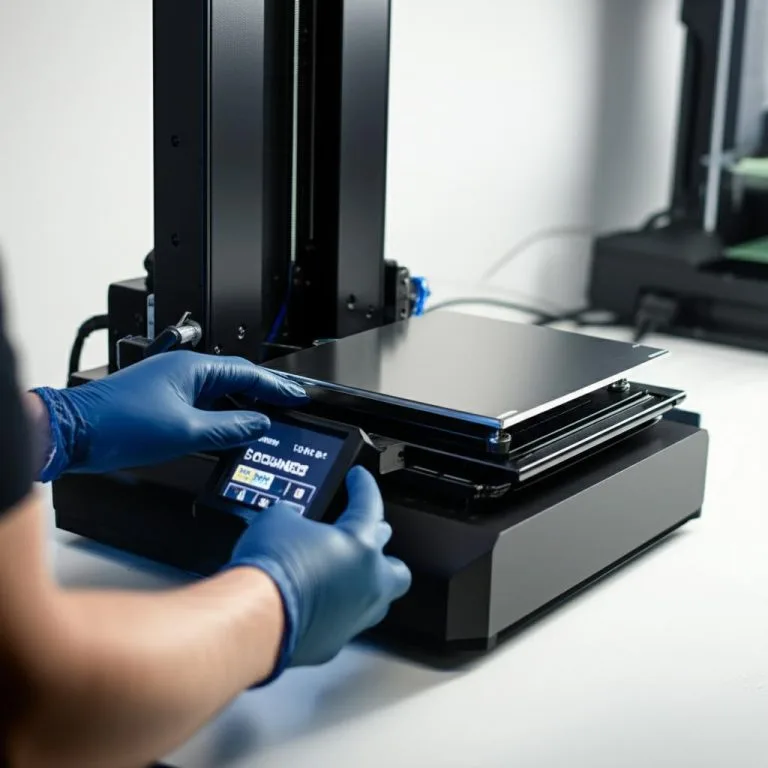
A resin exposure test is a small calibration print full of fine pins, holes, slots and text that shows whether your normal layer exposure time is too short or too long for one resin on one printer. To calibrate exposure time, start from the resin maker’s profile for your printer and layer height, print a test that covers several exposure times in steps (Anycubic’s R_E_R_F file prints eight copies in one run), and pick the exposure at which the most fine features form without holes and gaps closing up. Change only the normal exposure; bottom exposure controls how well the print holds the plate.
Which model to use depends on your printer and how much detail you need: a quick finder such as Phrozen’s XP Finder or the Photonsters XP2 Validation Matrix gets you into the right range in under half an hour, and AmeraLabs Town then fine-tunes it. Room temperature matters too: Phrozen asks for 20% more exposure when the room is between 18 and 24 °C. This guide explains the exposure settings, compares the common tests, shows how to read each feature, and covers the problems that look like exposure errors but are not. The details come from Anycubic, Phrozen and AmeraLabs documentation, linked at the end; where a value is our starting point rather than a published figure, we say so.
The consumer toolchanger 3D printer: the SnapSwap 4-toolhead system swaps heads in 5 seconds for true multi-color and multi-material printing, with smart calibration and auto filament loading.
- 4 toolheads · 5 s swap
- Up to 500 mm/s · 20,000 mm/s²
- 270 mm cube build volume
- Multi-color & multi-material

First resin calibration in 60 seconds
- Shake the resin bottle, mix the vat, and check the release film is clean.
- Load the resin maker’s profile for your printer and layer height. Change only the normal exposure time.
- Print a multi-exposure test (R_E_R_F on Anycubic) or a quick finder at a few different exposures.
- Wash properly, then compare text, pins, slots and holes on each copy.
- Pick the exposure with the most complete features and open holes; confirm with a detailed test such as AmeraLabs Town.
- For real models, Phrozen recommends adding at least 10% to the value you found, and 20% for models taller than 12 cm.
Resin exposure settings: normal, bottom and layer height
Exposure time is how long the light cures each layer. Anycubic sums up both failure modes: too short and the model is not fully cured, with poor detail, broken parts and obvious layer lines; too long and the print loses accuracy, swells because light spreads into the surrounding resin, and can turn brittle. A calibration print only answers the question for the settings around it, so fix those first.
| Setting | What it controls | Anycubic’s guidance | How to set it |
|---|---|---|---|
| Normal exposure | Cure of every layer after the base; decides fine detail | About 2–3 s for Anycubic resins on Anycubic printers; check the resin maker’s data for third-party resins | The exposure test |
| Bottom exposure | Adhesion of the first layers to the build plate | About 40 s on a brushed (“drawing”) platform, about 25 s on a laser-engraved platform | Adhesion of real prints; too long makes the base swell |
| Bottom layers | How many layers get the bottom exposure | Around 6; taller or heavier models may need more | Adhesion of real prints |
| Layer thickness | Z resolution; thinner layers allow shorter exposure, thicker layers need longer | 0.05 mm default on Photon printers; adjustable from 0.01 to 0.15 mm | Choose it before the test, then keep it fixed |
| Off time | Pause that lets resin flow back before the next exposure | Around 1–3 s; longer for thick or cold resin, or large layers | Leave at the profile value during the test |
These are one printer maker’s defaults, not universal values: your resin’s own profile for your printer model comes first. The key point is the split between normal and bottom exposure. The fine features on every test are printed with the normal exposure, so that is the only value you change between tests. An exposure found at one layer height does not carry over to another; see resin layer height before you decide.
Colour and pigment. Anycubic notes that darker resins block more light, and that it adjusts its own formulas so that different colours of the same resin type need about the same exposure. Other brands may not, so treat a new colour of a third-party resin as a new resin. AmeraLabs adds that weakly pigmented resins can let light bleed and fill fine gaps, while heavily pigmented ones can leave gaps too wide.
Which calibration print to choose
All of these tests measure the same thing, the normal layer exposure, but they differ in speed, detail and which printers they suit. A sensible first sequence is a fast finder to get into range, then one detailed part to settle on the final value; Phrozen’s help centre suggests exactly that order with the XP2 matrix and AmeraLabs Town.
| Test | What it is | Best for | Notes from the maker |
|---|---|---|---|
| Anycubic R_E_R_F | 8 small models in one print, each exposed longer than the one before | First calibration on Anycubic printers | The file is specific to each printer model; do not rename it or use another model’s file |
| Phrozen XP Finder | 3 mm thick plate with text, pillars, boards, lines and a logo | A quick, easy-to-read first test | About 20 minutes on a mono-LCD printer |
| Resin XP2 Validation Matrix (Photonsters) | 1.4 mm thick matrix of fine features | Getting into the right exposure range fast | About 10 minutes; Phrozen’s instructions say to set the layer count to 4 and the transition layer count to 0 |
| Photocentric XY Full Test | 66 × 119 mm test covering most of the screen | Checking exposure and the LCD/LED at the same time | Useful when you suspect the screen or light source |
| AmeraLabs Town | A small “town” with checkerboard, slots, pillars, bridges and logos | Fine-tuning after a finder; testing resin hardness and pigment | Phrozen calls it one of the most accurate finders, but it takes longer to print |
Dimensional tests (cubes, hole-and-peg gauges) come later. Exposure changes the size of every feature, so measure dimensions only after the exposure is settled. If you are still choosing a printer type, the SLA vs DLP vs MSLA comparison explains how the printer types differ; the print times quoted above are Phrozen’s figures for mono-LCD (MSLA) printers.
Before the first test print
- Mix the resin. AmeraLabs points to settled pigment as a cause of poor logos and surface defects on its test. Shake the bottle before pouring and stir the vat after it has stood.
- Change one setting only. Phrozen’s dial-in guide adjusts only the exposure times and leaves the other values at their defaults. Bottom exposure, lift and rest settings stay as the profile has them.
- Warm the room and the resin. Phrozen says most resins perform best above 24 °C, with 24–30 °C ideal, and begin to fail below 20 °C. Between 18 and 24 °C it recommends 20% more exposure; below 18 °C it advises against printing unless you heat the resin. Anycubic puts the optimum around 24 °C and says resin will not cure properly below 10 °C. Calibrate at the temperature you will actually print at.
- Plan the wash. Uncured resin trapped in gaps looks exactly like overexposure. Wash and dry the test the same way you will wash real parts.
How to run a multi-exposure test
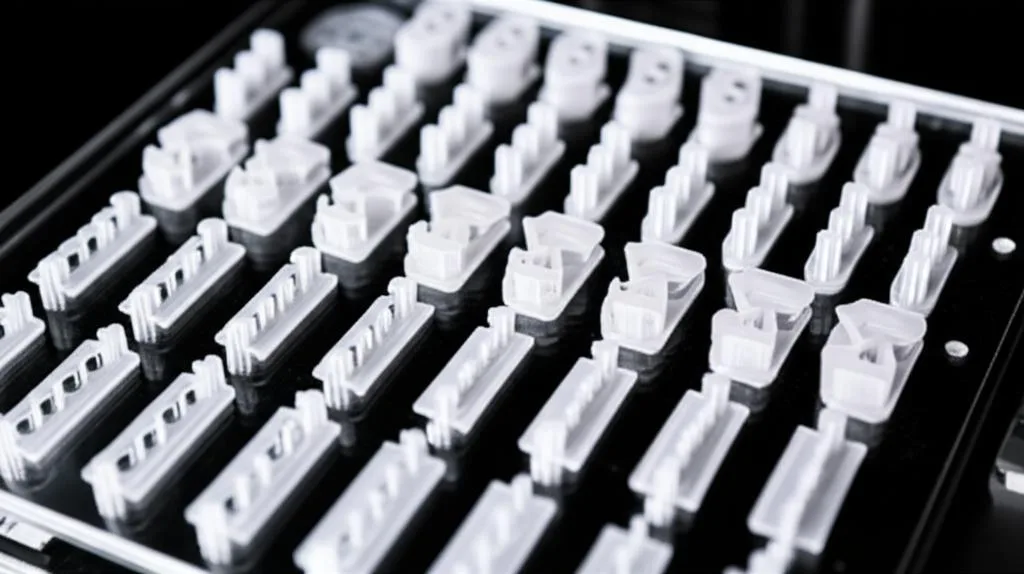
Anycubic R_E_R_F
- Download the R_E_R_F file for your exact printer model from Anycubic’s firmware and software page and copy it to the USB drive without renaming it.
- Set the normal exposure time, not the bottom exposure, on the printer or in the slicer. Model 1 prints at that time; models 2–8 each add a fixed increment that depends on the printer (listed in its manual).
- Choose a start value so the eight steps bracket the resin maker’s recommendation. Anycubic’s example: 1.5 s with a 0.25 s increment gives 1.5, 1.75, 2.0 and so on up to 3.25 s.
- Print, clean the models, and match each number on the model to its exposure.
- If none of the eight looks good, shift the start value and run it again.
Other printers: one exposure per print
Without a built-in multi-exposure mode, slice the XP Finder or XP2 matrix at the resin maker’s value, print it, then reprint at a shorter and a longer exposure and compare the three. Small steps work best once you are close; as a starting point, try steps of about 10% of the exposure time and narrow them as the copies start to look alike. Label each print on its base or keep them in a marked bag, because they look identical once washed.
How to read the calibration print
Too little exposure leaves features thin, soft or missing. Too much makes cured resin spread past the edges of each pixel, so positive features grow and negative ones (holes, slots, gaps) shrink or close. Anycubic describes this as the model expanding and losing dimensional accuracy because light spreads into the surrounding resin. Read every feature, not just one, and use a magnifier.
| Feature | Underexposed | Overexposed | Test |
|---|---|---|---|
| Small text | Dot of the “i” missing | Hole in the “e” filled in | XP Finder |
| Thin pillars | Some pillars missing | Pillars swollen | XP Finder, R_E_R_F |
| Boards and boundary lines | Some vanish or print too thin | Rectangles merge, lines widen | XP Finder |
| 1.0 mm checkerboard | Gaps between squares too wide | Gaps too narrow | AmeraLabs Town |
| Slots and ledges, 0.1–1.0 mm | Ledges missing or cracked | Narrow slots closed | AmeraLabs Town |
| Cross-shaped bridges | Pillars too thin | Pillars too thick | AmeraLabs Town |
| Inscribed vs raised logo | Inscribed logo bigger than raised | Raised logo bigger | AmeraLabs Town |
| Antenna tower | Weak or failed antenna | – | AmeraLabs Town |
| Base of the print (bottom exposure) | Print comes off the plate or stays on the film | First layers wider than the rest | Any print |
When the results disagree. Anycubic’s guide describes the classic split on R_E_R_F: one copy has many open holes but few pillars, another has few holes but many pillars. The first is at the edge of failing and keeps more detail; the second is overexposed, more reliable, and loses some detail. Pick between them according to what you print: fine miniatures lean towards the first, large or functional parts towards the second. On curved models, Anycubic suggests choosing the copy with the smoothest spherical and slanted surfaces when everything else is similar.
From test value to real prints. A calibration print is small and light. Phrozen recommends raising the normal exposure found with the XP Finder by at least 10% for real prints and by 20% for models over 12 cm, to leave a safety margin on full-size parts.
Results that aren’t an exposure problem
- Resin left in gaps. AmeraLabs’ first check on the Town is whether the gaps washed out. If residue remains, wash again before judging anything. The washing and curing guide covers times and solvents.
- Ghosting, a faint double image. AmeraLabs links it to the slicer, a loose or misaligned Z-axis, or vibration from nearby machines, not to exposure. Fix the mechanics first.
- Thin pillars fail at any exposure. AmeraLabs notes that pillar results depend on how hard and tough the resin is; flexible resins struggle to print the thinnest rows at all. Compare against what your resin type can do, see standard vs tough resin.
- Gaps too wide or too narrow even at a sensible exposure. AmeraLabs names poorly pigmented resin (light bleed) and heavily pigmented resin as causes, plus misaligned optics. A different resin may never pass the checkerboard perfectly.
- Features correct but parts snap later. That is usually post-curing or resin choice, not print exposure; see brittle resin prints.
Common calibration mistakes
- Changing bottom exposure instead of normal exposure. Bottom exposure applies to the first layers that hold the print to the plate. Anycubic’s R_E_R_F guide is explicit that model 1 uses the normal exposure, not the bottom one.
- Using another printer’s R_E_R_F file. Anycubic states the file differs for each model and should not be shared between them.
- Judging from a single feature. AmeraLabs asks you to read the logos together with the other tests. One closed hole is not a verdict.
- Keeping the value forever. Recalibrate for a new resin or colour, a new layer height, a new screen or release film, a big seasonal change in room temperature, and whenever prints that used to work start failing.
Printing with filament rather than resin? The equivalent first calibration on an FDM printer is a temperature tower, which does for nozzle temperature what an exposure test does for cure time.
Frequently asked questions
What is the best resin calibration print for beginners?
On an Anycubic printer, the built-in R_E_R_F file is the easiest because one print covers eight exposure times. On other printers, Phrozen’s XP Finder is quick and its text, pillars and boards are easy to read. Once you are close, AmeraLabs Town gives a more detailed check.
How do I know if my resin print is overexposed or underexposed?
Overexposed prints grow: holes and slots close, text fills in, pillars and raised features get thicker. Underexposed prints lose features: thin pillars, small dots and fine lines are missing or fragile. Check several features on the same test before deciding.
Should I use the exact exposure time from the test for real prints?
Not necessarily. Phrozen recommends adding at least 10% for real prints and 20% for models taller than 12 cm, to leave a safety margin on full-size parts. Fine miniatures can stay closer to the tested value.
Does room temperature change resin exposure time?
Yes. Phrozen explains that warm resin is more reactive and needs less energy to cure. It recommends 24–30 °C, 20% more exposure between 18 and 24 °C, and no printing below 18 °C without heating the resin. If your room changes a lot between seasons, rerun the exposure test at the new temperature.
Sources
- Anycubic Wiki: Guide for testing optimal exposure time
- Phrozen Help Center: Which exposure finder should I use?
- Phrozen Help Center: How to dial in resin for optimal results and What is the optimal temperature for 3D printing?
- Anycubic: Resin printer common parameters description
- AmeraLabs: Town calibration part and guide