Congratulations on taking the plunge into the fascinating world of resin 3D printing! Unboxing a brand-new resin printer is an exciting moment, full of potential for creating incredibly detailed models. However, unlike its FDM counterparts, setting up a resin (SLA/DLP) printer involves a few crucial extra steps, especially concerning safety and environmental considerations. This guide will walk you through the essential physical setup, ensuring your journey from box to first print is as smooth and safe as possible. We'll focus on the tangible aspects, laying a solid foundation before you even think about software or slicing.
Unpacking your new resin 3D printer: first impressions and safety first

Before you even think about tearing open the box, a little preparation goes a long way. Resin printing involves chemicals, so safety and a suitable workspace are paramount from the get-go.
Choosing the right workspace: ventilation and surface protection
Your printing area needs careful consideration. Resin fumes can be pungent and potentially harmful, so proper ventilation isn't just a recommendation; it's a necessity. When comparing solutions, consider:
- Passive Ventilation: This involves simply opening a window or using a standard room fan. It's the cheapest option, requiring no additional investment beyond what you might already have. However, its effectiveness is limited, especially in enclosed spaces or during adverse weather. It offers minimal protection against volatile organic compounds (VOCs) emitted by the resin.
- Active Ventilation: This is a more robust solution. It typically involves an exhaust fan connected to ducting that vents directly outside. This can range from a simple inline duct fan exhausting through a window kit to a fully enclosed system with a dedicated fume extractor. While it requires an initial investment (fans, ducting, possibly an enclosure), it offers significantly better air quality and safety. Some setups might also incorporate activated carbon filters, though these are more effective for odors than for all VOCs and require regular replacement, adding to ongoing costs.
Beyond ventilation, protect your surfaces. Resin spills are inevitable, and it's notoriously difficult to clean once cured. Lay down silicone mats, disposable plastic sheeting, or even old cardboard. Silicone mats offer a reusable, easy-to-clean surface, a slightly higher upfront cost, but save money and hassle in the long run compared to constantly replacing disposable options.
Ensure your workspace is stable, level, and away from direct sunlight, which can prematurely cure resin. Keep it out of reach of children and pets.
Unboxing with care: what to expect
With your workspace prepped, it's time for the main event. Gently open the box. Most manufacturers pack their printers securely with custom foam inserts. Take photos as you unbox – these can be invaluable if you need to repackage for warranty or shipping. Carefully remove all protective films, zip ties, and tape that secure moving parts. Locate your printer's serial number and note it down; it's often needed for registration or support.
Inventory and initial inspection: checking your kit
Once everything is out of the box, it's time to take stock of what you've got and ensure nothing is missing or damaged.
Printer components: a quick rundown
While specific parts may vary slightly by model, you'll generally find:
- The main printer unit (with the LCD screen and Z-axis column).
- A build plate (the platform where your prints are created).
- A resin vat (a container with a transparent film at the bottom, where the resin is held).
- A UV-blocking lid or cover (usually orange or red).
- A power supply unit and cable.
- A USB drive (often containing test files and the user manual).
Essential tools and accessories: beyond the basics
Most resin printers come with a starter kit of tools. These typically include:
- Plastic scrapers (for removing prints from the build plate).
- Metal scrapers (use with caution, can damage the build plate).
- Hex keys for assembly and leveling.
- A funnel with a fine mesh filter (for filtering resin back into the bottle).
- Disposable nitrile gloves and a basic face mask.
While these are a good start, we strongly recommend investing in additional safety gear and tools right away. When considering options, think about long-term safety and convenience:
- Better Personal Protective Equipment (PPE): Upgrade from basic masks to an N95 respirator or, ideally, a half-face respirator with organic vapor cartridges. This offers significantly superior protection against resin fumes and particulate matter compared to simple dust masks. The initial cost is higher, but cartridges are replaceable, making it a safer and more economical long-term solution. Also, get more nitrile gloves and safety glasses.
- Cleaning Solutions: Isopropyl Alcohol (IPA) is the standard, typically 90% concentration or higher. Some specialized resin cleaners are available; they might be less volatile or have a milder smell, but often come at a higher price point. Evaluate the trade-off between cost, effectiveness, and personal preference.
- More Paper Towels: You'll go through a lot.
- Wash & Cure Station: While manual washing in containers of IPA is a viable, low-cost option, dedicated wash and cure stations (e.g., Anycubic Wash & Cure, Elegoo Mercury) offer immense convenience, better safety (less direct resin contact), and more consistent results. They represent a significant upfront investment but streamline the post-processing workflow considerably.
Physical assembly: bringing your printer to life
With your inventory checked, it's time to put the pieces together.
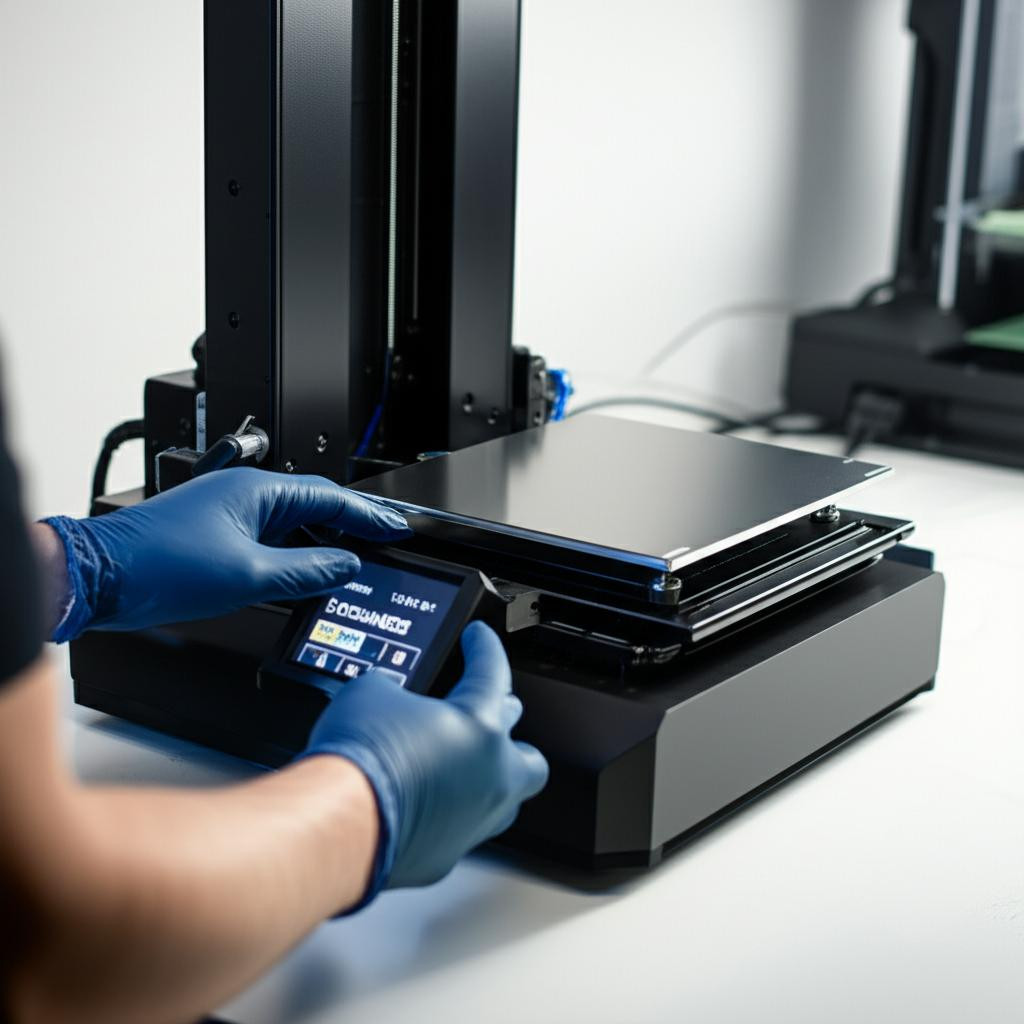
Attaching the build plate and resin vat
The build plate typically attaches to the Z-axis arm via a ball joint or a similar mechanism, secured by a screw or lever. Ensure it's mounted firmly. The resin vat then slides into place on the printer's base, usually secured by thumbscrews or clamps. Make sure it's seated correctly and securely to prevent resin leaks.
Installing the FEP film (if not pre-installed): a delicate task
The FEP (Fluorinated Ethylene Propylene) film is the transparent, non-stick bottom of your resin vat. Some printers come with the FEP pre-installed; others require you to install it yourself. There are also newer films like nFEP or ACF (Advanced Composite Film) which offer less stickiness and potentially faster print speeds, but might be more expensive or have specific installation requirements. If you're installing it, follow your printer's manual precisely. It's a delicate process: the film needs to be taut but not over-tightened, and free of dust or fingerprints. This film is a consumable and will need to be replaced periodically, adding to your ongoing operational costs.
Powering up and initial screen check
Connect the power supply and turn on your printer. The screen should illuminate, and you should see the printer's interface. Test the touch screen (if applicable) for responsiveness. This step is just to confirm basic electrical functionality; don't insert the USB drive or attempt any prints yet.
Placement and environmental considerations: optimizing your print zone

Where your printer lives is almost as important as the printer itself.
Ventilation systems: active vs. passive solutions
Revisiting ventilation, let's delve deeper into comparing options:
- Passive Ventilation: As mentioned, opening a window or using a small fan is the simplest and cheapest. It's an option if you have no other choice, but it's far from ideal. It relies on ambient airflow, which can be inconsistent, and doesn't actively remove harmful fumes.
- Active Ventilation: This is the gold standard for safety and comfort.
- Direct Exhaust: The most effective solution involves an enclosure (either purpose-built or DIY from a grow tent or cabinet) with an inline duct fan that pulls air from the enclosure and vents it directly outside via a window or a dedicated exhaust port. This setup effectively removes VOCs and odors from your immediate environment. The cost involves the fan, ducting, and enclosure, ranging from $100 for a basic DIY setup to several hundred for a more polished solution.
- Carbon Filtration: If direct outdoor venting isn't feasible (e.g., in an apartment), a system using activated carbon filters can help. These filters are excellent at trapping odors but are less effective against all types of VOCs. They require regular replacement (every 3-6 months depending on usage), which is an ongoing cost. The effectiveness is also lower than direct exhaust, so it's often considered a secondary or supplementary measure.
When comparing these, consider your budget, living situation, and tolerance for odor/risk. Investing in good active ventilation upfront is a wise decision for health and print quality.
Temperature and humidity: maintaining optimal conditions
Resin is sensitive to temperature. Most resins perform best between 20-30°C (68-86°F). Colder temperatures can lead to increased viscosity, failed prints, and longer cure times. Hotter temperatures can affect resin stability and print accuracy. Humidity can also be an issue, as some resins are hygroscopic (absorb moisture). Use a simple thermometer/hygrometer to monitor your print area.
If your environment is too cold, consider:
- Enclosure Heaters: Small, low-wattage heaters designed for enclosures can maintain a consistent temperature.
- Space Heaters: Use with extreme caution and never unattended due to fire risk, especially near flammable resin.
- Pre-heating Resin: Gently warming resin bottles in warm water before pouring can help, but isn't a substitute for a warm environment.
Light exposure: protecting your resin
Resin cures under UV light. Keep your printer's UV-blocking lid on when not actively working with the vat. Store resin bottles in a cool, dark place, sealed tightly. Avoid placing your printer in direct sunlight or under bright UV-emitting lights.
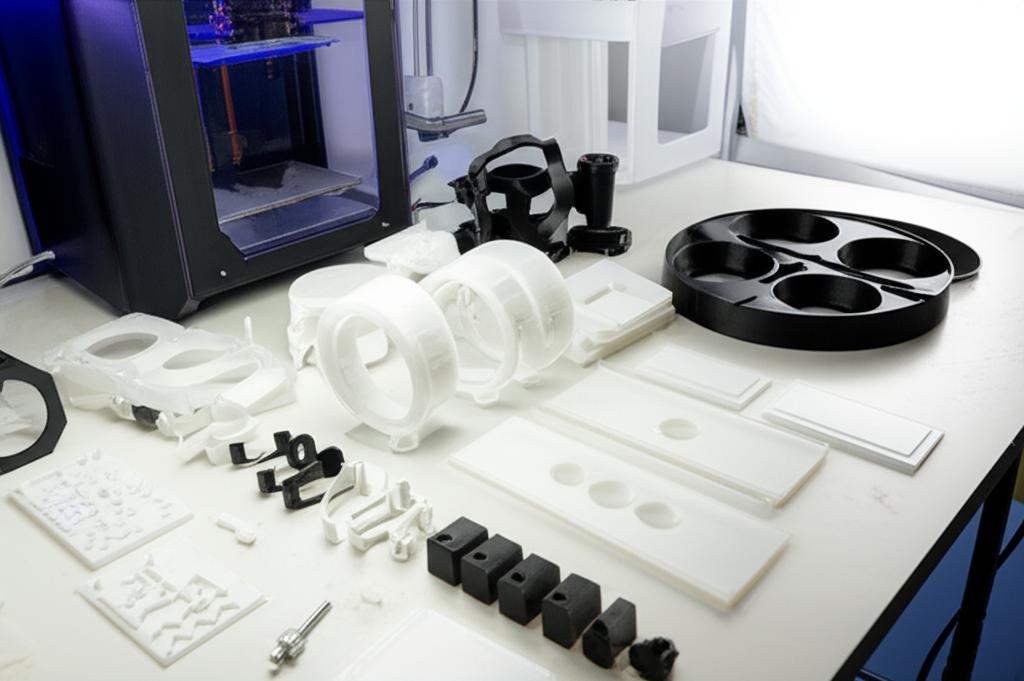
Setting up your post-processing station: the other half of the equation
Resin printing isn't just about the printer; it's also about what happens after the print finishes. A well-organized post-processing station is crucial.
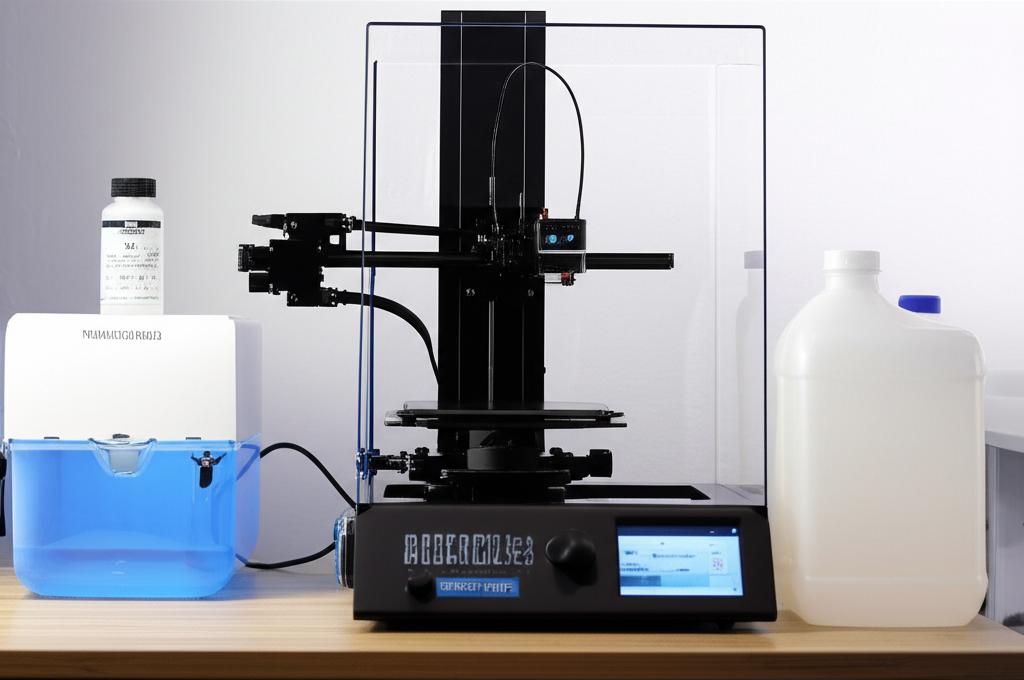
Washing station: manual vs. automated solutions
After printing, your model will be covered in uncured resin and needs to be washed. Here, you have two main approaches:
- Manual Washing: This involves using two containers of IPA (one for a dirty wash, one for a cleaner rinse). You agitate the print manually. Pros: Very low initial cost (just containers and IPA). Cons: More hands-on, increases exposure to resin and IPA, can be messy, and less efficient for multiple prints.
- Automated Wash Stations: Dedicated units like the Anycubic Wash & Cure or Elegoo Mercury Wash Station automate the washing process. They often use a magnetic stirrer or propeller to agitate the IPA, providing a thorough and hands-free wash. Pros: Convenient, cleaner, safer (less direct contact), more consistent results. Cons: Higher upfront cost (typically $100-300), takes up dedicated space. Some advanced units might offer ultrasonic cleaning, which is more effective for intricate details but also more expensive and requires specific care for the prints.
Consider your volume of prints and budget. For occasional printing, manual washing is fine. For frequent or larger prints, an automated station is a worthwhile investment.
Curing station: UV lamp options
After washing, prints need to be fully cured with UV light to harden them completely. Again, options vary:
- DIY Curing: Using a UV nail lamp, a UV flashlight, or even direct sunlight are low-cost options. Pros: Cheap. Cons: Inconsistent curing (especially sunlight, which varies in intensity), slower, and may not fully cure all surfaces evenly.
- Dedicated UV Curing Box: Many automated wash stations also include a curing function. Standalone curing boxes are also available. These units typically feature multiple UV LEDs (usually 405nm, matching most resin cure wavelengths) and a rotating turntable to ensure even exposure. Pros: Fast, consistent, safe (enclosed UV light). Cons: Higher cost, takes up space.
Safety gear: non-negotiable protection
We cannot stress this enough: always wear appropriate PPE when handling resin or IPA. This includes:
- Nitrile Gloves: Always, without exception. Resin is a sensitizer and can cause allergic reactions with repeated skin contact.
- Safety Glasses: Protect your eyes from splashes.
- Respirator: A respirator with organic vapor cartridges is essential for protecting your lungs from harmful fumes, especially during prolonged exposure or in less-than-ideally ventilated spaces.
Waste management: responsible disposal
Resin and contaminated IPA cannot simply be poured down the drain. This is a critical aspect of responsible resin printing, and different solutions exist for managing waste:
- Liquid Resin: Never dispose of liquid resin. Cure any residual resin in your vat (e.g., using a UV flashlight or sunlight) until it's a solid, inert plastic. Once solid, it can usually be disposed of with regular household waste.
- Contaminated IPA: IPA used for washing will become saturated with uncured resin. You can let the resin particles settle to the bottom of the container, then carefully pour off the cleaner IPA for reuse. The settled resin sludge can then be cured solid. Alternatively, you can evaporate the IPA (in a well-ventilated area, away from ignition sources) to leave behind solid resin, which can then be cured. For heavily contaminated IPA or large quantities, check with your local hazardous waste disposal facilities. Some communities have specific guidelines for chemical waste, which might involve a small fee for proper disposal.
- Resin-Contaminated Wipes/Gloves: Any paper towels, gloves, or other disposables that have come into contact with liquid resin should be cured under UV light until hard, then disposed of with regular waste.
Comparing these methods, the most cost-effective and environmentally friendly approach is to minimize waste by reusing IPA and curing all liquid resin into solid plastic before disposal. This reduces the need for costly hazardous waste services.
Initial calibration and first steps (physical aspects)

Before you introduce any resin, a few final physical checks are in order.
Leveling the build plate: the foundation of success
Proper build plate leveling is absolutely critical for successful resin prints. An unleveled plate will lead to failed prints, poor adhesion, or uneven curing. The process is generally as follows:
- Remove the resin vat.
- Loosen the screws that secure the build plate to the Z-axis arm.
- Lower the Z-axis until the build plate gently presses against the LCD screen. Many printers have a "home" or "zero" function for this.
- Place a piece of printer paper or the included leveling card between the build plate and the LCD screen.
- Gently press down on the build plate with one hand, ensuring it's flat against the screen/paper.
- Tighten the build plate screws evenly.
- Raise the Z-axis slightly and check if the paper can be pulled out with a slight drag, but not so tight that it tears.
Some advanced printers might feature auto-leveling, but for most consumer-grade SLA printers, this manual process is standard and essential.
Performing a dry run (without resin): checking for functionality
Once the build plate is leveled, it's a good idea to perform a dry run. This involves running a small test print (often included on the USB drive) without any resin in the vat. Observe the build plate's movement: does it lower correctly? Does it raise smoothly? Does the LCD screen flash the pattern of the print (if visible without resin)? This helps confirm that all mechanical and electronic components are functioning as expected before you introduce expensive and messy resin.
Conclusion
Unboxing and physically setting up your new resin 3D printer is a foundational step that sets the stage for all your future printing successes. By meticulously preparing your workspace, understanding the components, carefully assembling your machine, and establishing robust safety and post-processing stations, you're not just assembling a device; you're building a safe and efficient workflow. Remember, the initial investment in proper ventilation, safety gear, and a well-thought-out post-processing setup will pay dividends in terms of health, print quality, and overall enjoyment of your new hobby. With these essential physical steps complete, you're now ready to delve into the software side, prepare your first model, and embark on your resin printing adventure with confidence and peace of mind.