For resin miniatures, start at 0.05 mm (50 microns). Chitubox describes it as a typical layer height, and the calibration guide in the Lychee documentation calls 50 µm the default and most common setting. Drop to 0.03 mm (30 µm) for display figures with lots of curved surfaces, where stepping would show. Go below 30 µm only if your resin supports it: many resins recommend not printing thinner than 0.03 mm, and 20 or 10 µm layers need slower retraction and a longer pause before each exposure.
Layer height controls only vertical steps. Horizontal detail, such as a face or an engraved pattern, is fixed by your printer’s pixel size. Every time you halve the layer height you double the number of layers, and roughly the print time: Formlabs puts 25 µm prints at about four times as long as 100 µm prints. Each new layer height also needs its own exposure calibration.
The consumer toolchanger 3D printer: the SnapSwap 4-toolhead system swaps heads in 5 seconds for true multi-color and multi-material printing, with smart calibration and auto filament loading.
- 4 toolheads · 5 s swap
- Up to 500 mm/s · 20,000 mm/s²
- 270 mm cube build volume
- Multi-color & multi-material

Choosing a layer height in five steps
- Check your resin maker’s recommended settings for your printer, including the layer heights they list.
- Start at 0.05 mm with the recommended exposure time.
- Print an exposure calibration test at that layer height and adjust exposure until it passes.
- Print a figure. If stepping shows on rounded surfaces such as heads, shoulders or cloaks, try 0.03 mm and calibrate exposure again.
- Only go thinner than 0.03 mm if the resin allows it, and slow the retract speed and lengthen the rest time before exposure.
Resin layer heights for miniatures compared
| Layer height | Good for | Trade-offs | Source |
|---|---|---|---|
| 0.1 mm (100 µm) | Large terrain, props, test fits | Fastest; stepping visible on curves and shallow slopes | Formlabs; Lychee guide recommends 50 µm or higher for terrain and props |
| 0.05 mm (50 µm) | Gaming miniatures, first calibration on a new resin | Twice the layers of 0.1 mm | Chitubox “typical value”; Lychee guide default |
| 0.03 mm (30 µm) | Display pieces with faces, cloth and organic curves | About 1.7 times the layers of 0.05 mm; many resins list it as the minimum | Lychee guide (author prints show pieces at 30 µm) |
| 0.02–0.01 mm (20–10 µm) | Experiments on resins that support it | Long prints; needs slow retract (60 mm/min) and 4 s or more light-off delay | Lychee guide |
The spec sheets of current printers go lower than most resins do. The Anycubic Photon Mono M7 Pro lists a layer height range of 0.01–0.15 mm and the Phrozen Sonic Mini 8K S 0.01–0.30 mm. That tells you what the Z axis can move, not what your resin will print reliably.
What layer height changes, and what it doesn’t
A resin printer has two resolutions. XY resolution is the pixel size of the LCD: 16.8 × 24.8 µm on the Photon Mono M7 Pro, 22 µm on the Sonic Mini 8K S. You cannot change it in the slicer. Z resolution is your layer height, and it decides how finely the printer approximates a surface that rises at an angle.
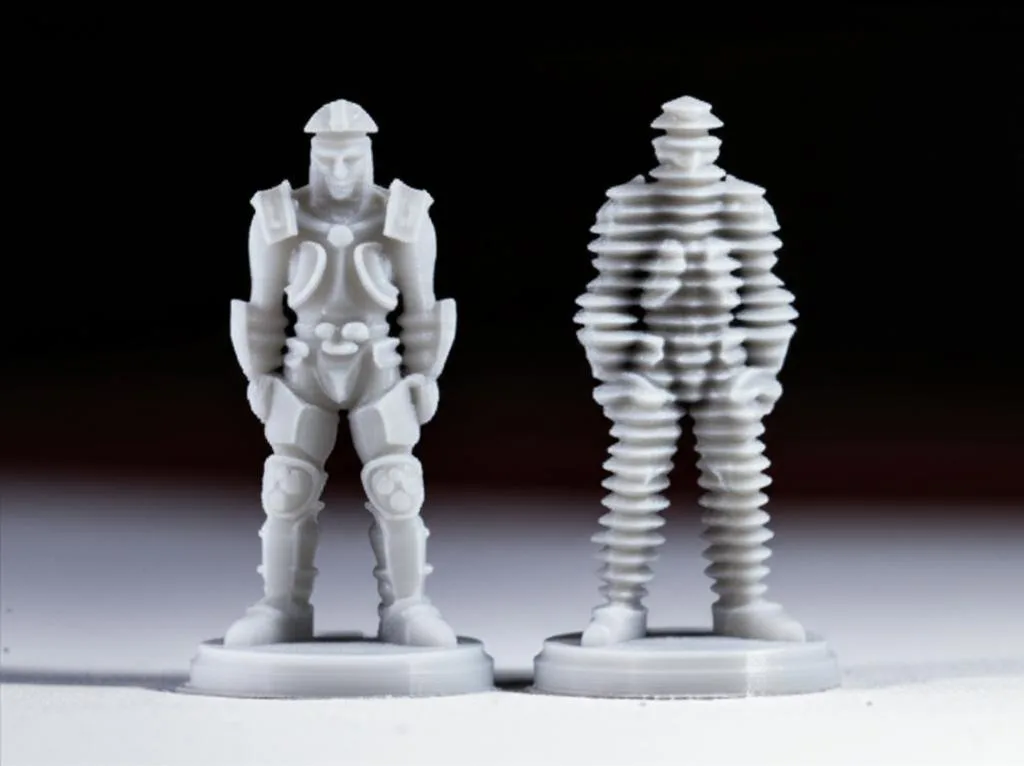
The illustration exaggerates the effect; at real resin layer heights the steps are a few hundredths of a millimetre. The principle is the same, though. Formlabs explains where thinner layers pay off and where they don’t:
- They help on organic forms, rounded arches, small embossings and intricate engravings, provided the printer has good XY resolution.
- They don’t help on models made mostly of vertical and horizontal faces with 90-degree angles. A tank hull or a stone wall should look much the same at 50 and 30 µm.
- They can make things worse if the printer’s XY edges are imprecise: more layers mean more slightly mismatched ridges on the surface.
For a typical figure, the surfaces that benefit are faces, helmets, shoulders and flowing cloth. If a model is mostly armour plates and bases, 0.05 mm is usually enough.
How layer height adds to print time and failure risk
A resin printer exposes a whole layer at once, so print time depends on the height of the job, not the number of figures on the plate. Remember that miniatures are usually tilted for supports, which makes the job taller than the figure. Layer counts for a job 40 mm tall:
| Layer height | Layers for 40 mm | Relative to 0.05 mm |
|---|---|---|
| 0.1 mm | 400 | 0.5× |
| 0.05 mm | 800 | 1× |
| 0.03 mm | about 1,333 | about 1.7× |
| 0.02 mm | 2,000 | 2.5× |
| 0.01 mm | 4,000 | 5× |
Each layer adds a full cycle of exposure, lift, retract and rest, so time rises roughly in step with the layer count, and more if you slow the motion for thin layers. Formlabs’ figure of about four times the print time for 25 µm versus 100 µm matches this arithmetic.
More layers also mean more chances for something to go wrong. Formlabs illustrates it with a hypothetical 99.99% success rate per layer: quadrupling the number of layers lowers the chance of a successful print from 90% to 67%. The exact numbers depend on your setup, but the direction holds: an extra thousand layers is an extra thousand peels from the film.
Exposure time when you change layer height
Exposure settings do not carry over between layer heights. Thinner layers generally need less exposure per layer, but not in proportion to the thickness, as manufacturer settings show:
| Resin and printer | 50 µm layers | 100 µm layers | Source |
|---|---|---|---|
| Siraya Tech Blu on EPAX X1 | 10 s | 12 s | Siraya Tech Blu user guide |
| Liqcreate ESD on Phrozen Sonic Mini 8K | 7.0 s | 9.0 s | Liqcreate settings |
Halving the layer thickness cut exposure by only a sixth to just under a quarter in these examples, so you cannot simply halve the time. These values are for those specific printers and resins; use them to understand the pattern, not as settings for your machine. The Lychee calibration guide recommends developing a calibration profile for each resin and each layer thickness. Liqcreate lists loss of fine detail, swollen features and difficult support removal as signs of over-exposure. Our step-by-step exposure calibration walks through the test print.
Settings to change below 30 microns
The Lychee guide says 20 and 10 µm layers are possible, but it pairs them with two changes:
- Retract speed around 60 mm/min, so the plate settles back into the resin gently.
- Light-off delay (rest before exposure) of 4 seconds or more. For normal layers the same guide suggests 2–3 s; the extra time lets the printer come fully to rest and bubbles escape.
Resin temperature matters too. Some printers now heat the vat: Anycubic says the M7 Pro keeps resin at 25 °C, and Elegoo says the Saturn 4 Ultra 16K holds 30 °C for better fluidity. Siraya Tech recommends a resin temperature of 25–35 °C for its Blu resin. If your room is cold, fix that before blaming the layer height.
Anti-aliasing is not a layer height setting
Anti-aliasing smooths a different kind of step. Chitubox describes its Gray Scale Level setting as reducing the “triangular sawtooth” by feathering the edges of each sliced image on LCD printers, and image blur (2–8 pixels) makes those edges softer still. That acts on pixel edges in the XY plane, not on the stepping between layers, so it complements layer height rather than replacing it. Too much blur can soften fine detail; see anti-aliasing and greyscale settings in resin slicers for how to tune it.
If your slicer offers variable or adaptive layer thickness, it tackles the time problem directly. Formlabs’ PreForm, for example, prints curves and slopes in thinner layers and the rest in thicker ones.
Common layer height mistakes
- Keeping the old exposure after changing layer height. Recalibrate every time; 30 µm layers printed with a 50 µm exposure are likely to be over-exposed.
- Printing at 0.01 mm because the spec sheet allows it. The printer’s minimum is a mechanical limit. Check the resin’s recommended range first.
- Expecting thinner layers to sharpen faces. Much of a face’s detail is XY detail, limited by pixel size and exposure, not layer height.
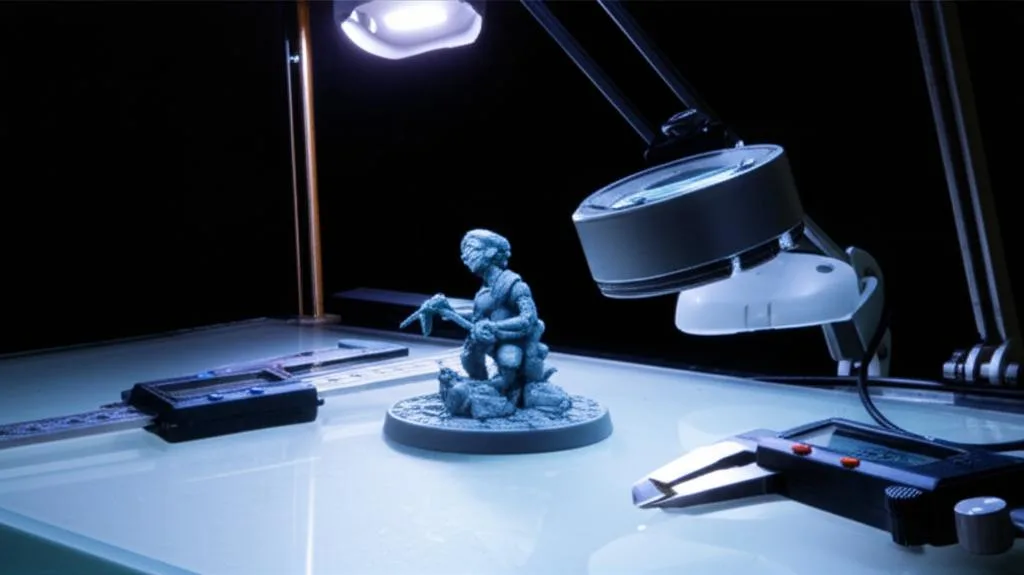
- Judging a test on the wrong surfaces. Compare heads, shoulders and curved cloth under a magnifier, not flat bases or vertical walls, where layer height makes little difference.
- Changing several settings at once. Change layer height, recalibrate exposure, then print. Otherwise you cannot tell which change helped.
If layer lines are fine but the figure still disappoints, look at the rest of the process: the resin printer setup and calibration guide covers the basics, and support removal techniques help keep support marks off the details you printed so carefully.
Frequently asked questions
Is 0.05 mm layer height good enough for resin miniatures?
For gaming miniatures, usually yes. Chitubox describes 0.05 mm as a typical layer height, and the Lychee calibration guide calls it the default. Consider 0.03 mm for display pieces with many curved surfaces, and recalibrate exposure when you switch.
Should I change exposure time when I change layer height?
Yes. Thinner layers generally need less exposure, but not proportionally: Siraya Tech lists 10 s at 50 µm and 12 s at 100 µm for its Blu resin on an EPAX X1. Run a calibration print for each layer height you use.
What is the lowest layer height a resin printer can print?
Many consumer LCD printers list 0.01 mm as their minimum. In practice many resins recommend not going below 0.03 mm, and 20 or 10 µm layers need a slow retract and a light-off delay of 4 seconds or more to print reliably.
Why do my prints fail more often at very thin layers?
A thinner layer means more layers, and each one is another peel from the film and another chance of failure. Formlabs shows that at a hypothetical 99.99% success per layer, quadrupling the layer count drops overall success from 90% to 67%. Slow the retract, lengthen the rest time and recalibrate exposure.