Achieving a flawless first layer is the bedrock of a successful 3D print. While many beginners focus intently on bed leveling, there’s another, equally critical factor often overlooked: the Z-offset. This seemingly small adjustment can make or break your print, determining whether your first layer adheres perfectly, warps, or becomes a tangled mess. Understanding and accurately calibrating your Z-offset is a fundamental 3D printing tip that elevates your print quality from good to exceptional, ensuring perfect adhesion every time.
Understanding Z-offset: more than just bed leveling

A retro-styled turntable and add-on speaker system with concrete and wood enclosure options. Currently running on Kickstarter.
Many new to 3D printing confuse Z-offset with bed leveling, but they are distinct, albeit related, concepts. Bed leveling ensures your print surface is uniformly equidistant from the nozzle across its entire area. Think of it as making sure your print bed is perfectly flat and parallel to the nozzle’s movement plane. Once your bed is level, the Z-offset comes into play.
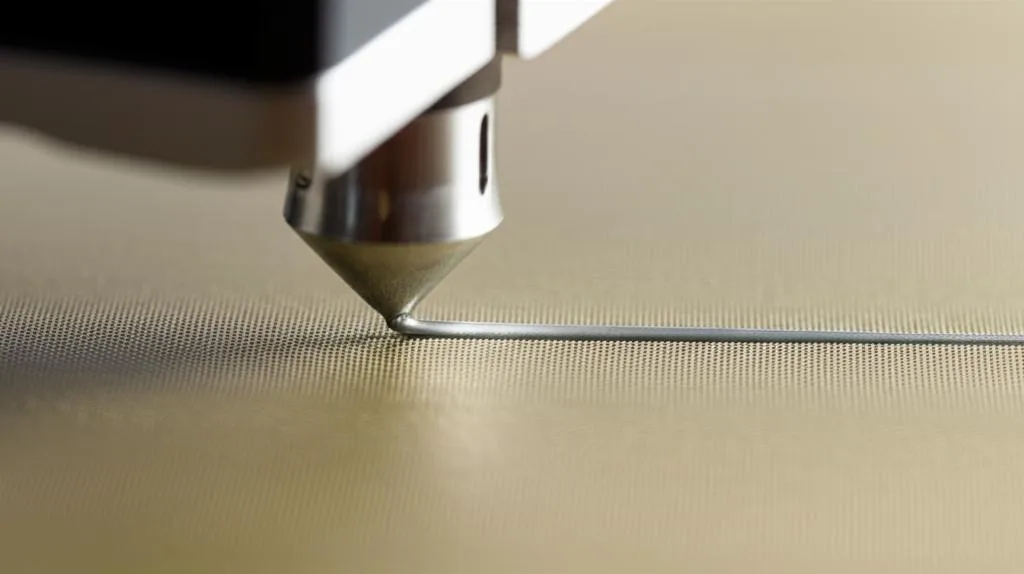
The Z-offset is the precise vertical distance between your nozzle’s true zero point (where the firmware thinks Z=0 is) and the actual print surface when the bed leveling probe or Z-endstop triggers. In simpler terms, it’s the fine-tuning of how high or low your nozzle sits relative to the build plate after your printer has determined its ‘home’ position. A correctly set Z-offset ensures the filament is extruded at the ideal height to squish onto the bed, creating a strong bond without being too thin or too thick.
Why Z-offset calibration is crucial for perfect adhesion
The first layer is arguably the most important part of any 3D print. It’s the foundation upon which the entire model is built. If the first layer fails, the rest of the print is doomed to follow. An incorrectly calibrated Z-offset is a primary culprit behind a myriad of first layer problems, directly impacting print quality and leading to wasted time and filament.
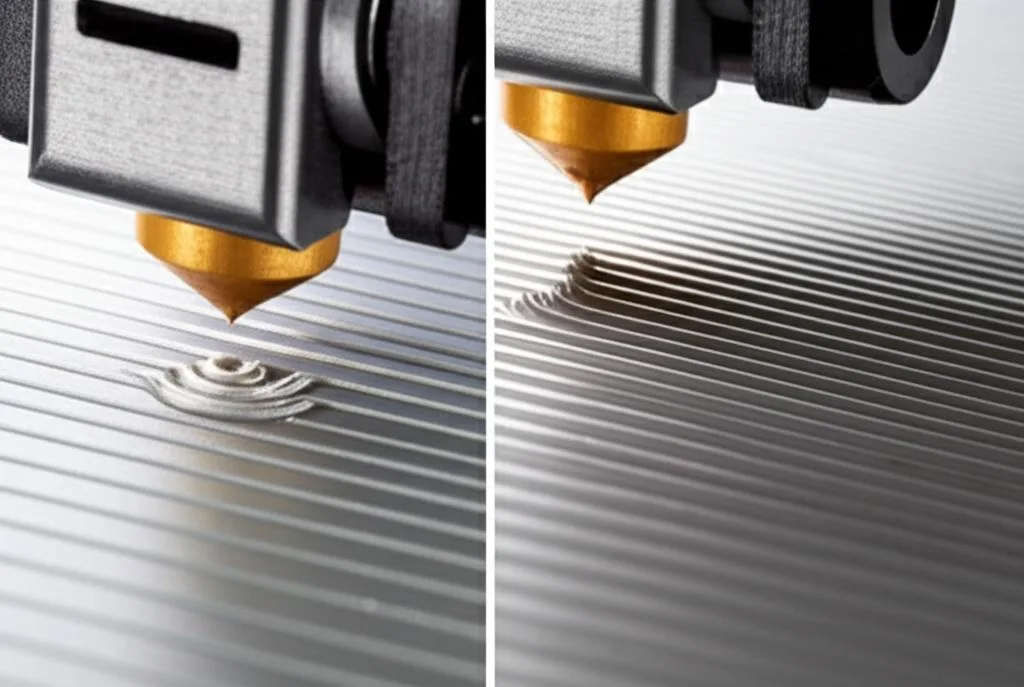
- Poor bed adhesion: If the Z-offset is too high, the filament is laid down in the air, barely touching the print surface. This results in weak adhesion, leading to warping, detachment, and ultimately, print failure.
- “Elephant’s foot”: Conversely, if the Z-offset is too low, the nozzle digs into the print surface, excessively squishing the first layer. This causes the base of your print to bulge outwards, creating an undesirable “elephant’s foot” effect that can make parts not fit together correctly.
- Uneven extrusion: A Z-offset that’s too low can also restrict filament flow, leading to inconsistent line width, under-extrusion, or even nozzle clogging due to back pressure.
- Surface damage: In extreme cases, a Z-offset that’s significantly too low can cause the nozzle to scrape and damage your print bed, especially delicate surfaces like PEI or glass.
Achieving perfect adhesion means finding that sweet spot where the filament is gently pressed into the bed, creating a robust bond that lasts the entire print, ensuring your first layer settings are truly optimized.
Symptoms of an incorrect Z-offset
Knowing what to look for can save you a lot of troubleshooting time. Here are the tell-tale signs of an improperly set Z-offset:
Z-offset too high (nozzle too far from the bed)
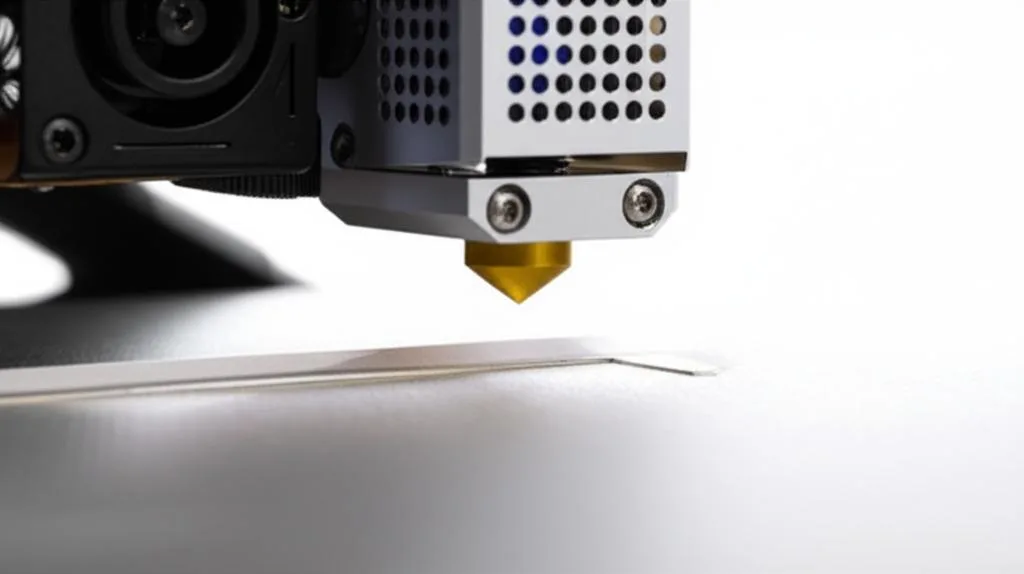
- Gaps between lines: The extruded lines on the first layer won’t fully connect, leaving visible gaps.
- Lines easily peel off: The filament might stick initially but can be easily scraped or peeled off the bed, indicating a weak bond.
- Round, stringy lines: Instead of flat, squished lines, the filament will look more like thin, round spaghetti laid on the surface.
- Poor adhesion and warping: Prints fail to stick, corners lift, or the entire print detaches during printing.
Z-offset too low (nozzle too close to the bed)
- Nozzle dragging/scraping: You might hear the nozzle scraping against the bed as it moves, or even see it leave marks.
- Thin, transparent lines: The filament is squished so much it becomes nearly transparent, often leaving very little material.
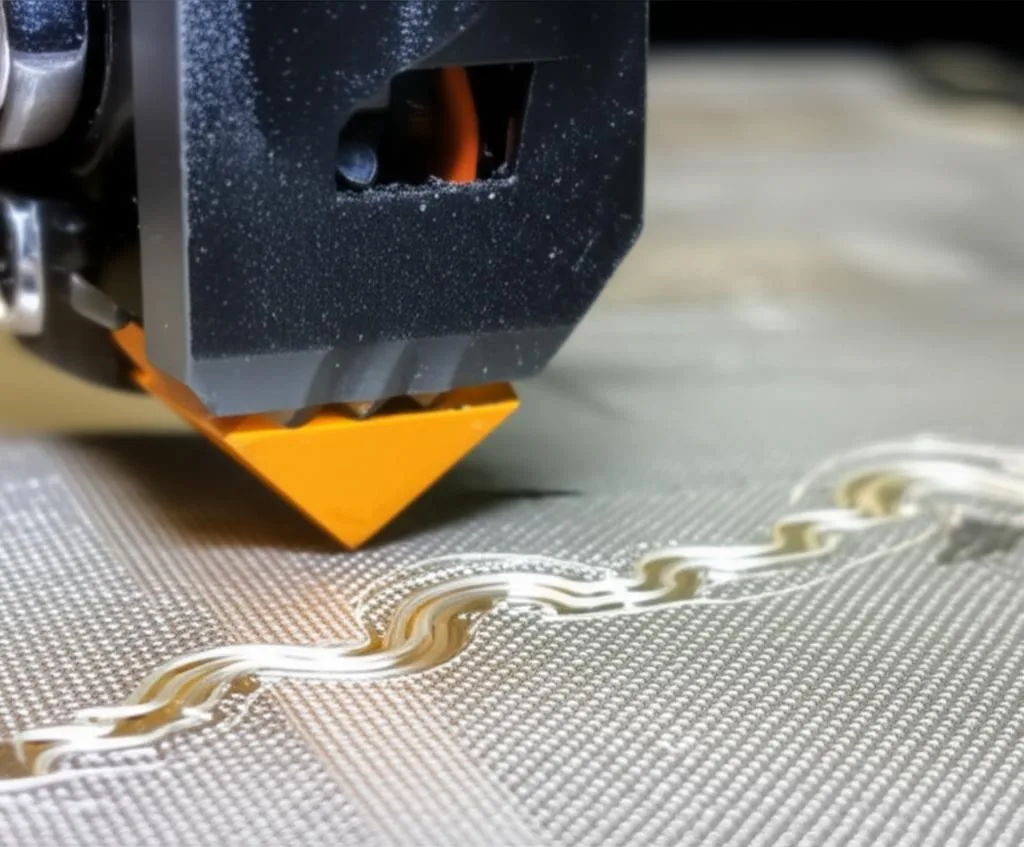
- Ridges or ripples: Excess material is pushed to the sides of the nozzle, creating ridges or waves on the first layer.
- “Elephant’s foot”: As mentioned, the base of your print will be wider than intended.
- Clogged nozzle: Persistent low Z-offset can lead to filament backing up into the nozzle, causing clogs.
Preparing for Z-offset calibration
Before you dive into Z-offset calibration, ensure your printer is in optimal condition. This preparation is crucial for accurate results and to avoid frustration.
- Clean your print surface: Remove any dust, grease, or old filament residue. A clean bed is paramount for good adhesion. Use isopropyl alcohol (IPA) for most surfaces, or soap and water for glass.
- Perform thorough bed leveling: This is a non-negotiable prerequisite. Whether you use manual bed leveling (adjusting screws at each corner) or auto bed leveling (ABL) with a probe, ensure your bed is as level as possible. Z-offset fine-tunes the height after leveling, it doesn’t compensate for a severely unlevel bed.
- Heat up your bed and nozzle: Calibrate your Z-offset at your typical printing temperatures for both the bed and nozzle. Materials expand when heated, so calibrating cold will give inaccurate results.
- Gather your tools: A standard piece of printer paper (approx. 0.1mm thick) is a good starting point. For more precision, a feeler gauge set can be invaluable.
Step-by-step Z-offset calibration: your guide to perfect first layers
This section outlines a comprehensive approach to Z-offset calibration, combining initial approximation with fine-tuning for optimal results. Remember, this is an iterative process that might require a few attempts to get just right.
1. Understand your printer’s Z-offset adjustment method
The way you adjust Z-offset varies significantly between printer models and firmware. It’s important to identify your printer’s specific method to ensure effective calibration. Generally, there are a few common approaches:
- Firmware-based (Marlin, Klipper, etc.): Many modern printers, especially those with auto bed leveling (ABL) probes, allow you to set the Z-offset directly in the firmware. This is often the most precise and permanent solution.
- LCD Menu: Most printers with an LCD screen will have a dedicated menu option, often under “Control” > “Probe Z Offset” or “Z-offset”. You adjust a value (e.g., -1.50mm) directly. This value represents how far the nozzle needs to move down from the probe’s trigger point to reach the print surface.
- G-code Commands: For advanced users or printers without an intuitive LCD menu, you can use G-code commands. For Marlin,
M851 Z-X.XXsets the offset, andM500saves it to EEPROM. For Klipper, you adjust the[stepper_z] position_endstopor[probe] z_offsetvalue in yourprinter.cfgfile and then restart the firmware.
Comparison: Firmware-based adjustments offer the highest precision and permanence. Once set, the printer consistently applies this offset across all prints. The “cost” here might be a slightly steeper learning curve for G-code or navigating menus, but the “feature” of consistent, reliable results is a significant benefit.
- Slicer-based adjustments (less ideal for true Z-offset): Some slicers offer an “Initial Layer Height” or similar setting. While you can technically use this to adjust the first layer’s squish, it’s not a true Z-offset calibration. It modifies the first layer’s height relative to subsequent layers but doesn’t change the printer’s fundamental understanding of Z=0. This can lead to issues if not carefully managed.
Comparison: Slicer adjustments are easy to implement for a single print but lack the universal application and precision of firmware settings. They are a quick “fix” but not a comprehensive “solution” for Z-offset calibration. The “cost” is potential inconsistency, while the “feature” is immediate, per-print control.
- Manual (for non-ABL printers with adjustable Z-endstops): For older or simpler printers without ABL, Z-offset is effectively set by physically adjusting the Z-endstop switch. While this sets the physical zero point, it’s more akin to a manual bed leveling step than a fine Z-offset adjustment post-probe. For these printers, the paper test (below) is primarily used for bed leveling. Our focus here is on printers where Z-offset is a digital compensation.
2. The initial “paper test” (approximation)
This method provides a good starting point for your Z-offset, especially if you’re beginning from scratch or after a nozzle change.
- Home your printer: Use your printer’s “Auto Home” or “Home All” function. This will move the nozzle and bed to their respective home positions, engaging the Z-endstop or ABL probe.
- Move nozzle to center: Manually or via printer controls, move the nozzle to the center of your print bed.
- Heat up: Ensure your bed and nozzle are at printing temperature (e.g., 60°C for PLA bed, 200°C for PLA nozzle).
- Place paper: Slide a standard piece of printer paper (typically ~0.1mm thick) under the nozzle.
- Adjust Z-offset: Using your printer’s LCD menu or G-code, slowly decrease the Z-offset value (making it more negative, e.g., from -1.00mm to -1.05mm, then -1.10mm, etc.) until you feel a slight drag on the paper when moving it back and forth. The paper should offer resistance but still be able to move. This signifies the nozzle is approximately 0.1mm from the bed.
- Save the setting: Crucially, save your new Z-offset value. On many printers, this is done via an “Store Settings” or “Save EEPROM” option in the menu or by sending an
M500G-code command.
3. The “test print” method (fine-tuning for perfect adhesion)
The paper test is a good approximation, but real-world extrusion dynamics require a live test print for true fine-tuning. This is where you achieve that “perfect adhesion” and “bed leveling fine-tuning”.
- Prepare a test print: Slice a simple, single-layer test print. A large square (e.g., 50x50mm) or a series of smaller squares/lines distributed across the bed are ideal. Use your typical first layer settings (e.g., 0.2mm layer height, 20mm/s speed).
- Tip: Many online resources offer pre-made Z-offset calibration squares.
- Start the print and observe: Begin the test print. As the first layer goes down, pay close attention to how the filament is laid onto the bed. This is where your critical observation skills come into play.
- Live adjustment (if supported): Many modern printers allow you to adjust the Z-offset *during* the first layer print via the LCD menu. This is the fastest and most effective way to dial it in.
- If your printer supports live Z-offset adjustment, make small adjustments (e.g., -0.02mm or +0.02mm) while the first layer is printing.
- If lines are gappy or round (too high): Decrease the Z-offset value (make it more negative).
- If lines are squished, transparent, or ridged (too low): Increase the Z-offset value (make it less negative, or more positive).
- Iterative observation and adjustment: If your printer doesn’t support live adjustment, you’ll need to stop the print, adjust the Z-offset in the menu, save, and restart the test print. This is more time-consuming but equally effective.
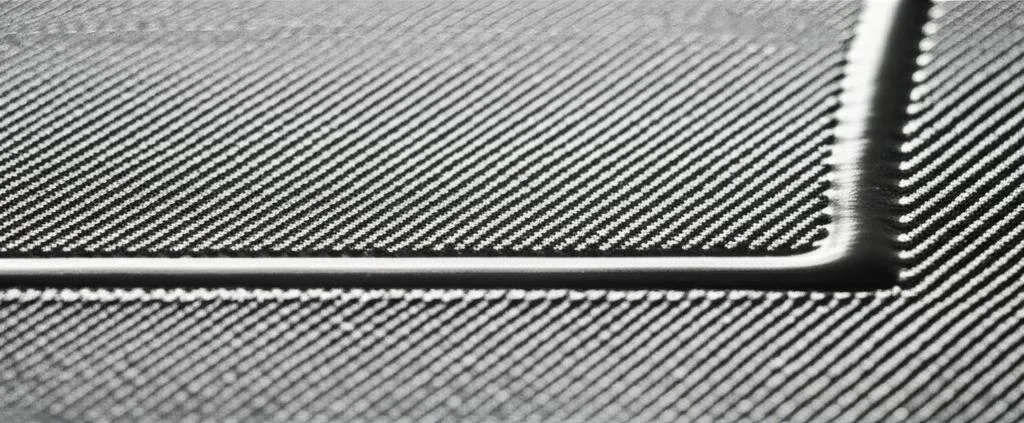
- What to look for: You want lines that are flat but not transparent, with no gaps between them. The top surface of the first layer should feel smooth, not bumpy or rough. The filament should adhere strongly to the bed without being difficult to remove after cooling.
- The “nail test”: After the print cools, try to scrape a line of filament off the bed with your fingernail. If it comes off too easily, your Z-offset is likely still too high. If it’s difficult to remove, it’s probably just right or slightly low.
- Save the final Z-offset value: Once you’re satisfied with the first layer’s appearance and adhesion, make sure to save the final Z-offset value to your printer’s EEPROM or configuration file. This is a critical step; otherwise, your changes will be lost on the next power cycle.
Advanced tips and considerations for Z-offset calibration
Mastering Z-offset goes beyond the basic steps. Here are some advanced 3D printing tips and considerations to further refine your first layer settings:
- Using feeler gauges for precision: While paper is good, a set of feeler gauges offers more precise control. If you aim for a 0.2mm first layer, you might use a 0.15mm or 0.2mm feeler gauge for calibration. This allows for a more consistent gap, leading to better squish.
- Material differences: Different filaments have varying adhesion properties and thermal expansion rates. You might find that your perfectly calibrated Z-offset for PLA needs a slight tweak (e.g., -0.02mm or +0.02mm) when switching to PETG or ABS for optimal adhesion. Always consider the material.
- Print surface variations: Glass, PEI, textured plates, or build tack surfaces each have unique characteristics. A Z-offset that works well for a smooth PEI sheet might be slightly off for a textured PEI sheet or a glass bed. Be prepared for minor adjustments when changing surfaces.
- Firmware updates and nozzle changes: Whenever you update your printer’s firmware or replace your nozzle, it’s a good practice to re-check your Z-offset. Firmware updates can sometimes reset settings, and a new nozzle, even if identical, might have slight manufacturing tolerances that alter its effective length.
- ABL (Auto Bed Leveling) and Z-offset: It’s a common misconception that ABL negates the need for Z-offset. ABL compensates for the tilt and unevenness of your bed. The Z-offset, however, tells the printer the exact distance from the ABL probe’s trigger point to where the nozzle should be for the first layer. They work in tandem: ABL maps the bed, and Z-offset sets the initial ‘squish’ height relative to that map. Always calibrate Z-offset *after* running your ABL routine.
Troubleshooting common Z-offset issues
Even with careful calibration, you might encounter some persistent issues. Here’s how to troubleshoot them:
- Z-offset keeps resetting: If your Z-offset doesn’t stick, you likely forgot to save it. Ensure you use the “Store Settings” (
M500) command or the equivalent menu option after making adjustments. - Inconsistent adhesion across the bed: If one side of your test print looks perfect but another is too high or too low, your primary issue is likely still bed leveling, not Z-offset. Re-level your bed thoroughly before re-calibrating Z-offset.
- Nozzle crashing into the bed: This is a serious issue. Immediately power off your printer. This usually indicates a problem with your Z-endstop or ABL probe not triggering correctly, or a wildly incorrect (too positive) Z-offset value. Double-check your probe wiring, mounting, and initial Z-offset value.
- Z-offset value seems unusually large (e.g., -5mm or more): For ABL probes, this is often normal. The probe triggers much higher than the nozzle tip. The value represents the distance from the probe trigger point to the nozzle tip at the print surface. Don’t be alarmed by large negative numbers if your prints are successful.
Conclusion
Mastering Z-offset calibration is a pivotal skill in your 3D printing journey. It’s the critical link between a perfectly level bed and a flawlessly adhering first layer. By understanding its nuances, performing diligent calibration, and fine-tuning with test prints, you unlock the potential for consistent, high-quality prints with minimal hassle. Consider this detailed guide your go-to resource for achieving perfect adhesion and making Z-offset calibration a routine, rather than a dreaded, part of your 3D printing workflow. Your prints will thank you for it!