Acrylonitrile Butadiene Styrene (ABS) is a thermoplastic polymer widely recognized for its robust mechanical properties, including good impact resistance, toughness, and heat deflection. These characteristics make it a go-to material for functional prototyping and end-use parts in various industrial applications, from automotive components to consumer electronics housings. However, parts produced via Fused Deposition Modeling (FDM) with ABS often exhibit a characteristic layer line appearance, a relatively rough surface finish, and can sometimes possess anisotropic mechanical properties due to the layer-by-layer deposition process. To elevate these raw 3D prints to industrial-grade standards – matching or even surpassing the quality of injection-molded counterparts in terms of aesthetics, durability, and performance – advanced post-processing techniques are indispensable. This comprehensive guide delves into various sophisticated methods, objectively comparing their features and cost structures to empower you to make informed decisions for your specific industrial needs.
Understanding ABS and the need for post-processing
The consumer toolchanger 3D printer: the SnapSwap 4-toolhead system swaps heads in 5 seconds for true multi-color and multi-material printing, with smart calibration and auto filament loading.
- 4 toolheads · 5 s swap
- Up to 500 mm/s · 20,000 mm/s²
- 270 mm cube build volume
- Multi-color & multi-material

ABS is favored in industrial 3D printing for its balance of strength, rigidity, and ductility. It’s often chosen for applications requiring parts that can withstand mechanical stress, moderate temperatures, and certain chemical exposures. Yet, direct from the printer, FDM ABS parts typically present several challenges:
- Surface Finish: Visible layer lines (stair-stepping effect) reduce aesthetic appeal and can create stress concentration points.
- Porosity: Micro-gaps between layers can lead to water absorption, reduced strength, and compromised sealing capabilities.
- Anisotropy: Parts are often weaker along the Z-axis (layer adhesion direction) compared to the X and Y axes.
- Dimensional Accuracy: While generally good, post-processing can sometimes further refine tolerances or introduce slight changes.
The goal of advanced post-processing is to mitigate these issues, transforming a functional prototype into a high-performance, aesthetically pleasing, and durable industrial component. This involves enhancing surface quality, improving mechanical properties, and adding protective layers.
General considerations before diving in
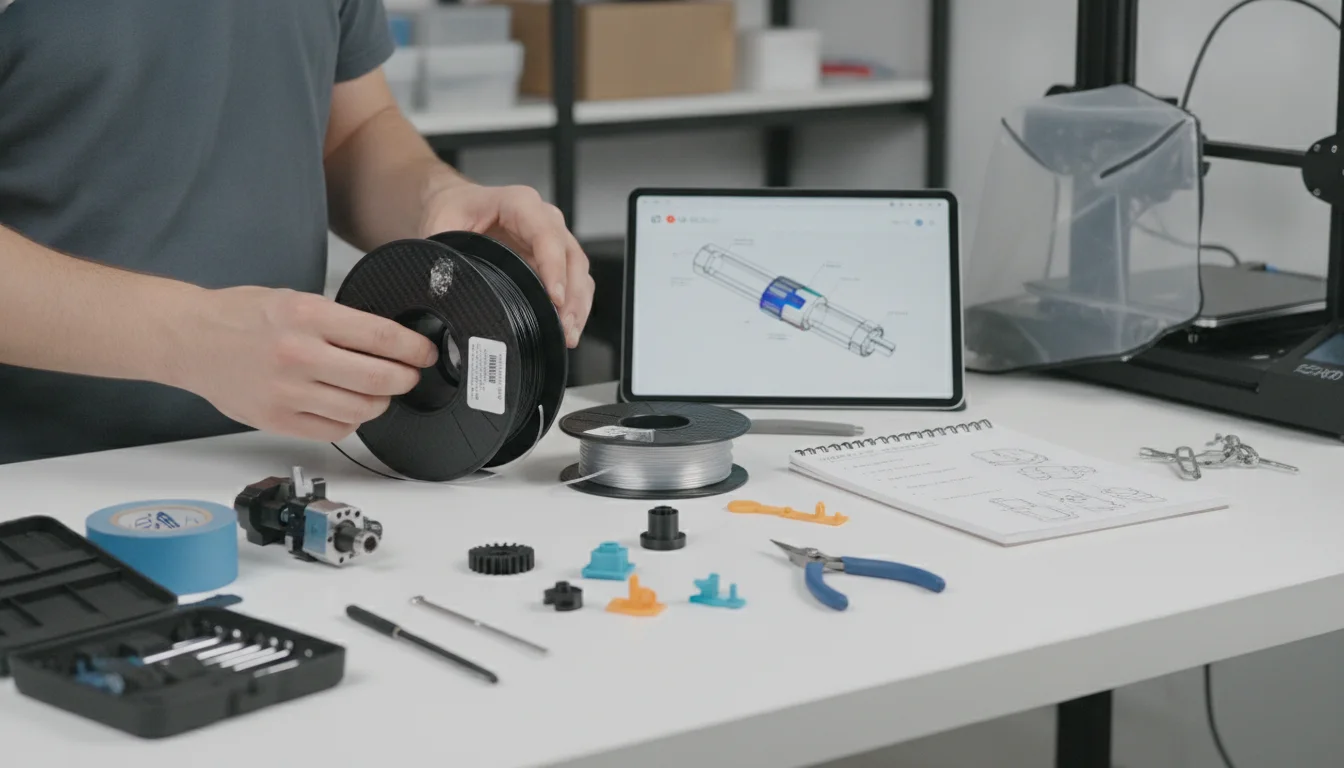
Before embarking on any post-processing journey, several foundational aspects require careful consideration to ensure safety, efficiency, and optimal results.
Safety first
Many advanced post-processing techniques involve chemicals, solvents, or fine particulates that can pose health risks. Always prioritize safety:
- Personal Protective Equipment (PPE): This is non-negotiable. Always use appropriate gloves (nitrile, butyl rubber, or Viton, depending on the chemical), safety glasses or goggles, and respiratory protection (vapor respirators for solvents, particulate masks for sanding).
- Ventilation: Work in a well-ventilated area, preferably under a fume hood or with local exhaust ventilation. Solvents can accumulate in enclosed spaces, creating hazardous atmospheres.
- Material Safety Data Sheets (MSDS/SDS): Familiarize yourself with the safety data sheets for all chemicals used. Understand their hazards, safe handling procedures, and emergency protocols.
- Fire Safety: Many solvents are flammable. Keep them away from ignition sources and have appropriate fire extinguishers readily available.
Part design considerations
The design of your ABS part can significantly influence the ease and effectiveness of post-processing. Consider:
- Geometry: Complex geometries with intricate details, internal channels, or sharp corners can be challenging for some methods, particularly vapor smoothing or manual sanding.
- Support Structures: Design support structures that are easy to remove without damaging the part, as their remnants will also need post-processing.
- Wall Thickness: Ensure adequate wall thickness to withstand any potential material removal or chemical exposure without compromising structural integrity.
Workspace setup
A dedicated and properly equipped workspace is crucial for consistent and safe post-processing:
- Cleanliness: A clean environment prevents dust and contaminants from adhering to parts during processing.
- Organization: Keep tools, chemicals, and PPE organized and easily accessible.
- Waste Disposal: Plan for proper disposal of chemical waste and spent materials according to local regulations.
Category 1: Surface smoothing techniques

Achieving a smooth, uniform surface is often the primary goal of ABS post-processing, dramatically improving aesthetics and sometimes enhancing mechanical properties by reducing stress concentrations.
Vapor smoothing
Vapor smoothing is a highly effective method for achieving a glossy, injection-molded-like finish on ABS parts. It involves exposing the printed part to a solvent vapor, which slightly dissolves and reflows the outer layer of the material, effectively melting away layer lines and reducing surface roughness.
Mechanism
The solvent vapor condenses on the part’s surface, causing a thin layer of ABS to temporarily soften and flow. Surface tension then pulls the molten plastic into a smoother, more uniform state. As the solvent evaporates, the ABS re-solidifies, leaving a significantly smoother finish.
Common solvents and their cost implications
The choice of solvent is critical, impacting effectiveness, safety, and cost:
- Acetone: Widely available, relatively inexpensive, and highly effective for ABS. It’s a common choice for both DIY and commercial systems. However, it is highly flammable, has a strong odor, and requires strict ventilation. Its volatility also means it evaporates quickly, requiring replenishment.
- Methyl Ethyl Ketone (MEK): Similar to acetone in effectiveness but generally less volatile and with a slightly higher boiling point. It’s also highly flammable and has a strong odor, requiring similar safety precautions. Its cost is comparable to or slightly higher than acetone.
- Methyl Acetate: A less common, but sometimes used, solvent that can be effective. It is generally less aggressive than acetone or MEK and may require longer exposure times. Its flammability and health hazards are still significant, though potentially less severe than acetone. Cost can vary based on availability.
The cost of solvents is an ongoing operational expense. Acetone typically offers the lowest per-liter cost, making it attractive for budget-conscious operations, but its high volatility might lead to higher consumption rates over time compared to less volatile alternatives.
Methods: Manual vs. automated chambers
Manual vapor smoothing (DIY)
This typically involves placing the ABS part in an enclosed container (e.g., a glass jar or sealed bucket) with a small amount of liquid solvent in a separate, lower compartment, or soaked onto a paper towel. The solvent evaporates, and its vapors smooth the part.
- Pros: Extremely low initial capital investment. Accessible to small workshops and hobbyists.
- Cons: Highly inconsistent results due to uncontrolled temperature, humidity, and vapor concentration. Significant safety risks due to direct handling of solvents and potential for vapor accumulation. Difficult to scale. Risk of “melting” or deforming parts if over-exposed.
- Cost Structure: Minimal upfront cost (container, solvent: $20-$100). High labor cost due to manual monitoring and potential for rework. High safety risk cost (potential health issues, fire hazards).
Automated vapor smoothing chambers (commercial solutions)
These are purpose-built machines designed to precisely control the temperature, vapor concentration, and exposure time. They often include safety features like explosion-proof designs, closed-loop solvent recovery systems, and integrated ventilation.
- Pros: Highly consistent and repeatable results. Excellent surface finish quality. Enhanced safety features, often meeting industrial safety standards. Scalable for batch processing. Reduced material waste through solvent recovery.
- Cons: High initial capital investment. Requires dedicated space and power. Operating costs include solvent replenishment, maintenance, and energy.
- Cost Structure: High initial investment ($10,000 – $100,000+ depending on size and features). Moderate consumable costs (solvent replenishment, filters). Low labor cost per part due to automation. Significantly lower safety risk cost compared to DIY.
Step-by-step guide (general process for automated systems)
- Part Preparation: Remove support structures and clean the part of any debris. Ensure the part is completely dry.
- Loading: Place parts into the chamber, ensuring adequate spacing for even vapor exposure.
- Cycle Initiation: Start the automated smoothing cycle, which typically involves heating the solvent, generating vapor, exposing parts, and then a drying phase.
- Monitoring: The machine monitors conditions (temperature, pressure, time) automatically.
- Unloading: Once the cycle is complete and the chamber is purged of vapors, carefully remove the smoothed parts.
- Curing/Drying: Allow parts to fully off-gas any residual solvent in a well-ventilated area.
Sanding and polishing
Manual or automated sanding and polishing are time-tested methods for improving surface finish, particularly for larger parts or areas that require specific contouring. While labor-intensive, they offer precise control over the final surface texture.
Mechanism
Abrasive materials (sandpaper, compounds) mechanically remove material from the part’s surface, progressively reducing roughness and layer lines. Polishing then uses finer abrasives to create a smooth, reflective finish.
Materials and tools
- Sandpaper: Ranging from coarse grits (e.g., 100-200) for initial material removal to very fine grits (e.g., 1000-5000+) for a smooth finish. Wet sanding is often preferred to prevent clogging and reduce dust.
- Files and Deburring Tools: For removing support nubs and refining edges.
- Rotary Tools: Dremel-style tools with various abrasive bits and polishing wheels can accelerate the process, especially for intricate areas.
- Polishing Compounds: Abrasive pastes or liquids used with polishing cloths or wheels to achieve a high-gloss finish.
Step-by-step guide
- Support Removal: Carefully remove all support structures.
- Initial Sanding: Begin with a coarse grit sandpaper (e.g., 200-400 grit) to remove major layer lines and imperfections. Sand in a consistent direction, then switch directions with the next finer grit.
- Progressive Sanding: Gradually move to finer grits (e.g., 600, 800, 1000, 1500, 2000, 3000, 5000), wet sanding at each stage. Ensure all scratches from the previous grit are removed before moving on.
- Cleaning: Thoroughly clean the part between sanding stages to remove dust and debris.
- Polishing (Optional): Apply a polishing compound to a soft cloth or polishing wheel and buff the surface until the desired sheen is achieved.
- Final Cleaning: Wash and dry the part to remove any residual compound.
Pros and cons
- Pros: High degree of control over surface finish. Can address specific localized imperfections. Does not require hazardous solvents. Can achieve very high-gloss finishes.
- Cons: Extremely labor-intensive and time-consuming, especially for complex parts. Requires significant skill and patience. Generates fine particulate dust, requiring respiratory protection. Can alter part geometry if not done carefully.
Cost structure
The cost of sanding and polishing is primarily driven by labor. Consumables (sandpaper, polishing compounds, tools) are relatively inexpensive (e.g., $50-$200 for a comprehensive kit). However, the human labor required can be substantial, making it a high-cost option for high-volume production. Automated sanding/polishing systems exist but involve significant capital investment, similar to automated vapor smoothing.
Category 2: Strengthening and sealing techniques

Beyond aesthetics, enhancing the mechanical integrity and environmental resistance of ABS parts is crucial for industrial applications.
Epoxy or resin coatings
Applying a coating of epoxy, polyurethane, or other resins can significantly improve a part’s strength, rigidity, abrasion resistance, chemical resistance, and provide a sealed, smooth surface.
Mechanism
A liquid resin is applied to the surface, filling in microscopic pores and layer lines. Upon curing, it forms a hard, durable shell that encapsulates the ABS part, reinforcing its structure and protecting it from external factors.
Types of coatings and their cost implications
- Epoxy Resins: Known for excellent adhesion, high strength, chemical resistance, and good electrical insulation. They typically come in two parts (resin and hardener). Cost varies widely based on formulation (e.g., general purpose vs. high-temperature, UV-resistant). Generally, a moderate cost per unit volume.
- Polyurethane Resins: Offer superior flexibility, abrasion resistance, and impact strength compared to epoxies. They can also provide good UV resistance. Often used where some elasticity is desired. Cost can be higher than standard epoxies.
- Acrylic-based Coatings: Generally thinner, faster-drying, and more focused on aesthetic sealing and UV protection. Less impact on mechanical properties than epoxies or polyurethanes. Typically lower cost per unit volume.
The cost of coatings is a direct material cost per part, plus the cost of application labor and equipment. High-performance industrial coatings can be significantly more expensive than general-purpose options, but they offer enhanced properties.
Application methods
- Brushing/Rolling: Simple, low-cost equipment, suitable for small batches or complex geometries. Labor-intensive.
- Spraying: Requires specialized spray guns and booths. Offers very uniform, thin coats and is efficient for larger batches. Higher initial equipment cost.
- Dipping: Parts are submerged in the resin. Excellent for internal and external coating, but requires more resin and a controlled environment for draining/curing.
Step-by-step guide (general for brushing/spraying)
- Part Preparation: Ensure the ABS part is clean, dry, and free of any dust or grease. Light sanding (e.g., 400-600 grit) can improve adhesion.
- Mixing Resin: Carefully mix the resin components according to the manufacturer’s instructions, paying close attention to ratios and pot life.
- Application: Apply the coating evenly. For brushing, use smooth, overlapping strokes. For spraying, maintain consistent distance and speed for uniform coverage. Apply multiple thin coats rather than one thick coat if recommended.
- Curing: Allow the part to cure in a dust-free environment according to the resin’s specifications (temperature, humidity, time). Some resins may require post-curing at elevated temperatures.
- Finishing (Optional): Light sanding and polishing of the cured coating for a smoother or glossier finish.
Pros and cons
- Pros: Significantly enhances mechanical strength, rigidity, abrasion, and chemical resistance. Creates a sealed, non-porous surface. Improves aesthetics. Can add UV protection.
- Cons: Adds material thickness, potentially affecting dimensional accuracy. Requires careful mixing and application. Curing times can be long. Can be messy.
Cost structure
Material costs for resins vary from moderate to high, depending on the specific formulation. Labor costs can range from moderate (brushing) to low (automated spraying/dipping for high volume). Equipment costs are low for brushing (brushes, mixing cups: $10-$50) but high for spraying or dipping systems ($500 – $5,000+ for professional setups).
Infiltration techniques
Infiltration involves using a low-viscosity resin or adhesive to penetrate the porous structure of the 3D printed part, filling voids and strengthening the material from within.
Mechanism
A liquid infiltrant wicks into the micro-gaps and pores within the printed part through capillary action. Upon curing, it creates a denser, more homogeneous material, increasing strength, rigidity, and reducing porosity.
Materials and their cost implications
- Cyanoacrylate (CA) Adhesives (Super Glue): Low viscosity, fast-curing, and readily available. Effective for small parts or localized strengthening. Can leave a white residue (blooming) if not applied carefully. Very low cost per small bottle, but can add up for larger parts.
- Specialized Infiltration Resins: Designed specifically for 3D printed parts, these often have tailored viscosity, curing times, and mechanical properties. They are typically more expensive per unit volume than general-purpose CA glues but offer superior performance and consistency.
The cost is primarily the material cost of the infiltrant, which can range from very low for commodity CA glues to moderate for specialized resins.
Application methods
- Brush Application: For localized infiltration.
- Dipping: Submerging the part in the infiltrant for full saturation. Requires more material and a controlled environment.
- Vacuum Infiltration: Placing the part and infiltrant in a vacuum chamber to draw the resin deep into the part’s pores. Highly effective but requires specialized equipment.
Step-by-step guide (general for dipping/brushing)
- Part Preparation: Ensure the part is clean and dry.
- Application: Carefully apply the infiltrant to the part’s surface. For dipping, submerge the part until saturation, then remove and allow excess to drip off. For brushing, apply thin, even coats.
- Curing: Allow the infiltrant to cure according to manufacturer instructions. CA glues cure rapidly, while specialized resins may require more time or UV light.
- Finishing: Remove any excess or cured infiltrant from the surface, often by light sanding.
Pros and cons
- Pros: Significantly increases part density, strength, and rigidity. Reduces porosity and improves sealing. Minimal impact on external dimensions.
- Cons: Can be difficult to control penetration depth. Excess infiltrant on the surface can require additional finishing. Some infiltrants can be brittle.
Cost structure
Material costs are moderate. Labor costs are moderate to high depending on the application method (manual brushing vs. vacuum infiltration). Equipment costs are low for manual application but high for vacuum chambers ($500 – $5,000+).
Category 3: Aesthetic and functional enhancements
The consumer toolchanger 3D printer: the SnapSwap 4-toolhead system swaps heads in 5 seconds for true multi-color and multi-material printing, with smart calibration and auto filament loading.
These techniques primarily focus on changing the appearance or adding specific functional properties like conductivity or color.
Painting and priming
Painting is a common method to achieve a specific color, hide layer lines, and add a protective layer. Priming is essential for good paint adhesion on ABS.
Mechanism
A primer layer prepares the ABS surface for paint adhesion. The paint then applies a colored, opaque, or transparent layer, altering the part’s appearance and providing some level of protection.
Types of paints and their cost implications
- Acrylic Paints: Water-based or solvent-based. Versatile, fast-drying, and available in a wide range of colors. Good for general-purpose applications. Relatively low cost.
- Enamel Paints: Oil-based, known for their hard, durable finish and good chemical resistance. Slower drying. Moderate cost.
- Specialized Industrial Paints: Formulated for specific performance requirements (e.g., UV resistance, extreme chemical resistance, high-temperature resistance, conductive paints). These are typically more expensive but offer superior performance for demanding applications.
The cost of paints varies significantly by type and brand, ranging from low for craft acrylics to high for industrial-grade formulations. Primers are an additional, often necessary, cost.
Priming ABS
ABS can be tricky to paint due to its relatively smooth, non-porous surface. Using a dedicated ABS plastic primer or an adhesion promoter is highly recommended to ensure good paint adhesion and prevent chipping or peeling. Some primers are specifically designed to bond with ABS, creating a strong interface for subsequent paint layers.
Application methods
- Brushing: For small details or localized areas. Can leave brush strokes.
- Spraying: Aerosol cans for small jobs, or professional spray guns for larger parts and uniform coverage. Offers the best finish quality.
Step-by-step guide
- Part Preparation: Clean the part thoroughly. Lightly sand (e.g., 400-600 grit) and clean again for better adhesion.
- Priming: Apply a thin, even coat of ABS-compatible primer. Allow to dry completely as per manufacturer instructions. Multiple thin coats are better than one thick coat.
- Sanding Primer (Optional): Lightly sand the cured primer with very fine grit (e.g., 800-1000) for a smoother base, then clean.
- Painting: Apply thin, even coats of paint, allowing each coat to dry to tackiness before applying the next. Avoid heavy coats to prevent drips and unevenness.
- Curing: Allow the painted part to fully cure. This can take hours to days depending on the paint type.
- Clear Coat (Optional): Apply a clear protective coat for added durability and a desired sheen (matte, satin, gloss).
Pros and cons
- Pros: Wide range of color and finish options. Can hide layer lines effectively. Adds a protective layer.
- Cons: Requires careful preparation for good adhesion. Can chip or scratch if not applied properly or if the paint isn’t durable. Adds material thickness.
Cost structure
Material costs for primers and paints are moderate. Labor costs are moderate to high, especially for multi-coat applications or intricate designs. Equipment costs are low for aerosol cans ($10-$50) but higher for professional spray gun setups ($200-$2,000+).
Dyeing
Dyeing offers a way to uniformly color ABS parts without adding any material thickness, preserving dimensional accuracy. It typically involves submerging the part in a hot dye bath.
Mechanism
ABS is a thermoplastic that can absorb certain dyes when heated. The dye penetrates the material itself, coloring it throughout the outer layer without forming a separate surface coating.
Dye types and process
Specialized dyes for plastics, often disperse dyes, are used. The part is submerged in a hot dye solution (typically 60-90°C) for a period, allowing the dye to penetrate. The longer the soak and the higher the temperature (within ABS’s heat deflection limits), the deeper and more intense the color.
Pros and cons
- Pros: Uniform color without adding thickness. Preserves dimensional accuracy. Color is deeply integrated into the material, making it resistant to scratching or chipping.
- Cons: Limited color palette compared to painting. Requires precise temperature control to avoid part deformation. Not suitable for multi-color designs on a single part.
Cost structure
Material costs for dyes are relatively low. Equipment costs are low (hot water bath, containers: $50-$200). Labor costs are low to moderate, primarily for monitoring the process.
Combining techniques for optimal results
For truly industrial-grade ABS parts, a combination of these techniques often yields the best results. A typical workflow might look like this:
- Support Removal & Initial Cleaning: Basic cleanup of the raw print.
- Sanding (Optional but Recommended): For heavy layer lines or specific contouring, a quick pass with medium grit sandpaper can significantly reduce subsequent processing time.
- Vapor Smoothing: To achieve a smooth, uniform surface finish, eliminating most layer lines and reducing porosity.
- Light Sanding/Cleaning: After vapor smoothing, some parts might benefit from a very light sanding to remove any residual tackiness or minor imperfections, followed by thorough cleaning.
- Coating/Infiltration: Applying an epoxy or specialized resin to further enhance mechanical strength, chemical resistance, and sealing properties.
- Painting/Dyeing (Optional): For specific aesthetic requirements or additional protective layers.
The synergy between these methods allows for a comprehensive approach, addressing different aspects of part quality. For example, vapor smoothing creates an ideal base for coatings, ensuring better adhesion and a smoother final appearance. Infiltration can strengthen the core of the part, while an external coating provides surface durability.
Comparative analysis of cost structures and features

Choosing the right post-processing technique or combination hinges on a careful evaluation of desired outcomes, budget, and operational capacity. Below is an objective comparison of the key aspects for each method.
Initial investment
- Vapor Smoothing (DIY): Extremely low (tens of dollars for basic materials).
- Vapor Smoothing (Automated): High to very high (thousands to tens of thousands of dollars for commercial machines).
- Sanding & Polishing (Manual): Low (hundreds of dollars for tools and consumables).
- Sanding & Polishing (Automated): High (thousands to tens of thousands for robotic systems).
- Epoxy/Resin Coatings (Manual): Low (tens to hundreds of dollars for brushes, mixing tools).
- Epoxy/Resin Coatings (Automated Spray/Dip): Moderate to high (hundreds to thousands for spray guns, booths, dipping setups).
- Infiltration (Manual): Low (tens of dollars for infiltrant).
- Infiltration (Vacuum): Moderate to high (hundreds to thousands for vacuum chamber).
- Painting & Priming (Aerosol): Low (tens of dollars for cans).
- Painting & Priming (Professional Spray): Moderate to high (hundreds to thousands for spray guns, compressors, booths).
- Dyeing: Low (tens to hundreds of dollars for dye, heating equipment).
Consumables cost per part/batch
- Vapor Smoothing (DIY): Moderate (solvent evaporation, occasional spills).
- Vapor Smoothing (Automated): Low to moderate (solvent replenishment, filters; often offset by recovery systems).
- Sanding & Polishing: Low (sandpaper, polishing compounds wear out).
- Epoxy/Resin Coatings: Moderate to high (material cost of resin directly proportional to part size and number of coats).
- Infiltration: Low to moderate (material cost of infiltrant, can be higher for specialized resins).
- Painting & Priming: Moderate (primer, paint, clear coat material cost).
- Dyeing: Low (dye solution can be reused for some time).
Labor cost/time
- Vapor Smoothing (DIY): High (constant monitoring, manual handling, trial-and-error).
- Vapor Smoothing (Automated): Low (loading/unloading, minimal supervision during cycle).
- Sanding & Polishing: Very high (extremely labor-intensive, requires skilled operators).
- Epoxy/Resin Coatings (Manual): Moderate to high (careful application, multiple coats, curing time management).
- Epoxy/Resin Coatings (Automated Spray/Dip): Low to moderate (setup, monitoring, less direct manual application).
- Infiltration (Manual): Moderate (careful application, managing excess).
- Infiltration (Vacuum): Low to moderate (loading/unloading, process monitoring).
- Painting & Priming: High (preparation, multiple coats, drying times, meticulous application).
- Dyeing: Low (submersion, monitoring temperature).
Required skill level
- Vapor Smoothing (DIY): Low entry, but high skill for consistent results.
- Vapor Smoothing (Automated): Moderate (operating machine, troubleshooting).
- Sanding & Polishing: High (requires significant practice and finesse for professional results).
- Epoxy/Resin Coatings: Moderate to high (mixing, application technique, avoiding defects).
- Infiltration: Moderate (understanding material absorption, managing excess).
- Painting & Priming: Moderate to high (surface prep, even application, avoiding drips/unevenness).
- Dyeing: Low to moderate (temperature control, timing).
Surface finish quality
- Vapor Smoothing: Excellent (smooth, glossy, uniform, injection-molded look).
- Sanding & Polishing: Excellent (can achieve very high gloss, precise control over specific areas).
- Epoxy/Resin Coatings: Excellent (can achieve high gloss, smooth, sealed surface).
- Infiltration: Minimal direct surface finish improvement, primarily internal strengthening.
- Painting & Priming: Excellent (can hide imperfections, wide range of finishes).
- Dyeing: Good (uniform color, retains original surface texture).
Mechanical property enhancement
- Vapor Smoothing: Moderate (reduces surface stress concentrations, can slightly increase tensile strength).
- Sanding & Polishing: Minimal direct enhancement, potentially reduces stress risers from layer lines.
- Epoxy/Resin Coatings: High (significantly increases strength, rigidity, abrasion, and chemical resistance).
- Infiltration: High (significantly increases part density, strength, and rigidity, reduces porosity).
- Painting & Priming: Low (primarily protective layer, minimal structural enhancement).
- Dyeing: None.
Safety concerns
- Vapor Smoothing (DIY): Very high (flammable solvents, toxic fumes, explosion risk).
- Vapor Smoothing (Automated): Moderate (controlled environment, but still involves hazardous chemicals; requires proper ventilation and safety protocols).
- Sanding & Polishing: Moderate (fine dust inhalation, eye protection; can be mitigated with proper PPE and dust extraction).
- Epoxy/Resin Coatings: Moderate (skin irritants, fumes; requires PPE and ventilation).
- Infiltration: Moderate (chemical exposure, fumes; requires PPE and ventilation).
- Painting & Priming: Moderate (fumes, flammability of some paints; requires PPE and ventilation).
- Dyeing: Low (hot liquids, potential for skin irritation; requires basic heat safety and gloves).
Environmental impact
- Vapor Smoothing: Moderate (solvent emissions, waste solvent disposal; automated systems with recovery reduce impact).
- Sanding & Polishing: Low (particulate waste, water waste if wet sanding).
- Epoxy/Resin Coatings: Moderate (chemical waste, potential for VOCs depending on resin type).
- Infiltration: Moderate (chemical waste).
- Painting & Priming: Moderate (VOCs, paint waste, cleaning solvents).
- Dyeing: Low (dye solution disposal).
Scalability
- Vapor Smoothing (DIY): Very low (manual, inconsistent).
- Vapor Smoothing (Automated): High (batch processing, repeatable).
- Sanding & Polishing: Very low (highly manual, labor-intensive).
- Epoxy/Resin Coatings (Manual): Low.
- Epoxy/Resin Coatings (Automated Spray/Dip): High.
- Infiltration (Manual): Low.
- Infiltration (Vacuum): Moderate to high.
- Painting & Priming: Moderate (can be automated with robotic systems).
- Dyeing: Moderate (batch processing).
Conclusion
Transforming raw FDM ABS prints into industrial-grade components is a multifaceted endeavor that requires a strategic approach to post-processing. Each technique, from the transformative surface smoothing of vapor processes to the robust strengthening of coatings and infiltrations, offers distinct advantages and comes with its own set of cost implications and operational considerations. There is no universally “best” method; instead, the optimal choice is a careful alignment of the desired final part characteristics, the specific industrial application, available budget, and operational capabilities. By objectively evaluating the initial investment, ongoing consumable costs, labor requirements, skill level, and the specific enhancements each technique provides, manufacturers and engineers can make informed decisions to elevate their ABS 3D printed parts to meet the rigorous demands of industrial use, ensuring durability, functionality, and an impeccable finish.
Frequently asked questions
Can I vapor-smooth a part that has internal channels or blind holes?
Yes, but internal geometry is challenging for vapor smoothing because the vapor must circulate freely to reach all surfaces. Small-diameter channels or deep blind holes may not smooth evenly, and vapor can condense inside and pool, causing localized melting or deformation. For parts with complex internal features, manual sanding or a thin epoxy coating is often a more reliable alternative.
How much does it actually cost to set up a basic DIY vapor smoothing station?
A basic DIY vapor smoothing setup costs roughly $20 to $100, covering a sealed glass jar or bucket, a small bottle of acetone, and a holder for the part. However, this low upfront cost comes with significant trade-offs: inconsistent results, high safety risks from flammable solvent fumes, and no solvent recovery, which means you will regularly need to buy more acetone.
After vapor smoothing, should I still sand and prime before painting?
Yes, in most cases you should still sand and prime after vapor smoothing if you plan to paint. Vapor smoothing leaves a glossy, slightly reflowed surface that can be too slick for paint to adhere well without a primer. A very light sanding with 600-800 grit wet sandpaper followed by an ABS-compatible primer ensures the paint bonds properly and does not chip or peel later.