ABS post-processing is the finishing work that follows an ABS print: smoothing the surface, joining and filling seams, sanding, painting and adding threads. ABS, like ASA, dissolves in acetone, which is why it supports methods PLA and PETG do not: vapor smoothing, solvent welding and a dissolved-ABS filler called slurry. Every one of those uses a highly flammable solvent, so ventilation and ignition control come before technique.
This guide covers the finishing methods in a short section each and links to the deep guides for acetone vapor, welding and sanding. It adds what they do not: acetone slurry for gaps, heat-set inserts, and the safety numbers from the acetone data sheet. These are hobby methods on printed parts. They change the look and the feel of a part, but nothing here turns a desktop ABS print into an engineered, certified component, so treat any load-bearing use as your own test.
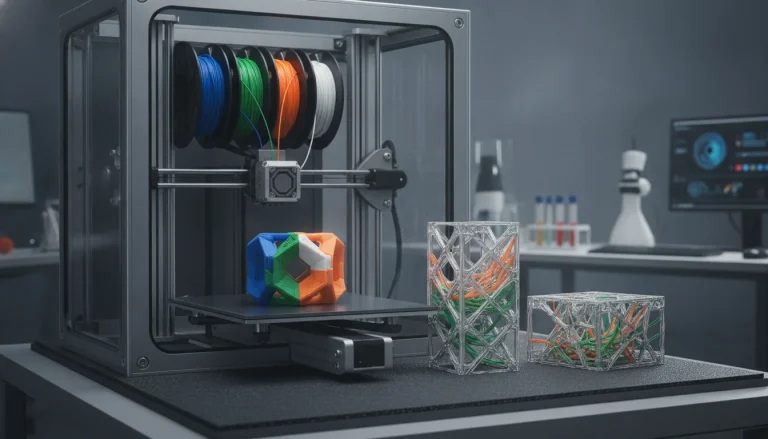
The consumer toolchanger 3D printer: the SnapSwap 4-toolhead system swaps heads in 5 seconds for true multi-color and multi-material printing, with smart calibration and auto filament loading.
- 4 toolheads · 5 s swap
- Up to 500 mm/s · 20,000 mm/s²
- 270 mm cube build volume
- Multi-color & multi-material

Which ABS finishing method for which goal
| Goal | Method | Where to read more |
|---|---|---|
| Glossy, layer-free surface | Acetone vapor smoothing | Acetone vapor smoothing |
| Join two ABS parts | Solvent welding | Gluing 3D prints |
| Fill gaps and seams | Acetone slurry, then sanding | This page |
| Flat, paint-ready surface | Sanding, filler primer, paint | Sanding, primer, painting |
| Screw threads | Heat-set inserts | This page |
| Glossy shell without solvents | Epoxy coat | This page |
Acetone vapor smoothing, in brief
Vapor smoothing exposes the part to acetone vapor so the outer layer softens and flows into the gaps between layer lines. Prusa’s tests used a heated box with the bed at about 80 °C and roughly 5 mm of acetone on the bottom. Prusament ASA was glossy in 15 to 20 minutes, most other ABS and ASA filaments needed 20 to 40 minutes, and two of the filaments Prusa tested still showed layers after an hour. Treat those times as checkpoints, not a recipe: they depend on the chamber, the temperature and the filament, and long exposure risks deforming details. The method is cosmetic and changes dimensions, so do not use it on mating surfaces.
Prusa’s article lays out the fire rules: the box must not be perfectly sealed, any heater stays outside the box, a fan is used only if it is in perfect condition (damaged electronics can spark and ignite fumes), and the process is never left unattended. The full procedure, exposure times and PPE live in the acetone vapor smoothing guide.
Acetone slurry for gaps and seams
Slurry is ABS dissolved in acetone to a putty-like consistency. It fills gaps and blends the seam between welded ABS parts, and it dries to solid ABS that you can sand. MatterHackers publishes three recipes that all use 50 mL of acetone:
| Mix | ABS (scrap or filament) | Consistency | Use |
|---|---|---|---|
| Juice | About 4 g | Like milk | Print-bed adhesion aid (glass only) |
| Glue | About 8 g | Like white school glue | Welding two ABS parts |
| Slurry | About 20 g | Very goopy | Filler putty for seams and gaps |
Treat the amounts as starting points from a retailer’s guide, not a specification, and adjust by adding ABS or acetone.
- Cut ABS filament or scrap into small pieces and drop them in the acetone, in a metal, glass, polypropylene or HDPE container with a lid.
- Let it sit overnight. MatterHackers loosens the lid from time to time to release vapor.
- Spread the slurry into the gap with a spatula or a stick, a little proud of the surface. Acetone evaporates out of the slurry, so expect some shrinkage and build up in thin layers.
- When it has fully hardened, sand it flush; the sanding guide has the grit steps.
Work with the container closed, away from ignition sources, and apply it only in a well-ventilated area. Keep the mixing jar out of reach of children and pets.
Solvent welding ABS parts
Welding differs from slurry filling: the solvent melts both faces so they fuse into one piece, and it needs tight-fitting parts. Acetone is the hobby choice. Plumbing ABS cement is a stronger mixture; Oatey’s ABS Medium Black Cement safety data sheet lists 40 to 60 % methyl ethyl ketone, 30 to 40 % ABS resin and 10 to 20 % acetone, and its signal word is “Danger”. Step-by-step welding, joint shapes and what not to use are in gluing 3D prints.
Sanding and threads
Sanding is the solvent-free default for ABS and needs only dust control. Start with the finest grit that removes the defect and work up; the grit progression guide covers grits, wet sanding and dust. Fill pinholes and layer lines with filler primer before painting.
For threads, Protolabs says it recommends inserts over tapping for threaded holes in printed plastic parts. Tapping is possible and is simpler, but gives a weaker thread. If a part will be screwed together more than a few times, use inserts.
Heat-set inserts in ABS
A heat-set insert is a knurled brass insert pushed into a slightly undersized hole with a hot soldering iron; the plastic melts around it and locks it in. CNC Kitchen’s guide gives these starting points:
- **Iron temperature:** 10 to 20 °C above the printing temperature of the plastic; CNC Kitchen’s figure for ABS is about 265 °C. If the iron is not adjustable, pull it away early.
- **Hole size:** holes in printed parts usually come out smaller than in the CAD model, so print a test coupon with a range of hole sizes. CNC Kitchen offers test parts on Printables. Choose a hole just big enough for the insert’s pilot tip to enter without leaving a burr under it.
- **Hole depth:** blind holes about 1 mm deeper than the insert; through holes need no extra depth. Keep holes straight and skip a chamfer.
- **Pressing in:** melt the insert only to about 90 % of its depth, then press it flush with a screwdriver or tweezers.
- **Cooling:** hold it for a few seconds until the plastic hardens, because inserts tend to creep back out.
- **Space:** Protolabs suggests about 0.25 inch (6.35 mm) of clearance around an insert surrounded by other features, so nothing melts during installation.
Melting plastic gives off fumes, so install inserts with the same ventilation you use for printing ABS; see ABS fume ventilation.
Epoxy coating without vapor
If you want a glossy, sealed surface without acetone vapor, a thin epoxy coat works on ABS. Smooth-On’s XTC-3D lists ABS among compatible materials, mixes 2 parts A to 1 part B by volume, has a 10-minute pot life and is tack-free in about 2 hours. Apply a single layer under 1/64 inch (about 0.4 mm) with a foam brush, and use ventilation, gloves, eye protection and a NIOSH-approved respirator, as its page asks. The cured coat can be painted. Because its page gives no UV data, ABS that lives outdoors needs a UV-rated clear coat; see UV protection for outdoor prints.
Acetone safety numbers
The W. M. Barr Klean-Strip acetone safety data sheet (revision 06/2019) says:
- **Fire:** the flash point is 0 °F (about -18 °C, closed cup) and the explosive limits are 2.5 to 13.0 % in air at 77 °F, so vapor can ignite at room temperature. The vapors are heavier than air and can spread along the floor, and the sheet says not to use it near flames, heaters or in small enclosed spaces such as basements and bathrooms.
- **Health:** serious eye irritation, respiratory irritation, drowsiness and dizziness. The sheet says nausea, dizziness, headache or watering eyes mean ventilation is inadequate: stop and get fresh air. Limits: OSHA PEL 1,000 ppm, ACGIH TLV 500 ppm.
- **Protection:** eye protection and gloves; a dust mask does not protect against vapors, and a NIOSH-approved organic-vapor respirator is advised where ventilation is poor.
- **Waste:** dispose of leftover acetone and the container under local, state and federal regulations.
Common mistakes
- Smoothing a part with fine details or tight tolerances and expecting it to keep its dimensions.
- Using nail polish remover instead of pure acetone; it usually contains other ingredients, so check the label.
- Working in a closed room, or with a heater, a spark source or a pilot light nearby.
- Applying thick slurry in one go; it shrinks and cracks as it dries.
- Guessing insert hole sizes instead of printing a test coupon.
- Printing ABS that warps, then trying to fix it afterwards; see ABS warping and cracking.
Frequently asked questions
What is ABS slurry and how do I make it?
ABS slurry is ABS dissolved in acetone until it is a thick putty used to fill gaps and blend welded seams. MatterHackers uses about 20 g of ABS in 50 mL of acetone, left overnight in a container with a lid. Sand it flush once it has hardened.
Is acetone vapor smoothing safe to do at home?
Only with strict precautions. Acetone is highly flammable (flash point 0 °F) and its vapor is heavier than air, so work outdoors or with strong ventilation, no ignition sources, a chamber that is not sealed, and never leave it running. A dust mask does not stop the vapors.
Do heat-set inserts work in ABS?
Yes. CNC Kitchen suggests setting the iron 10 to 20 °C above the print temperature, about 265 °C for ABS, and melting the insert in to about 90 % depth before pressing it flush. Test hole sizes on a coupon first, because printed holes are usually smaller than in CAD.
Can I sand ABS before painting?
Yes, and you should. Sand to remove layer lines, fill pinholes with filler primer, and sand the primer flat before color. Wipe the dust off with isopropyl alcohol before painting.
Sources
- Prusa Research: Improve your 3D prints with chemical smoothing
- W. M. Barr Klean-Strip acetone safety data sheet, revision 06/2019
- MatterHackers: How to make ABS juice, glue and slurry
- CNC Kitchen: Tips and tricks for heat-set inserts
- Protolabs: Threading in 3D printing, inserts and tapping
- Smooth-On XTC-3D product page
- Oatey ABS Medium Black Cement safety data sheet