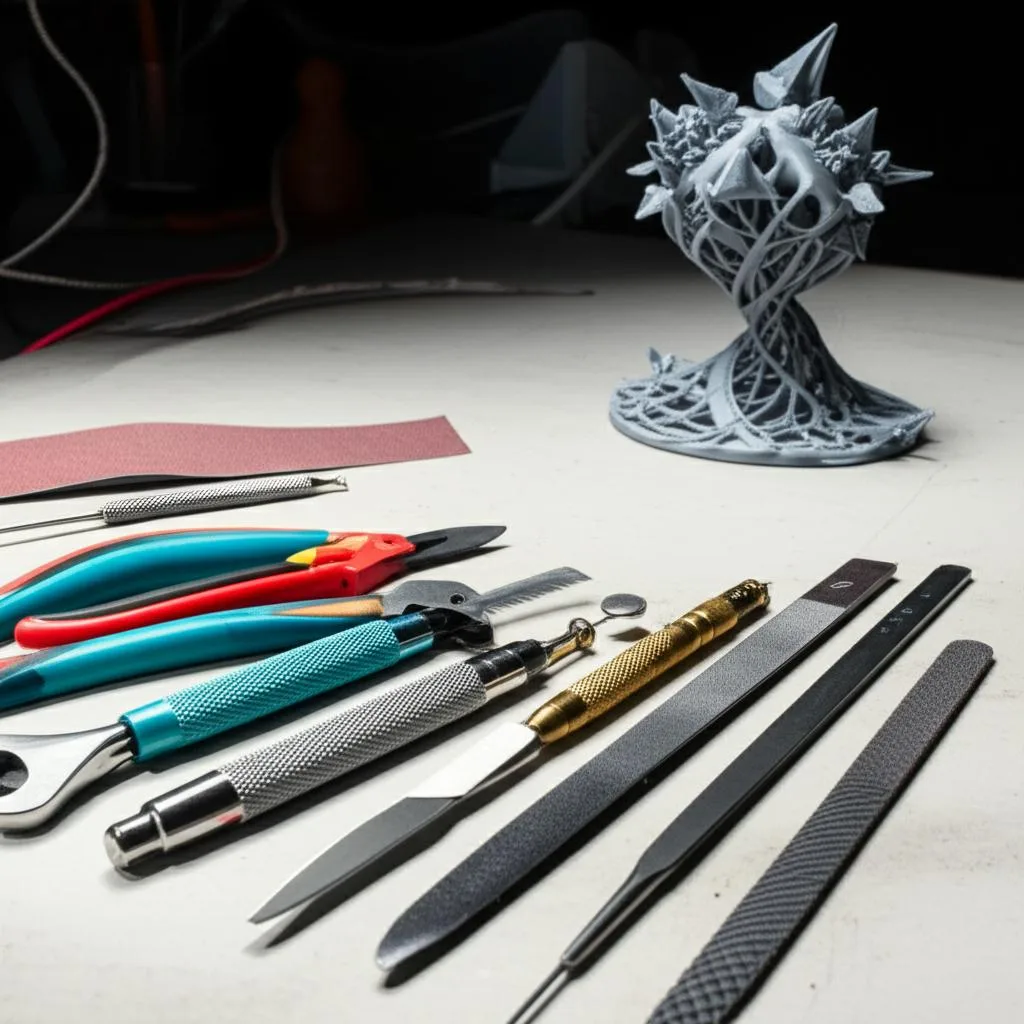
A useful first post-processing kit for FDM prints is small: flush cutters, a hobby knife with spare blades, a swivel-blade deburring tool, a set of needle files, sanding sticks with wet/dry paper, fine tweezers or needle-nose pliers, a thin scraper, super glue plus a two-part epoxy, safety glasses with side shields and a well-fitting dust mask. That covers support removal, cleanup, sanding, gluing and paint prep for most hobby prints. Add power tools later, once you know which jobs eat your time.
The mistakes that damage prints are mostly about timing and force, not tools: pulling parts off a hot bed, leaving supports on moisture-sensitive filaments for hours, twisting supports off thin features, sanding through the walls, gluing before a dry fit, and spraying primer too heavily. The advice below comes from Bambu Lab’s and Prusa’s post-processing guides, a filler primer manufacturer’s data sheet and workplace safety guidance, all linked at the end.
The consumer toolchanger 3D printer: the SnapSwap 4-toolhead system swaps heads in 5 seconds for true multi-color and multi-material printing, with smart calibration and auto filament loading.
- 4 toolheads · 5 s swap
- Up to 500 mm/s · 20,000 mm/s²
- 270 mm cube build volume
- Multi-color & multi-material

What to buy first
- Safety glasses with side protection. Snipped supports and brittle plastic fly further than you’d think.
- Flush cutters for supports, brims and thick strings.
- Hobby knife and a pack of blades. A dull blade needs more force and slips.
- Deburring tool for edges, holes and the elephant’s foot on first layers.
- Sanding sticks and wet/dry paper from about P120 to P800.
- Super glue with activator, and a two-part epoxy for joints that carry load.
- Dust mask (FFP3 or equivalent) before you do any dry or power sanding.
Post-processing tools by job
| Job | Tool | Good for | Watch out for |
|---|---|---|---|
| Removing the print | Flexible build plate, thin scraper | Flexing the plate, lifting edges gently | Prying a hot print; gouging a textured sheet with a metal blade |
| Support removal | Flush cutters, needle-nose pliers | Cutting supports close to the surface, pulling loosened pieces | Twisting supports off thin features with pliers |
| Trimming nubs and blobs | Hobby knife | Shaving flat, precise cuts | Cutting toward your hand; worn blades |
| Edges and holes | Swivel-blade deburring tool | Removing sharp edges and first-layer flare, cleaning hole rims | Taking too many passes and chamfering an edge you wanted sharp |
| Tight spots | Needle files, dental picks, tweezers | Slots, internal corners, strings inside holes | Scratching visible faces with a slipping pick |
| Smoothing | Sanding sticks, blocks, wet/dry paper | Layer lines, support scars, filler | Sanding flat faces without a block; skipping grits |
| Joining parts | Super glue with activator, epoxy | Quick bonds (super glue), load-bearing joints (epoxy) | Gluing before a dry fit |
| Paint prep | Body filler, filler primer, masking tape | Filling seams, revealing defects | Heavy coats that run or fill detail |
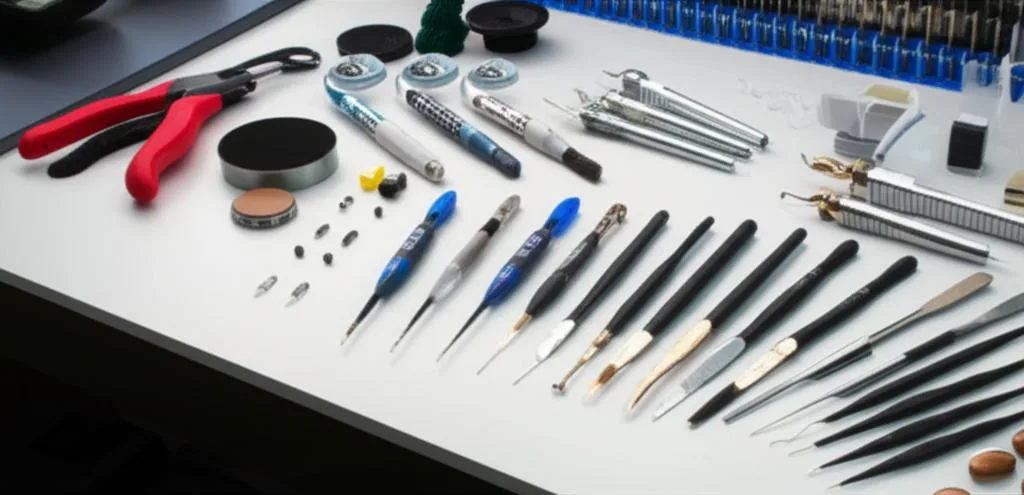
Removing the print and supports without damage
Many damaged parts are damaged during removal, not printing. This sequence follows Bambu Lab’s post-print guidance and applies to any FDM printer.
- Let the bed and print cool to room temperature. Bambu Lab recommends waiting before removing the print, both to avoid burns and to avoid damaging the model or plate.
- Flex the plate from several angles first. If a large base still holds, work a scraper gently under each edge and corner. If you used glue stick, soaking the joint in water dissolves the glue.
- Remove supports soon. Bambu Lab advises removing them as soon as possible, before they absorb moisture and soften, and within 2 hours for moisture-prone nylon composites such as PA-CF and PAHT-CF. If they have already become hard to remove, dry the whole print, let it cool and try again.
- Cut first, then pull. Snip large support sections into pieces with flush cutters so you are not levering against the model. Pull remaining pieces away from thin features, not across them.
- Soak soluble supports if tools can’t reach them. Bambu Lab notes that water can seep into internal cavities during long soaks.
- Rinse off glue film from the bottom of the part so it doesn’t stay tacky.
How hard supports are to remove is decided mostly in the slicer. If you fight them on every print, look at support interface settings and at designing breakaway supports.
Deburring, trimming and sanding
Work from the least aggressive tool to the most aggressive. A deburring tool removes the sharp flare on the first layer and cleans the rim of holes quickly; a knife held at a shallow angle shaves nubs flush; files handle slots and flat edges; sandpaper comes last. Sandpaper tends to round off edges, so use the blade tools where you want to keep a crisp corner.
Prusa’s own post-processing workflow starts rough sanding with P100 and sands the final primer coat with P400, and recommends printing parts you plan to post-process with at least 20% infill, because the part is stressed while you work on it. The full grit sequence, wet sanding and rotary tool speeds are covered in how to sand 3D prints. For stringing and blobs specifically, see the strings and blobs cleanup guide.
Gluing printed parts
Prusa’s advice is to tape the parts together first. A dry fit shows which parts must be glued and which can be painted separately, which saves masking later. Choose the glue by material and load, following Bambu Lab’s bonding guidance:
| Situation | Glue | Limitation |
|---|---|---|
| PLA or PETG, low-strength joint | Super glue (cyanoacrylate), ideally with activator | Bambu Lab: poor cold resistance and durability; can crack and lose strength in the cold or over time |
| Higher strength on most filaments | Two-part epoxy | Check the product’s listed materials and conditions |
| Rough-surface composites (PAHT-CF, PET-CF, PA6-CF) | Hot melt glue | Heat can deform the print; take care with burns |
| Flexible joints | TPU-type shoe repair glue | Limited materials; read the instructions |
For joint design, clamping and hiding seams, see how to glue 3D printed parts together.
Preparing prints for primer and paint
Prusa fills seams with automotive body filler in thin layers, sands it back, then sprays a filler primer as a guide coat between rounds, because the uniform color shows every bump. A filler primer’s data sheet gives the practical limits. Rust-Oleum’s automotive Filler Primer (data sheet ATO-50), as one example:
- Clean first: wash with detergent, rinse with fresh water, dry with a clean cloth.
- Conditions: apply between 10 and 32 °C with humidity below 85%, outdoors or in a well-ventilated space, away from open flame.
- Technique: hold the can 12–16 in (about 30–40 cm) from the surface, keep it moving, and apply two or more light coats a few minutes apart.
- Sanding: touch dry in 10 minutes and ready for wet sanding once dry; for dry sanding, wait 2–4 hours (times at 21 °C and 50% humidity, longer when cooler).
Prusa’s guide uses a closer distance, about 20 cm, for its filler spray. Different products are formulated differently, so follow the label on your can rather than a general number. The same data sheet lists acetone among the primer’s solvents; on ABS or ASA parts, light coats matter even more, since those plastics react to acetone. Which primer suits which plastic is covered in the primer guide for PLA, ABS and resin.
Safety gear that belongs in the kit
- Eye protection with side shields. OSHA’s workplace eye protection rule calls for side protection wherever there is a hazard from flying objects, which describes cutting supports and using rotary tools.
- A dust mask that seals. The UK Health and Safety Executive names FFP3 as the most advisable type for dusty work and stresses that masks rely on a tight seal to the face.
- A vacuum rather than a brush for cleanup. HSE notes dry sweeping raises far more dust than vacuuming or wet wiping.
- A cutting mat and nitrile gloves. The mat protects the bench and blade tips; gloves are essential for resin prints and useful with fillers and glues.
Common beginner post-processing mistakes
| Mistake | What happens | Do this instead |
|---|---|---|
| Prying the print off a hot bed | Warped base, burns, damaged build sheet | Wait for room temperature, flex the plate, then use a scraper |
| Leaving supports on nylon or other moisture-prone filament | Supports soften and bond harder | Remove supports promptly (within 2 hours for PA composites, per Bambu Lab); dry the print if they have set |
| Twisting supports off with pliers | Snapped pins, torn surfaces, broken overhangs | Cut into sections with flush cutters and pull away from thin features |
| Starting with coarse paper on detail | Rounded edges, lost text and texture | Blade tools on edges; fine paper on a stick near detail |
| Sanding thin walls over sparse infill | Sanding through into the infill | Print with at least 20% infill; if you break through, fill it rather than reprint |
| Gluing before a dry fit | Misaligned parts, extra masking for paint | Tape the parts together first and plan the paint order |
| Super glue on joints that see cold or long-term load | Joint cracks and fails later | Use epoxy for load-bearing joints |
| Heavy primer coats | Runs, filled detail, long drying | Several light coats at the distance on the can |
| Dull blades | More force, slips, cuts | Change blades as soon as they drag |
Budget time as well as tools. Prusa estimated that a painted helmet prop took an experienced modeler over 8 hours of work, not counting printing and drying, and that a beginner is likely to need more than twice as long.
Frequently asked questions
What tools do I need to remove supports from 3D prints?
Flush cutters and needle-nose pliers handle most FDM supports, with a hobby knife and a deburring tool for the marks left behind. Cut large supports into sections instead of twisting them off. Wear safety glasses, as pieces can fly.
Should I remove supports while the print is still warm?
Let the bed and print cool to room temperature before taking the part off the plate, as Bambu Lab recommends. Do not leave supports on for long afterwards, though: they can absorb moisture and become harder to remove, and Bambu Lab suggests removing them within 2 hours for nylon composites.
Do I need a deburring tool if I have sandpaper?
It is worth having. A swivel-blade deburring tool removes first-layer flare and cleans hole edges while keeping the edge shape, whereas sandpaper tends to round corners. Use sandpaper for faces and layer lines.
What glue works best for PLA and PETG prints?
Super glue works for quick, low-load joints, but Bambu Lab notes it can crack in the cold or over time. For joints that carry load, use a two-part epoxy. Always dry-fit the parts with tape before gluing.