Polishing a resin print means wet sanding the washed and cured surface through finer and finer grits until layer lines and support marks are gone, then buffing it with a plastic polish or sealing it with a clear coat. Formlabs describes a sequence from 400 up to 12,000 grit in 200-grit steps: the part turns glossy around 3,000 and reflective at 12,000. For clear resin the short version is 800 then 1,200 grit wet, then polish, and for real transparency a spray or resin coat on top.
This guide covers the grit sequence, polishing compounds and rotary-tool limits, the extra steps clear resin needs, and what causes cloudiness, haze and yellowing. Numbers come from Formlabs, Phrozen and Novus documentation and a MatterHackers guide, linked at the end. Where a value is a starting point rather than a published figure, it is labelled as one.
The consumer toolchanger 3D printer: the SnapSwap 4-toolhead system swaps heads in 5 seconds for true multi-color and multi-material printing, with smart calibration and auto filament loading.
- 4 toolheads · 5 s swap
- Up to 500 mm/s · 20,000 mm/s²
- 270 mm cube build volume
- Multi-color & multi-material

Polishing a resin print in six steps
- Wash the print and cure it fully, as in the washing and curing guide. A tacky surface clogs sandpaper. Clear resin has its own curing rule, see the clear resin section below.
- Cut off supports flush and take down the nubs with the coarsest paper you need, not coarser.
- Wet sand, one grit at a time, rinsing and drying between grits. Do not move on until the scratches from the previous grit are gone.
- Stop at 3,000 grit for a satin-glossy surface, or continue with micromesh pads toward 12,000 for a reflective one.
- Buff with a plastic or acrylic polish on a soft cloth, or seal with a clear coat.
- Inspect under a strong light from several angles and repeat the last grit wherever swirls remain.
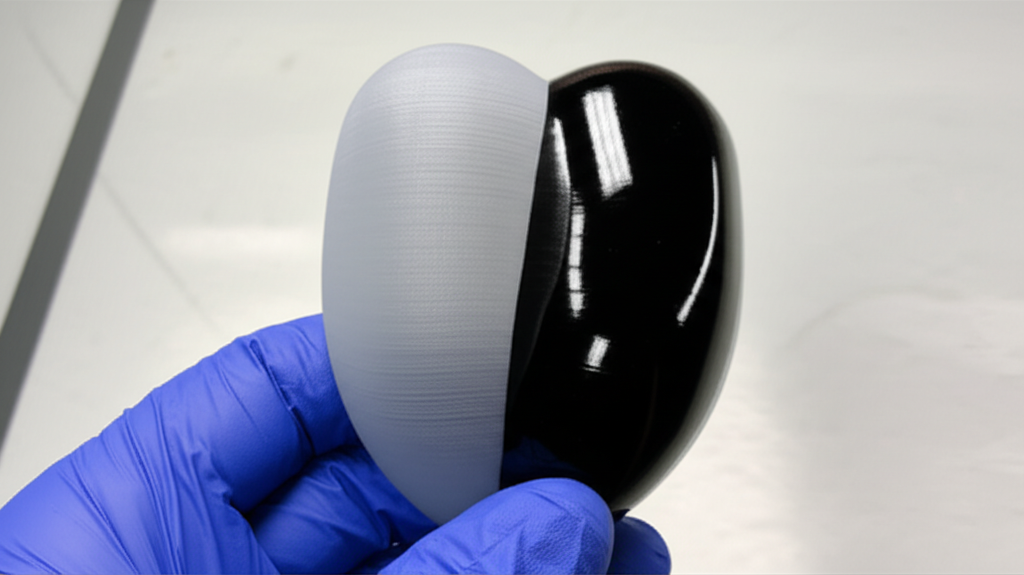
Wet sanding grit sequence for resin
Cured resin has much finer layer lines than FDM, so you can start with finer paper than on an FDM print. Formlabs notes that SLA parts need less sanding than FDM parts and that the most common reason to sand at all is removing support marks. Its own range starts at 400 grit. Phrozen’s guide for transparent resin starts at 800 and stops at 3,000. Treat the table as starting points and drop one grit coarser if steady sanding changes nothing.
| Stage | Grit | What you are doing | Basis |
|---|---|---|---|
| Support marks and nubs | 220 to 400 | Level the mark flush with the surface | Formlabs suggests 220 grit for support marks and starts its range at 400 |
| Layer lines and scratches | 600 to 1,000 | Remove the scratches from the coarse stage | Starting point |
| Smoothing | 1,200 to 2,000 | Matte, even, no visible scratches | Formlabs and Phrozen use 800 to 3,000 for clear parts |
| Gloss | 3,000 | Glossy and smooth to the touch | Formlabs |
| Mirror | 5,000 to 12,000 (micromesh) | Reflective surface | Formlabs |
Sand under running water or on wet paper, which Formlabs suggests for tough parts, and rinse the part between grits so loose coarse grains do not scratch the next stage. Water also keeps dust down. For gloves and respirators see the resin PPE checklist for gloves and respirators, and check your resin’s safety data sheet. Grit labels above about 220 differ between the FEPA (P) and CAMI systems, so check the scale on the back of the sheet; the grit progression guide has the conversion table.
Hand sanding works best on simple shapes, according to Formlabs. Parts with deep crevices or internal supports are better served by polishing or media blasting than by paper. If the surface needs heavy sanding, Formlabs also suggests rubbing a washed part in mineral oil first, with the caveat that results depend on geometry. Marks left by supports are a topic of their own: resin support removal covers how to avoid them in the first place.
Polishing compounds and rotary tools
After the last grit, polishing removes the finest scratches. Formlabs finishes clear parts with an acrylic cleaner on a cork board, then a microfiber cloth, and optionally an acrylic spray. A widely sold option is the Novus three-step system, made for plastics and acrylics: No. 3 for heavy scratches, No. 2 for fine scratches and haze, and No. 1 for cleaning. Novus applies them with a firm back-and-forth motion at right angles to the scratches, keeps the cloth saturated, then finishes in small circles and buffs. Novus says No. 2 and No. 3 are not recommended on coated plastics, so polish before any clear coat, not after.
A rotary tool speeds up large surfaces but melts resin quickly. For sanding with a rotary tool Formlabs says to turn the speed down to the minimum, usually 500 to 1,000 RPM, to avoid scorching. No published buffing speed for resin was found, so use the lowest speed, light pressure, keep the buffer moving and stop if the surface smears. Use a separate wheel for each compound so coarse particles do not travel into the fine stage. Delicate details are safer with a cotton swab or a cloth.
Clear resin: how to get a transparent print
A clear print looks frosted for two reasons: the surface is rough and scatters light, and washing in IPA or ethanol leaves a frosty surface as the solvent dries, according to MatterHackers. Sanding fixes the first, but Formlabs says it is very difficult to reach total optical transparency by hand alone. Micro-scratches show at shallow viewing angles, and the method suits simple shapes better than complex ones. A coating fills what the paper leaves behind.
| Method | Best for | Key details | Source |
|---|---|---|---|
| Wet sand and polish | Simple shapes, semi-clear results | 800 to 1,200 grit (Formlabs) or 800 to 3,000 (Phrozen), then acrylic polish | Formlabs, Phrozen |
| Spray clear coat | Most clear parts and details paper cannot reach | Sand first: more sanding means better clarity. Formlabs recommends a 2K clear coat, two to three coats, in a dust-free place | Formlabs |
| Resin dipping | Flat or near-flat surfaces such as lenses and windows | Keep the layer as thin as possible, remove bubbles with a syringe, post-cure, then repeat on the other side. It can soften fine detail and slightly changes the focal length of lenses | Formlabs |
| Mineral oil | Semi-transparent parts only | Evens out the finish and hides light spots | Formlabs |
| Acrylic floor polish dip | Small parts | A community method; no manufacturer data could be verified, so test on a scrap print | None |
Resin dipping is not universally recommended. MatterHackers advises against it for parts in daily use, because print resin is viscous and tacky and can blur fine details.
To post-cure before coating, or not
Sources disagree. Formlabs says not to post-cure a part before spray coating because it can cause yellowing, and to wash it in IPA and let it air dry fully. MatterHackers describes washing, drying and UV curing the part first, then optionally sanding and spraying. If you use Formlabs resin, follow Formlabs; for other resins follow the resin maker’s instructions and the clear coat’s data sheet, and test the sequence on a scrap print.
Cloudiness and yellowing in clear resin

Yellowing is mainly a UV and heat problem, and different resins vary a lot. Formlabs notes that a clear coat protects against UV-driven yellowing and unintended post-curing. Phrozen says overexposure to UV speeds yellowing and recommends resin labelled UV-stable or non-yellowing, a UV-blocking clear coat after polishing, and storing finished prints in a cool, dark place. MatterHackers recommends curing clear parts at room temperature, preferably in three steps of 5 minutes, because heat can create side products that add yellowing. That is one maker’s recommendation: your resin’s own cure settings come first. Phrozen also suggests curing clear parts underwater for a smoother finish, without giving a time.
Cloudiness has a separate cause. Dirty or reused IPA leaves a white residue, according to Phrozen, so do the final rinse in fresh IPA. If the surface is hazy after polishing, the scratches from the last grit were probably too deep for the compound.
Troubleshooting polished resin prints
| Symptom | Likely cause | Fix |
|---|---|---|
| Swirl marks after polishing | Scratches from a coarser grit were not fully removed | Go back one grit, sand until the scratch pattern is uniform, then polish again |
| Haze or cloudiness | Last grit too coarse for the compound, or residue | Sand one or two grits finer, wipe clean, re-polish |
| Print looks clear only while wet | Water fills the scratches; the surface is still rough | Sand finer, or fill the scratches with a clear coat |
| White film after washing | Dirty or reused IPA | Rinse in fresh IPA and dry fully (wash and cure guide) |
| Sticky surface under the polish | Under-washed or under-cured resin | Rewash and cure again before sanding |
| Smeared or softened spots | Heat from a rotary tool or dry sanding | Lower the speed, lighter pressure, or hand-polish |
| Orange peel or bubbles in the clear coat | Coat too thick, dust or humidity | Let it cure, wet sand lightly, recoat in thinner layers |
Common mistakes
- Skipping grits. A coating or gloss polish makes deeper scratches more visible, not less.
- Sanding before the print is cured and clean. Sticky residue loads the paper and smears.
- Using a rotary tool at speed. Cured resin softens and smears; Formlabs advises the minimum speed even for sanding with rotary tools.
- Expecting a coat to hide layer lines. Formlabs says clarity improves with more sanding before coating; a coat fills scratches, it does not level ridges.
- Polishing over a clear coat. Novus does not recommend its No. 2 and No. 3 on coated plastics.
If you plan to paint rather than polish, skip the compounds and go to painting 3D prints. Prints that will sit in sunlight need more than a gloss coat: see UV protection coatings.
Frequently asked questions
What grit should I start with to polish resin prints?
Formlabs’ range starts at 400 grit, and its clear-resin shortcut starts at 800. Start with the finest grit that removes the support marks in reasonable time, then step up without skipping: glossy at about 3,000, reflective at about 12,000 with micromesh pads.
Can I get a clear resin print fully transparent without a coating?
Rarely. Formlabs says total optical transparency is very difficult by hand sanding and polishing alone, and micro-scratches show at shallow angles. A spray clear coat or a thin resin dip fills the remaining scratches, with a spray coat suiting most shapes.
Why did my clear resin print turn yellow?
UV exposure and heat are the usual causes. Over-curing, long sun exposure and some resin formulations all speed it up. Use your resin’s recommended cure settings, store finished parts out of direct light, and consider a UV-blocking clear coat.
Should I post-cure clear resin before spraying a clear coat?
Sources disagree. Formlabs says not to post-cure before spray coating because it can cause yellowing, while MatterHackers cures first. Follow your resin maker’s instructions and the clear coat’s data sheet, and test the sequence on a scrap print.
Sources
- Formlabs: Guide to transparent 3D printing (sanding, spray coating, resin dipping)
- Formlabs Support: Polishing clear resin for a transparent finish
- Formlabs: Guide to post-processing and finishing SLA prints and How to prime and paint 3D printed parts
- Phrozen: Transparent resin troubleshooting
- MatterHackers: How to 3D print transparent parts and Novus: three-step plastic polish system