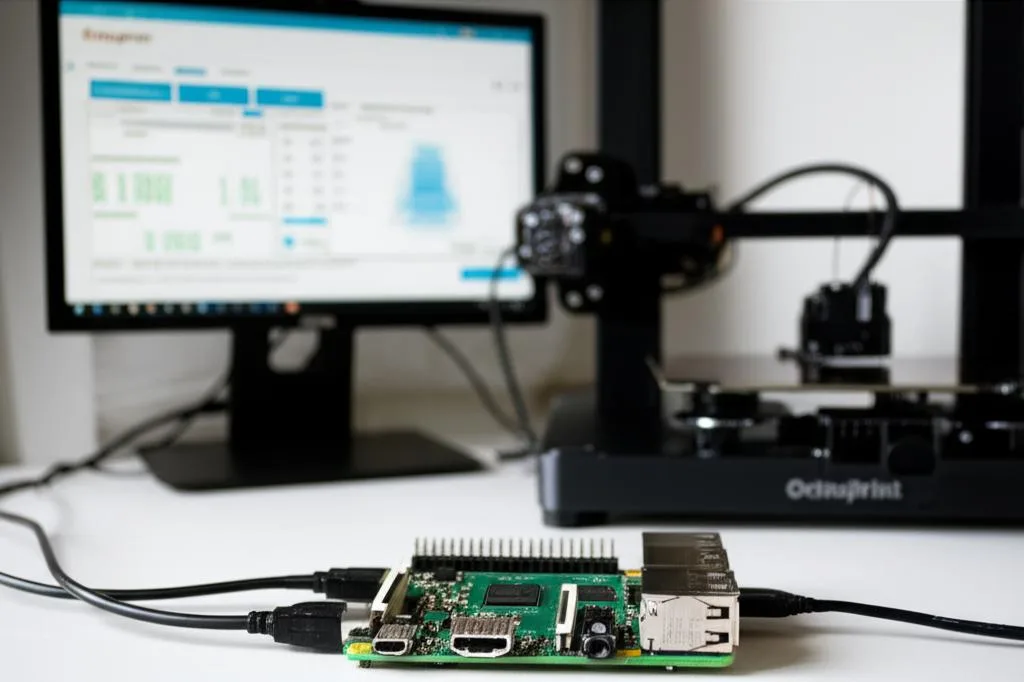
OctoPrint is a free, open-source web interface that runs on a small computer connected to your 3D printer over USB, so you can upload G-code, start and stop prints and watch a webcam from any browser on your network. The quickest way to install it is OctoPi: a ready-made Raspberry Pi image you write to a microSD card with Raspberry Pi Imager, then open at http://octopi.local and finish in the setup wizard. OctoPrint recommends a Raspberry Pi 3B, 3B+, 4B or Zero 2, and explicitly advises against the original Zero and Zero W.
The one rule that matters more than any setting: do not expose OctoPrint to the internet with port forwarding. It controls heaters and motors, and OctoPrint’s own documentation calls putting it on the public internet a terrible idea. This guide covers hardware, flashing, first boot, connecting the printer, the webcam and safe remote access, based on the OctoPrint and Raspberry Pi documentation linked at the end.
The consumer toolchanger 3D printer: the SnapSwap 4-toolhead system swaps heads in 5 seconds for true multi-color and multi-material printing, with smart calibration and auto filament loading.
- 4 toolheads · 5 s swap
- Up to 500 mm/s · 20,000 mm/s²
- 270 mm cube build volume
- Multi-color & multi-material

OctoPrint setup in eight steps
- Get a supported Raspberry Pi, its official power supply and a microSD card.
- In Raspberry Pi Imager choose Other specific-purpose OS → 3D printing → OctoPi → the stable build.
- Open the advanced options (Ctrl+Shift+X) and set Wi-Fi, country, a new password for the
piuser and, if you like, the hostname. - Write the card, and do not format it when your computer offers to.
- Boot the Pi, wait for the first start to finish, and open
http://octopi.localor the Pi’s IP address. - In the setup wizard create the administrator account and enter your printer profile.
- Plug the printer in by USB and click Connect.
- Add a webcam and choose a remote access method that does not open a port on your router.
Which Raspberry Pi and what else you need
OctoPi boots on many Pi models, but OctoPrint only recommends a few. The reason it gives for rejecting the Zero and Zero W is weak Wi-Fi performance, which can cause print artefacts and slow file loading when the Pi streams G-code to the printer.
| Board | OctoPrint’s view | Notes |
|---|---|---|
| Raspberry Pi 3B / 3B+ | Recommended | Enough for one printer and a USB webcam |
| Raspberry Pi 4B | Recommended | Official supply: 5 V, 3 A over USB-C |
| Raspberry Pi Zero 2 W | Recommended | Compact; fewer USB ports, so plan the webcam connection |
| Raspberry Pi 5 | Supported since OctoPi 1.1.0 | Official supply: 5 V, 5 A (a 3 A supply limits USB peripherals to 600 mA) |
| Raspberry Pi Zero / Zero W | Explicitly not recommended | Wi-Fi too weak for reliable printing |
- Power supply: use the official supply for your model or one with the same rating. Phone chargers are a common cause of undervoltage, which shows up as random disconnects and a sluggish interface.
- microSD card: any reasonably fast card from a known brand. Timelapses and uploaded files live on it, so a bigger card gives you more room.
- USB data cable that matches your printer’s port (USB-B, micro-USB or USB-C). Charge-only cables will not connect.
- Webcam (optional): a standard USB webcam is the simplest choice; see the webcam section below before buying a Pi camera module.
You can also run OctoPrint on an old PC or laptop with Linux, but you install it manually with Python instead of flashing an image, and the machine has to stay on for every print. Printers running Klipper do not use OctoPrint at all: they use Mainsail or Fluidd, covered in our Mainsail and Fluidd comparison.
Flash OctoPi with Raspberry Pi Imager
Older guides tell you to download a ZIP, flash it with Etcher and edit octopi-wpa-supplicant.txt for Wi-Fi. That file no longer applies to current images: OctoPi 1.1.0 is based on Debian Bookworm and uses NetworkManager, with a wifi.nmconnection file in /boot/firmware for manual headless setup. Raspberry Pi Imager handles all of it for you:
- Install Raspberry Pi Imager on your computer and insert the microSD card.
- Choose your Pi model, then the OS: Other specific-purpose OS → 3D printing → OctoPi. Pick the stable build unless you have a reason to test another one.
- Open the advanced options. Enter the Wi-Fi name, password and your Wi-Fi country (skip Wi-Fi if you use Ethernet).
- Set a new password for the
pisystem user. This is the Linux login used for SSH, not your OctoPrint login. The factory default ispi/raspberry, and OctoPrint tells you to change it. - Optionally set the timezone and a hostname. With several printers, give each Pi its own name, such as
octopi-mk3. - Write the image. When Windows or macOS says the card is unreadable and offers to format it, decline.
First boot and the setup wizard
Put the card in the Pi, connect the power supply and give it a few minutes; the first boot does extra setup work. Then open http://octopi.local (or your hostname plus .local). If that name does not resolve on your network, find the Pi’s IP address in your router’s device list and use it instead. OctoPrint also answers over HTTPS with a self-signed certificate, so a browser warning on https:// is expected.
The wizard walks you through:
- Access control. Since OctoPrint 1.5.0 it is mandatory and cannot be switched off. You create the first administrator account here. Use a unique, strong password.
- Online connectivity check and plugin blacklist. Leave both on so OctoPrint can find updates and block plugins with known problems.
- Anonymous usage tracking. Optional; your choice.
- Printer profile. Build volume, origin, heated bed, nozzle diameter and number of extruders. OctoPrint uses it for the visualiser and manual controls; your slicer settings still decide what the printer actually does.
OctoPrint ships with four user groups: Admins, Operator (the default for new users, allowed to run prints), Read-only Access and Guests. Give family members or colleagues their own Operator or Read-only accounts rather than sharing the admin login, and leave the Guests group without permissions. The documentation is blunt about it: unless you use a VPN, do not give guests any permissions.
Connect the printer over USB
Plug the printer into the Pi and switch it on. In the Connection panel, leave the serial port and baud rate on AUTO for the first try, select your printer profile and click Connect. The state should change to Operational, and the Terminal tab will show temperature reports. After that, upload G-code by dragging files onto the Files panel, or send them straight from your slicer: PrusaSlicer and OrcaSlicer can upload to OctoPrint as a physical printer, and Cura does it through a plugin. Each needs OctoPrint’s address and an API key.
Printers with their own touchscreen keep working as usual, but avoid driving the printer from its screen and from OctoPrint at the same time. If you flash new firmware later, disconnect OctoPrint first; the Marlin flashing guide covers the USB method.
Add a webcam: USB camera or Pi camera module
OctoPi 1.1.0 streams video with mjpg-streamer. A standard USB (UVC) webcam plugged into the Pi usually works without configuration and appears under Settings → Webcam & Timelapse. Two things to know before you buy:
- Raspberry Pi Camera Module 3 is not supported by the mjpg-streamer build in OctoPi 1.1.0, because it needs libcamera. OctoPrint’s newer camera-streamer stack supports it, but the 1.1.0 release notes say camera-streamer was not included in that image. If you want the Camera Module 3, check the current OctoPi release notes first.
- Resolution costs bandwidth. MJPEG streams are heavy. A modest resolution is enough to spot spaghetti or a detached part and keeps a Zero 2 W or Pi 3 responsive.
Mount the camera where it sees the nozzle and the whole bed, and add light if the printer sits in a dark corner. The built-in timelapse works out of the box; plugins such as Octolapse and AI failure detection build on the same camera feed, covered in our guide to OctoPrint failure-detection plugins.
Safe remote access: what to use instead of port forwarding
OctoPrint’s guidance on remote access starts with a warning: putting OctoPrint on the public internet is a terrible idea. Someone who gets in could do more than read your files. They could flash firmware with the safety checks removed over USB and tell the heaters to keep heating. So OctoPrint is designed to live on your home network, and remote access has to go through something that keeps it there.
| Method | How it works | Difficulty | Verdict |
|---|---|---|---|
| Local network only | Browser on the same Wi-Fi or LAN | None | Safest default |
| Cloud plugin (OctoEverywhere, Obico and similar) | Plugin opens an outgoing connection to the service; no router changes | Easy | The easiest option in OctoPrint’s remote access guide; read each service’s terms and limits |
| VPN into your home network | Your phone joins the home network through an encrypted tunnel | Moderate | OctoPrint stays invisible to the internet |
| Reverse proxy with extra login | Web server in front of OctoPrint with its own authentication and rate limiting | Advanced | Only if you know how to maintain it |
| Plain port forwarding | Router sends internet traffic straight to the Pi | Easy | Do not do this |
Whatever you choose, keep OctoPrint and OctoPi updated through the Software Update screen, and remember that remote monitoring does not make unattended printing safe on its own. Our 3D printer fire safety guide covers thermal runaway protection and smoke alarms.
Common OctoPrint problems and next steps
| Symptom | Likely cause | What to try |
|---|---|---|
octopi.local does not open | Name not resolved on your network, Pi not on Wi-Fi, or first boot still running | Use the IP from your router; re-check Wi-Fi country and password in Imager; try Ethernet |
| Undervoltage warning, random disconnects | Weak power supply or thin cable | Use the official supply for your Pi model |
| Printer will not connect | Charge-only USB cable, wrong port or the printer’s screen holding the connection | Swap the cable, leave port and baud on AUTO, power-cycle printer and Pi |
| Stuttering or blobs on curves while printing from OctoPrint | Weak Wi-Fi or a slow Pi struggling with many plugins or a heavy webcam stream | Use a recommended board, Ethernet if possible, lower the webcam resolution, disable unused plugins |
| Camera module not detected | Camera Module 3 needs libcamera, which the stock mjpg-streamer lacks | Use a USB webcam or an OctoPi build with the camera-streamer stack |
Once one printer runs smoothly, the usual next step is adding a second. OctoPrint controls one printer per instance, so a farm means one Pi per printer or several instances on one computer, plus a dashboard on top. Our overview of print farm software compares the options. If you are moving to Klipper instead, see the Marlin to Klipper migration guide.
Frequently asked questions
Can I run OctoPrint on a Raspberry Pi Zero W?
It will boot, but OctoPrint explicitly does not recommend the Zero or Zero W because their Wi-Fi performance can cause print artefacts and slow loading. The Zero 2 W is on the recommended list, alongside the Pi 3B, 3B+ and 4B.
What is the default OctoPrint login?
There is none. The setup wizard makes you create the first administrator account, and access control has been mandatory since OctoPrint 1.5.0. The only default credentials are for the Linux system user, pi / raspberry, which you should change in Raspberry Pi Imager before you write the card.
Is it safe to access OctoPrint from outside my home?
Yes, if you do it without exposing OctoPrint itself. Use a cloud plugin that connects outwards, a VPN into your home network, or a properly secured reverse proxy. OctoPrint warns against plain port forwarding because an attacker could take control of the printer’s heaters.
Does OctoPrint work with Bambu Lab or Klipper printers?
OctoPrint talks to printers that accept G-code over a USB serial connection, which covers most Marlin-based machines. Klipper printers normally use Mainsail or Fluidd through Moonraker instead. Bambu Lab printers have their own software ecosystem and are not a typical OctoPrint target.