A functional household print is a part that has to survive daily use (load, heat, water, repeated handling), so you design it around the way it will fail rather than the way it looks. The short answer: pick the material by the hottest and wettest place the part will live, put the strength into walls and orientation instead of infill, leave a tested clearance wherever two parts meet, and use metal inserts where a screw goes in and out.
This guide gives design rules with the numbers makers publish: heat figures from Prusa’s data for PLA, PETG and ASA, wall and orientation guidance from Prusa’s slicer help, and fit and overhang rules from design guides. Tolerances are printer-dependent, so every clearance below is a starting point to test, not a guarantee. Where a value is an example rather than a published figure, we say so.
The consumer toolchanger 3D printer: the SnapSwap 4-toolhead system swaps heads in 5 seconds for true multi-color and multi-material printing, with smart calibration and auto filament loading.
- 4 toolheads · 5 s swap
- Up to 500 mm/s · 20,000 mm/s²
- 270 mm cube build volume
- Multi-color & multi-material

Designing a household part in 60 seconds
- Write down what the part will face: weight, heat, water, sunlight, cleaning products, how often it is handled.
- Choose the material from that list (table below), not from what is already loaded in the printer.
- Orient the part so the main load does not pull the layers apart (see print orientation).
- Spend perimeters, not infill: more walls where the part bends or holds a screw.
- Round inside corners and add ribs or gussets instead of thickening everything.
- Leave clearance on mating parts, test it on a small piece, then print the real part.
- For screws that go in and out, use a heat-set insert or a metal fastener.
Pick the material by where the part lives
Prusa publishes heat figures for its own filaments. These are lab measurements, so leave a margin: the part’s real temperature, including sun on a dark surface or hot water, should stay well below them.
| Filament | Heat figure from Prusa | What else the maker says | Household fit (starting point) |
|---|---|---|---|
| Prusament PLA | Heat deflection temperature 55 °C (ISO 75, at 0.45 and 1.80 MPa) | The data sheet makes no outdoor or UV claim | Indoor organizers, brackets, holders away from heat |
| Prusament PETG | “Temperature resistance” 68 °C | Page calls it suitable for waterproof applications and for indoor and outdoor mechanical parts; low water absorption | Bathroom and kitchen-area holders, tougher clips |
| Prusament ASA | Shows no deformation up to about 93 °C | Described as UV stable and “will not turn yellow”; prints at 260 ± 5 °C and a 110 ± 5 °C bed, and large parts can still warp without an enclosure or tall skirt | Parts in sun or hotter spots, garden items |
The names differ in how Prusa quotes them (heat deflection versus temperature resistance), so compare the figures only loosely. For nylon, polycarbonate and carbon-fibre blends see choosing strong filaments. For parts that live outside, the sun matters as much as temperature: UV-resistant outdoor prints covers it.
Where the strength comes from
Walls beat infill. PrusaSlicer’s help says model strength depends mostly on perimeter count, not infill, and Prusa’s PETG page makes the same point: the majority of a print’s strength comes from its outer shell. Add perimeters where a part bends, holds a screw or takes a knock, and keep infill moderate. Design thickness and perimeter count need to agree, as explained in our wall thickness guide.
Fillets and ribs. Stratasys notes that fillets are not required in FDM but reduce stress concentrations and raise strength, and that ribs or gussets should support bosses and raised features. A hook, shelf bracket or handle breaks first at a sharp inside corner, so round it.
Orientation. FDM parts are usually weakest between layers, so print hooks and brackets with the load running along the layers rather than across them. The trade-offs are in the orientation guide linked above.
Plate-side details. Hubs (Protolabs Network) advises a 45° chamfer or radius on edges that touch the build plate to reduce elephant’s foot and warping, and a small fillet at the base of a vertical pin. It also notes that pins under 5 mm in diameter can print with perimeters only, making a weak joint.
Fit and clearance
Holes tend to print undersized. Hubs says the amount varies by printer, slicer, hole size and material, and for a critical diameter suggests printing it undersized and drilling it to size. For separate parts that have to slot together, the University of Florida library’s guide for the Prusa MK4 and XL says a clearance of 0.30–0.40 mm works consistently for parts designed to assemble. That is one lab’s figure on two printer models; treat it as the first value to test, and tighten it only after a test piece fits.
A practical method for any lid, hinge pin or sliding drawer:
- Print a short slice of the joint (a few millimetres of the lip, not the whole box).
- Try the fit with the mating piece.
- Change the clearance in small steps (0.05 mm is a sensible step) and reprint the slice.
- Record the final value for that printer and material.
Overhangs and bridges at home
Hubs says an overhang can usually be printed up to 45° without compromising quality, and that sagging or support marks are largely unavoidable on a bridge unless it is under 5 mm; beyond that it suggests splitting the design or post-processing. Design shelf supports as 45° chamfers instead of flat undersides, and split awkward parts into two pieces that join flat.
Screws and mounting
A printed thread is fine for a large, low-torque lid but wears quickly. For a bracket that gets screwed down and unscrewed, use a brass heat-set insert in a hole sized to the insert maker’s drawing; Stratasys suggests at least 0.080 in (about 2 mm) of wall around the insert’s outside diameter. Details, hole sizes and the printed-thread alternative are in the printed threads guide.
Examples: what fails and how to design for it
These are starting points drawn from the rules above, not tested designs.
| Item | What usually fails | Design response | Material starting point |
|---|---|---|---|
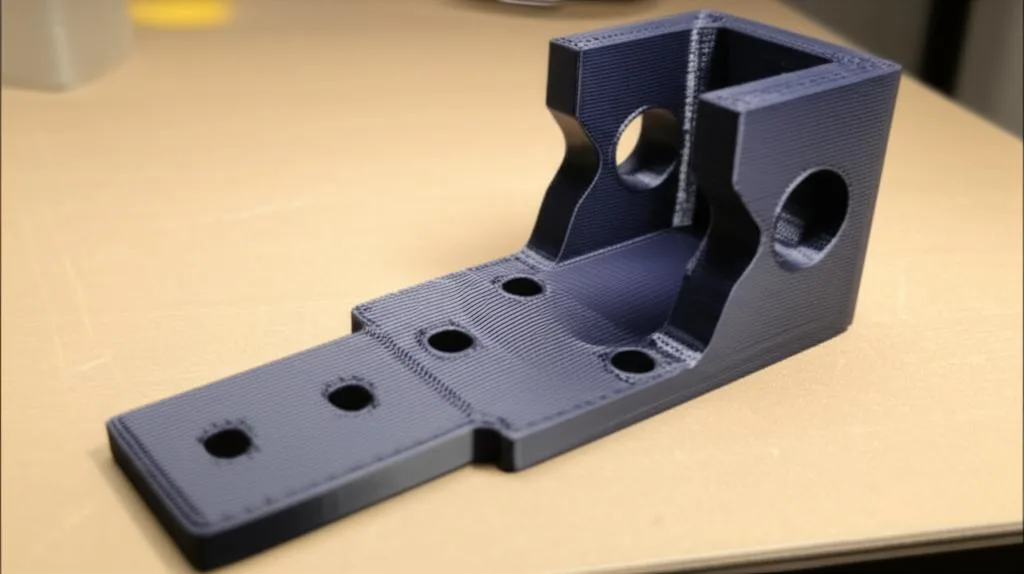
| Wall or coat hook | Snaps at the base where the layers run across the load | Orient so layers run along the load, fillet the base, add perimeters | PETG; ASA outdoors |
| Bathroom shelf bracket or soap dish | Softening where it is warm; water pooling | Thicker walls, chamfered plate edges, drainage slots | PETG (Prusa lists low water absorption) |
| Drawer organizer | Rarely fails; fit is the issue | Measure the drawer, leave clearance, minimal supports | PLA is usually enough; see drawer organizers |
| Replacement knob or clip for an appliance | Heat, torque on a screw | Heat-set insert, thick boss with ribs, heat margin | PETG or ASA, depending on the heat source |
| Garden or balcony holder | Sun, frost, wind loads | UV-stable material, round corners, thicker walls | ASA |
Food contact, chemicals and safety
We make no food-safety claims for printed parts. Prusa’s PETG page does not claim food contact, and layered surfaces are hard to clean. If a part will touch food, read the food safety rules for printed items before you decide. Cleaning sprays, solvents and oils can also attack some plastics, so check the filament maker’s data sheet for the specific chemical and test a scrap piece first.
Common household print mistakes
- Printing a hook, bracket or hinge flat on its side so the layers split under load.
- Using PLA near a stove, a car dashboard or a kettle, where it can soften.
- Using infill to “fix” a weak part that needs more walls.
- Modeling mating parts to the same nominal size with no clearance.
- Printing a long unsupported shelf underside instead of a chamfer.
- Skipping the small test slice and printing the whole part to find out the fit is off.
Frequently asked questions
Which filament is best for functional household items?
It depends on where the part lives. By Prusa’s figures PLA has a heat deflection temperature of 55 °C, PETG a temperature resistance of 68 °C and ASA about 93 °C, so PLA suits indoor low-heat parts, PETG damp or tougher parts, and ASA sun or hotter spots.
Can I use 3D printed parts for food?
We make no food-safety claims. The layered surface of FDM parts is hard to clean, and Prusa’s PETG page makes no food-contact claim, so read the food safety guide and the maker’s data sheet before using a printed part with food.
How much clearance should I leave between mating parts?
A University of Florida library guide for the Prusa MK4 and XL reports that 0.30–0.40 mm works consistently for separate parts designed to assemble. Your printer may differ, so print a small slice of the joint and adjust in 0.05 mm steps.
Is more infill the way to make a printed part stronger?
Not usually. Prusa’s slicer help says strength depends mostly on the number of perimeters, so add walls first and use moderate infill.