The burgeoning world of 3D printing has opened up a universe of possibilities, from intricate prototypes to functional parts. As creators push the boundaries, an increasing number of 3D-printed objects are finding their way into outdoor environments. However, the very elements that make the outdoors so appealing – sunshine, rain, and fluctuating temperatures – pose a significant threat to the longevity and aesthetic integrity of these prints. Ultraviolet (UV) radiation, in particular, is a silent adversary, capable of turning a vibrant, strong print into a brittle, discolored relic.
This guide delves into the crucial role of UV resistant coatings in safeguarding your outdoor 3D prints. We’ll explore the science behind UV degradation, objectively compare various types of protective clear coats and their features, dissect their cost structures, and outline best practices for application. Our aim is to equip you with the knowledge to make an informed decision, ensuring your creations withstand the test of time and the rigors of the elements, achieving optimal print degradation prevention through durable finishes.
Understanding the threat: UV degradation and its impact on 3D prints
The consumer toolchanger 3D printer: the SnapSwap 4-toolhead system swaps heads in 5 seconds for true multi-color and multi-material printing, with smart calibration and auto filament loading.
- 4 toolheads · 5 s swap
- Up to 500 mm/s · 20,000 mm/s²
- 270 mm cube build volume
- Multi-color & multi-material

At its core, UV degradation is a process of photodegradation, where the high-energy photons in UV light break down the chemical bonds within the polymer chains that constitute your 3D print. This isn’t a sudden event but a gradual, insidious assault that manifests in several ways:
- Discoloration: Many plastics, especially lighter colors, will yellow or fade over time. This is often one of the first visible signs of UV exposure.
- Brittleness: As polymer chains break down, the material loses its elasticity and becomes increasingly brittle. What was once a robust part can easily crack or shatter under minimal stress.
- Surface chalking or flaking: The surface of the print can become powdery or develop a rough texture as the outer layers degrade and break away.
- Loss of mechanical properties: Beyond surface changes, the internal structure weakens, leading to a significant reduction in tensile strength, impact resistance, and overall structural integrity.
Different 3D printing materials exhibit varying degrees of inherent UV resistance. For instance, PLA (Polylactic Acid) is notoriously poor in UV stability, quickly becoming brittle and discolored. ABS (Acrylonitrile Butadiene Styrene) offers slightly better resistance but still succumbs to degradation over time. PETG (Polyethylene Terephthalate Glycol) provides a modest improvement. ASA (Acrylonitrile Styrene Acrylate) is often marketed as UV-resistant, and while it performs significantly better than PLA or ABS, even ASA benefits from an additional protective clear coat for prolonged outdoor exposure. Resins, particularly those used in SLA or DLP printing, also vary widely in their UV stability, with many standard resins being highly susceptible to degradation without a protective clear coat.
Therefore, regardless of the base material, applying a UV resistant coating is often a non-negotiable step for any 3D print destined for the great outdoors, ensuring print degradation prevention and the longevity of your project.
Exploring UV resistant coating types for durable finishes
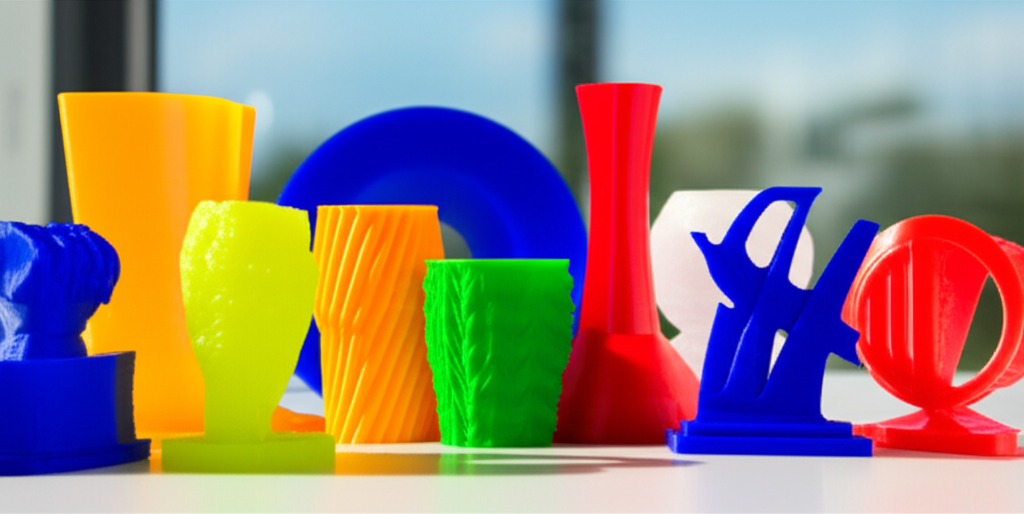
When it comes to protecting your outdoor 3D prints, a variety of UV resistant coating options are available, each with its own set of characteristics, advantages, and considerations. Understanding these differences is key to selecting the right protective clear coat for your specific application.
Acrylic-based clear coats
Acrylic clear coats are a popular choice due to their ease of use and affordability. They are typically solvent-based or water-based and form a hard, clear layer upon drying. Many formulations include UV inhibitors to block harmful radiation.
- Composition and Properties: Made from acrylic polymers, they offer good optical clarity and can be quite flexible, resisting minor impacts without cracking. They dry relatively quickly, making them convenient for multi-coat applications.
- UV Resistance: Generally provide good UV protection, especially formulations specifically designed for outdoor use with added UV blockers. However, some can yellow slightly over very long periods of intense sun exposure.
- Adhesion: Adhere well to most common 3D printing plastics after proper surface preparation.
- Durability: Offer decent abrasion resistance but are typically less durable than polyurethane coatings, making them suitable for objects that won’t experience heavy wear or impact.
- Cost Structure: Often the most budget-friendly option, available in aerosol cans or brush-on liquid forms.
Polyurethane-based clear coats
Polyurethane coatings are renowned for their exceptional durability and long-lasting protection, making them a premium choice for demanding outdoor applications. They come in one-part (1K) and two-part (2K) formulations.
- Composition and Properties: Polyurethanes are synthetic polymers known for their toughness, flexibility, and resistance to chemicals and abrasion. 2K polyurethanes, which involve mixing a base resin with a hardener, create a much stronger, more cross-linked film.
- UV Resistance: Offer superior long-term UV protection, with many formulations being non-yellowing and highly stable under prolonged sun exposure.
- Adhesion: Excellent adhesion to a wide range of substrates, often forming a stronger bond than acrylics.
- Durability: Provide outstanding abrasion, impact, and chemical resistance, making them ideal for functional prints or items subject to harsh conditions.
- Cost Structure: Generally more expensive than acrylics, particularly 2K systems. The added cost often translates to significantly extended longevity and performance, potentially reducing long-term maintenance costs.
- Application Complexity: 1K polyurethanes are relatively straightforward to apply, similar to acrylics. 2K systems require precise mixing and have a limited pot life, demanding more careful application and clean-up.
Epoxy-based clear coats (UV-stable formulations)
While traditional epoxy resins are known for their high gloss and hardness, they are often susceptible to yellowing from UV exposure. However, specialized UV-stable epoxy formulations are available that incorporate advanced UV inhibitors.
- Composition and Properties: Two-part systems that cure into a very hard, rigid, and often high-gloss finish. They offer excellent chemical resistance and can create a thick, protective layer.
- UV Resistance: Standard epoxies have poor UV stability. Only specifically formulated UV-resistant epoxies should be considered for outdoor use, and even then, their long-term non-yellowing performance might not match that of high-quality polyurethanes.
- Adhesion: Excellent adhesion to many surfaces, forming a strong, permanent bond.
- Durability: Extremely hard and resistant to abrasion and chemicals. However, their rigidity can make them prone to cracking or chipping under impact, especially on flexible 3D prints.
- Cost Structure: Can be quite expensive, especially specialty UV-stable formulations.
- Application Complexity: Requires precise mixing of two parts and careful application to avoid bubbles and ensure an even, self-leveling finish.
Specialized UV-resistant paints and primers
For applications where a colored finish is desired, or where the print material requires a specific adhesion promoter, specialized UV-resistant paints and primers can be integrated into the protection strategy. These are often automotive-grade or marine-grade products designed for harsh outdoor conditions.
- Layering Approach: Typically involves a primer for adhesion, a colored base coat, and then a clear UV resistant coating on top for ultimate protection and gloss retention.
- Advantages: Allows for custom colors and can provide an additional layer of UV protection and durability beneath the clear coat.
- Considerations: Adds complexity and cost due to multiple layers and potentially different product lines.
Choosing among these options involves balancing desired longevity, the specific environmental challenges, aesthetic preferences, and the practicalities of application and budget. Each UV resistant coating offers a unique profile of features and cost implications for ensuring durable finishes on your outdoor 3D prints.
Key features and considerations for selection

When selecting a UV resistant coating for your outdoor 3D prints, a thorough understanding of various product features is paramount. The right choice hinges on a careful assessment of your print’s material, its intended use, and the environmental conditions it will face. Here’s a breakdown of critical factors:
UV resistance spectrum and efficacy
Not all UV protection is created equal. UV radiation is categorized into UVA, UVB, and UVC. While UVC is mostly absorbed by the Earth’s atmosphere, UVA and UVB rays are the primary culprits behind material degradation. A high-quality UV resistant coating should explicitly state its ability to block or absorb both UVA and UVB radiation. Look for products that feature advanced UV inhibitors and absorbers, as these are designed to neutralize UV energy before it can damage the underlying material. The effectiveness can vary significantly between brands and types of coatings, directly influencing the print’s long-term degradation prevention.
Adhesion to common 3D print materials
A coating is only as good as its bond to the substrate. Different 3D printing materials (PLA, ABS, PETG, ASA, various resins) have distinct surface chemistries that can affect adhesion. Some coatings are more universally adhesive, while others might require specific primers or extensive surface preparation to form a strong, lasting bond. Poor adhesion can lead to delamination, peeling, and ultimately, compromised protection. Always check product specifications for compatibility with your specific 3D print material. Adequate surface preparation, such as cleaning with isopropyl alcohol (IPA) and light sanding, is almost always crucial for optimal adhesion.
Durability: abrasion and impact resistance
Outdoor 3D prints are often exposed to more than just sunlight. They can face wind-blown debris, accidental bumps, or even intentional handling. The coating’s ability to resist scratches, scuffs, and impacts is a key indicator of its overall durability. Polyurethane coatings typically excel in this area due to their inherent toughness and flexibility. Acrylics offer moderate resistance, while some epoxies, despite their hardness, can be brittle and prone to chipping upon impact. Consider the functional requirements of your print: a decorative garden gnome might tolerate less abrasion than a functional outdoor sensor housing.
Chemical resistance
Outdoor environments can expose prints to various chemicals, from acid rain and pollutants to cleaning agents and accidental spills. A coating with good chemical resistance will maintain its integrity and protective properties when exposed to these substances. This is particularly important for prints that might require regular cleaning or are situated in industrial or urban areas with higher levels of atmospheric pollutants. Polyurethanes and specialized epoxies often provide superior chemical resistance compared to standard acrylics.
Temperature resistance
Outdoor temperatures can fluctuate wildly, from freezing winters to scorching summers. The chosen UV resistant coating must be able to withstand these extremes without cracking, delaminating, or losing its protective qualities. Rapid temperature changes can also induce stress on the coating, especially if it has a significantly different coefficient of thermal expansion than the underlying print material. Look for coatings that are formulated for a broad temperature range, ensuring they remain flexible enough in the cold and stable enough in the heat.
Finish: gloss, matte, or satin
While primarily an aesthetic choice, the finish of the protective clear coat can also have subtle implications for durability and maintenance. High-gloss finishes tend to reflect more light, potentially offering a marginal benefit in UV reflection, but they also show scratches and dust more readily. Matte or satin finishes can hide minor imperfections and diffuse light, which some prefer aesthetically. This choice is largely personal but contributes to the overall perceived quality and durable finish of your outdoor 3D prints.
Curing time and method
The time it takes for a coating to fully cure can impact project timelines and the complexity of your workflow. Some coatings air-dry quickly, allowing for multiple coats in a single day, while others require extended periods (24-72 hours or more) to reach full hardness. Two-part systems often have specific pot lives once mixed, demanding efficient application. Some specialized coatings may even require UV light curing. Consider your workshop setup, environmental conditions (temperature, humidity), and the urgency of your project when evaluating curing times.
Environmental factors and safety
Many high-performance coatings are solvent-based and emit Volatile Organic Compounds (VOCs), which can be harmful if inhaled. Water-based alternatives are available and generally safer, though they may not always offer the same level of durability as their solvent-based counterparts. Always prioritize proper ventilation and personal protective equipment (PPE) such as respirators, gloves, and eye protection, regardless of the coating type. Understanding the environmental impact and safety requirements is crucial for responsible application.
By carefully weighing these features against your project’s specific needs, you can confidently select a UV resistant coating that provides optimal print degradation prevention and a lasting, durable finish for your outdoor 3D prints.
Application techniques for optimal results
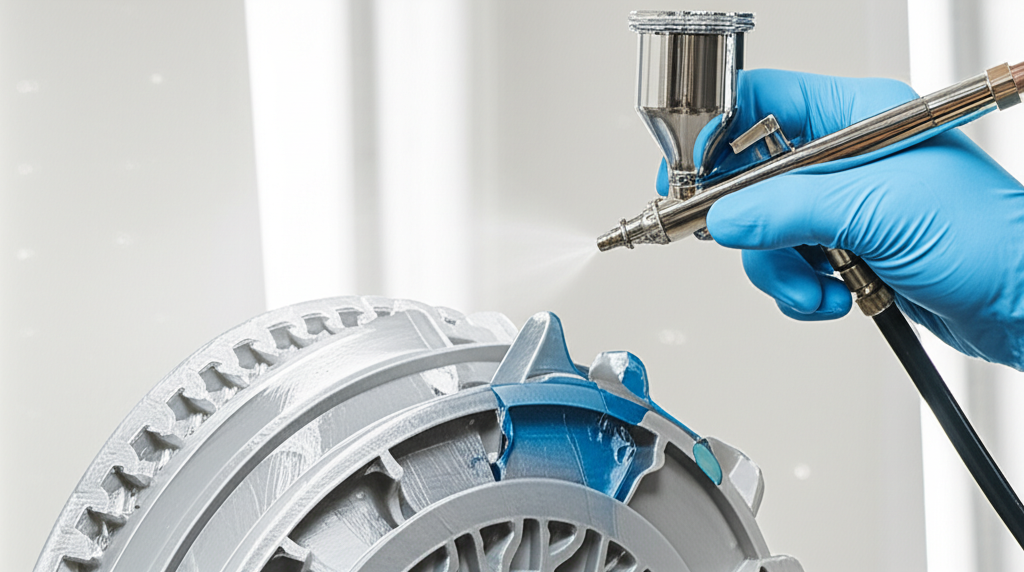
The effectiveness of any UV resistant coating is significantly influenced by its application. Even the highest-quality protective clear coat will underperform if not applied correctly. Adhering to proper techniques ensures maximum adhesion, durability, and a professional-looking finish for your outdoor 3D prints.
Surface preparation: the foundation of success
This is arguably the most critical step. A clean, properly prepared surface ensures the coating adheres strongly and evenly.
- Cleaning: Begin by thoroughly cleaning your 3D print. Use isopropyl alcohol (IPA) for most plastics to remove oils, fingerprints, and residual uncured resin. For FDM prints, ensure no support material residue remains. For SLA/DLP prints, ensure all resin is fully cured and washed.
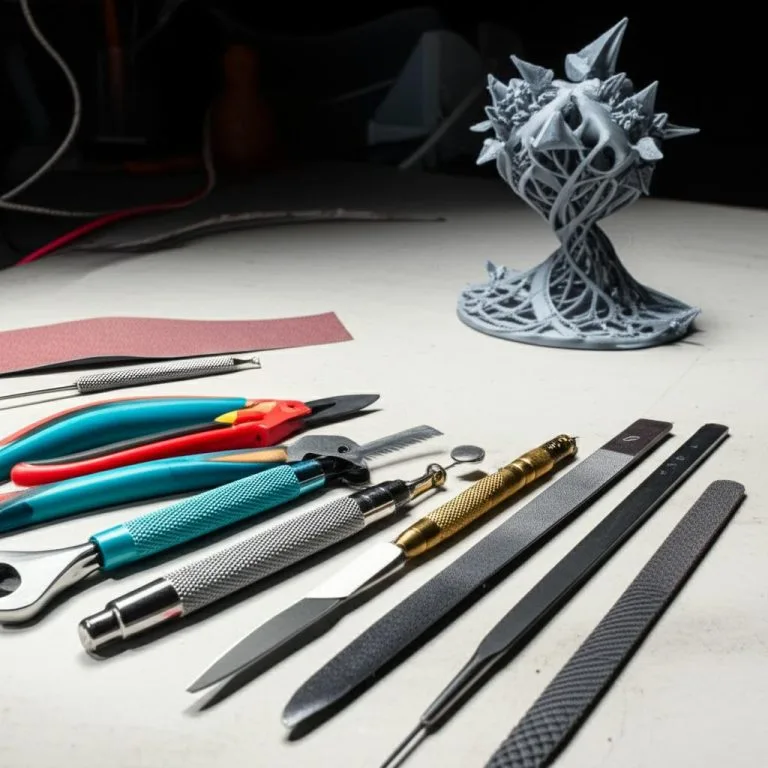
- Sanding: For optimal adhesion and a smoother finish, light sanding is often recommended. Start with a medium grit (e.g., 220-400) to remove layer lines or surface imperfections, then progress to finer grits (e.g., 600-800) for a smoother base. For very smooth prints, a light scuff with a fine grit sandpaper or Scotch-Brite pad can create mechanical tooth for the coating to grip. Always clean off sanding dust thoroughly before proceeding.
- Filling (Optional): If your print has significant gaps, layer lines, or imperfections you wish to hide, apply a suitable filler (e.g., Bondo, 3D printing specific putties) and sand smooth before coating.
- Priming (Optional but Recommended): For some materials or for enhanced adhesion, a dedicated primer formulated for plastics can be beneficial. This creates a uniform surface for the topcoat and can sometimes offer additional UV protection.
Application methods: choosing your approach
The method you choose depends on the size and complexity of your print, the type of coating, and your personal preference and equipment.
- Aerosol Sprays:
- Pros: Convenient, relatively easy to achieve thin, even coats, good for complex geometries.
- Cons: Can be less precise for small details, prone to overspray, can be more expensive per volume, and environmental factors (humidity, temperature) can significantly impact results.
- Technique: Hold the can 6-12 inches (15-30 cm) from the surface. Use steady, overlapping passes. Avoid holding in one spot to prevent drips.
- Brush-on Coatings:
- Pros: Excellent control for small details, allows for thicker coats in a single pass, minimal equipment needed.
- Cons: Can leave brush marks, may not be ideal for very large or intricate surfaces, requires good brush technique for an even finish.
- Technique: Use a high-quality brush appropriate for the coating type. Apply in smooth, even strokes, working in one direction. Avoid overworking the coating once it starts to set.
- Spray Gun Application:
- Pros: Achieves the most professional, factory-like finish, highly efficient for large prints, excellent control over material flow and fan pattern.
- Cons: Significant initial investment in equipment (gun, compressor, filters), requires practice and skill, more complex cleanup.
- Technique: Follow manufacturer’s recommendations for thinning (if applicable), air pressure, and nozzle settings. Maintain consistent distance and speed for even coverage.
Layering and curing: building protection
- Thin, Even Coats: Regardless of the method, apply multiple thin coats rather than one thick coat. Thin coats dry and cure more evenly, reduce the risk of drips, and build a stronger, more flexible film.
- Drying Times: Always adhere to the manufacturer’s recommended drying times between coats. Applying a new coat too soon can lead to solvent entrapment, blushing, or adhesion issues.
- Full Cure: Understand the difference between ‘tack-free,’ ‘dry to handle,’ and ‘full cure.’ A coating may feel dry to the touch but still be curing internally. Full cure, which can take days or even weeks for some polyurethanes, is when the coating reaches its maximum hardness and protective properties.
- Curing Environment: Ensure proper ventilation, consistent temperature, and controlled humidity during curing. Extremes can negatively impact the coating’s performance and appearance.
Safety precautions: protecting yourself
Always work in a well-ventilated area, preferably outdoors or in a spray booth with exhaust. Wear appropriate personal protective equipment (PPE), including a respirator (organic vapor cartridges are often necessary), chemical-resistant gloves, and eye protection. Read and understand the Material Safety Data Sheet (MSDS) for your chosen coating before use.
By meticulously following these application guidelines, you can ensure that your chosen UV resistant coating provides the maximum possible print degradation prevention and a truly durable finish for your outdoor 3D prints.
Cost structures and comparative analysis of UV resistant coatings
The consumer toolchanger 3D printer: the SnapSwap 4-toolhead system swaps heads in 5 seconds for true multi-color and multi-material printing, with smart calibration and auto filament loading.
Evaluating the cost of UV resistant coatings for outdoor 3D prints goes beyond the initial purchase price. A comprehensive analysis considers factors like coverage, longevity, reapplication frequency, and necessary equipment, allowing for an objective comparison of different solutions.
Initial product cost per volume
- Acrylic-based clear coats: Generally represent the lowest initial investment. Available in aerosol cans (convenient but often higher per-ounce cost) or larger liquid containers for brush or spray gun application. A typical aerosol can might cost $10-$20, while a quart of liquid acrylic might range from $20-$40.
- Polyurethane-based clear coats (1K): These are usually a step up in price from acrylics. A 1K polyurethane aerosol can might be $15-$30, and a quart of liquid could range from $30-$60.
- Polyurethane-based clear coats (2K): As two-part systems, these often command a higher price point due to their superior performance. A kit (base + hardener) might cost $40-$80 or more for a smaller volume, increasing for larger quantities.
- Epoxy-based clear coats (UV-stable): Specialty UV-stable epoxies can be among the most expensive options, with smaller kits potentially starting at $30-$60 and larger volumes significantly higher.
- Specialized UV-resistant paints/primers: These vary widely, often aligning with automotive or marine paint pricing, which can be premium. A can of specialty primer might be $15-$25, with colored paints and clear coats in similar or higher ranges.
Coverage rate and efficiency
The ‘cost per square foot’ is a more accurate metric than just the cost per can or bottle. A more expensive product might offer better coverage, meaning less product is needed for the same surface area, potentially leveling the playing field on a per-project basis. For example, a thinner acrylic might require more coats to build sufficient protection compared to a thicker, more robust polyurethane. Always check the manufacturer’s stated coverage rates.
Longevity and reapplication frequency (long-term cost)
This is where the true cost-effectiveness of a UV resistant coating often becomes apparent. A cheaper coating that needs reapplication every 1-3 years can become more expensive over a decade than a more costly, higher-performance coating that lasts 5-10 years or more.
- Acrylics: May require reapplication every 1-3 years, depending on environmental exposure. The cumulative cost of product and labor for reapplication can add up.
- Polyurethanes (1K): Often provide 3-5 years of protection before reapplication might be considered.
- Polyurethanes (2K): Frequently offer 5-10+ years of protection due to their superior durability and UV stability, making them a strong contender for lowest long-term cost despite a higher initial outlay.
- Epoxies (UV-stable): Longevity can vary; while hard, their UV stability needs careful monitoring, and yellowing might necessitate earlier reapplication for aesthetic reasons.
When considering print degradation prevention, the extended lifespan offered by premium coatings translates directly into reduced labor and material costs over the object’s lifetime, providing a more durable finish.
Equipment costs
The chosen application method significantly impacts additional equipment costs.
- Aerosols: Minimal additional cost, perhaps just masking tape and drop cloths.
- Brush-on: Requires brushes (disposable or reusable, with cleaning supplies), potentially a mixing cup.
- Spray gun: This is the most significant investment. A basic HVLP (High Volume Low Pressure) spray gun kit can range from $100-$300, plus the cost of an air compressor (if you don’t already own one, potentially $200-$500+), air filters, hoses, and cleaning kits. This upfront investment is substantial but can be amortized over many projects if you frequently coat larger or multiple prints.
- Safety Gear: Respirators, gloves, and eye protection are essential for all methods, with costs ranging from $20 for basic gear to $100+ for professional respirators and filters.
Labor and time investment
Time is money, even for DIY projects. Coatings that require extensive surface preparation, multiple thin coats with long drying times in between, or complex mixing (like 2K systems) demand a greater time investment. While an aerosol can be quicker to apply, a 2K polyurethane might take longer to apply and cure, but the extended protection it offers could save time on future reapplications.
Cost vs. performance trade-offs
There is no universally “cheaper” or “better” option; the optimal choice depends on your specific priorities and constraints. An acrylic might be perfectly adequate and cost-effective for a temporary outdoor display or a decorative piece that can be easily recoated. For a critical functional part that must endure harsh conditions for many years, the higher upfront cost of a 2K polyurethane, factoring in its exceptional durability and longevity, often represents a more economical choice in the long run. The decision involves balancing your budget against the desired level of print degradation prevention, the required durability, and the complexity of application you are willing to undertake.
Maintaining your coated 3D prints for lasting durability
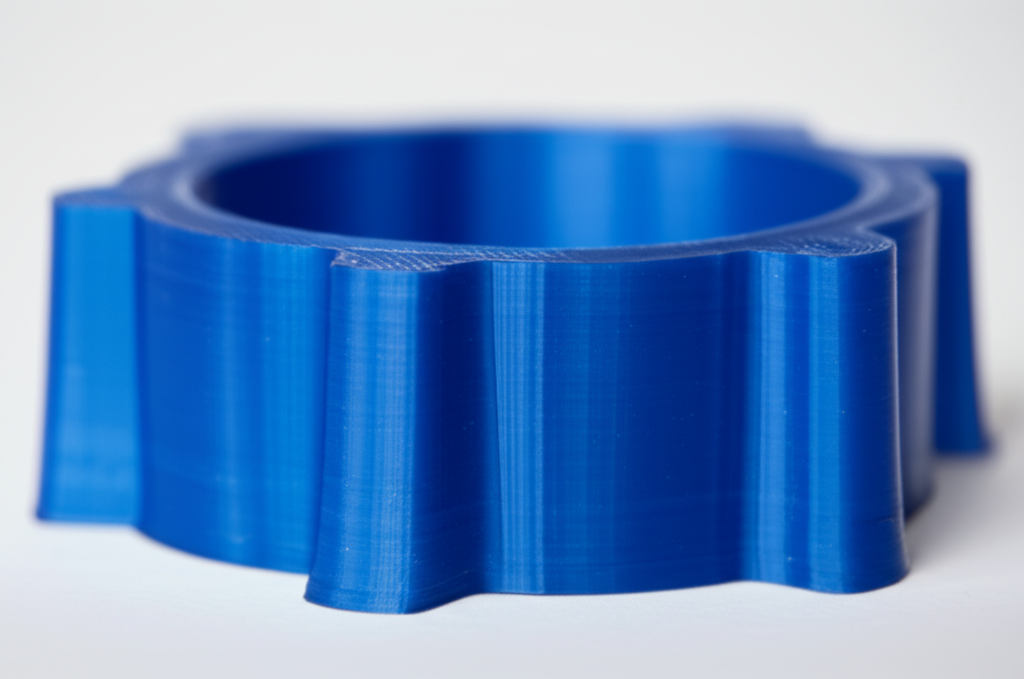
Even with the best UV resistant coating, proper maintenance plays a vital role in extending the life and preserving the aesthetic appeal of your outdoor 3D prints. A little ongoing care can significantly enhance print degradation prevention and keep your durable finishes looking their best.
Regular cleaning
Outdoor items accumulate dirt, dust, pollen, and environmental pollutants. Regular, gentle cleaning helps prevent these substances from adhering to the coating and potentially degrading its surface over time. Use a soft cloth or sponge with mild soap and water. Avoid abrasive cleaners or harsh chemicals, as these can scratch or damage the protective clear coat, compromising its UV resistance and overall integrity.
Inspecting for wear and tear
Periodically inspect your outdoor 3D prints for any signs of wear on the coating. Look for:
- Fading or yellowing: While UV resistant coatings are designed to prevent this, prolonged extreme exposure might still cause subtle changes over many years.
- Cracking or chipping: These can indicate physical damage or, in rare cases, a failure in the coating’s flexibility or adhesion.
- Peeling or blistering: A sign of adhesion failure, often due to improper surface preparation or environmental stress.
- Loss of gloss or chalking: Can indicate the top layer of the coating is beginning to degrade.
Early detection of these issues allows for timely intervention, preventing more extensive damage to the underlying 3D print.
When to reapply
The need for reapplication depends heavily on the type of UV resistant coating used, the intensity of UV exposure, and environmental conditions. As discussed, acrylics might need recoating every 1-3 years, while high-quality polyurethanes can last 5-10 years or more. If you notice significant signs of degradation in the coating itself – such as widespread dullness, cracking, or the beginnings of discoloration on the print beneath – it’s time to consider reapplication. For optimal print degradation prevention, it’s generally better to reapply a fresh protective clear coat before the old one completely fails and exposes the 3D print material.
The reapplication process typically involves cleaning the existing coated surface, lightly sanding to create mechanical adhesion for the new coat, and then applying fresh layers of the UV resistant coating, following the original application guidelines. This proactive approach ensures continuous protection and preserves the durable finish of your outdoor 3D prints for years to come.
Conclusion: empowering your choice for lasting outdoor 3D prints
Navigating the world of UV resistant coatings for outdoor 3D prints can seem daunting, but armed with the right knowledge, you are well-equipped to make an informed decision. The core principle remains clear: protecting your creations from the relentless assault of UV radiation is paramount for achieving print degradation prevention and ensuring their long-term viability and aesthetic appeal.
We’ve explored the critical differences between various types of UV resistant coatings – from the accessible acrylics to the robust polyurethanes and specialized epoxies. Each offers a distinct balance of features, including UV resistance spectrum, adhesion properties, durability, and chemical resistance, all of which contribute to a durable finish. Crucially, we’ve dissected the cost structures, emphasizing that the initial price tag is just one piece of the puzzle. Factors like coverage, longevity, and equipment needs significantly influence the true cost of ownership over time. An investment in a higher-performance protective clear coat might yield substantial savings in reapplication frequency and labor, making it a more economical choice in the long run.
Ultimately, there is no single “best” UV resistant coating for every scenario. Your choice should be a thoughtful balance between your budget, the specific demands of your outdoor environment, the type of 3D printing material used, and your desired level of longevity and finish. By objectively comparing the features and cost implications presented in this guide, you can confidently select the ideal UV resistant coating to ensure your outdoor 3D prints not only survive but thrive in the elements, maintaining their integrity and beauty for years to come.
Frequently asked questions
Can I just use any spray paint as a UV coating for my 3D prints?
No. Standard spray paints are not formulated for UV resistance and will quickly fade, chalk, or crack outdoors. You need a product specifically labeled as UV-resistant—ideally an acrylic or polyurethane clear coat with added UV inhibitors—to protect the print material beneath. Even colored paints should be topped with a dedicated UV-resistant clear coat for long-term protection.
Do I need to sand my print before applying the coating?
Light sanding is strongly recommended for optimal adhesion. A clean, slightly roughened surface gives the coating something mechanical to grip, reducing the risk of peeling or delamination later. Start with a medium grit (220–400) to remove layer lines, then progress to finer grits (600–800), and always remove all sanding dust with isopropyl alcohol before coating.
How often will I need to reapply the coating?
It depends on the coating type. Acrylic-based clear coats typically need reapplication every 1–3 years under outdoor conditions, while 1K polyurethanes last around 3–5 years, and high-quality 2K polyurethanes can provide 5–10+ years of protection. Reapply as soon as you notice fading, cracking, or loss of gloss to prevent damage to the underlying print.