Many 3D prints, while impressive in their detail, often suffer from visible layer lines or imperfections. Achieving a truly professional look requires meticulous post-processing. One of the most effective methods for transforming a rough print into a showroom-ready piece is a combination of 3D printing grinding filling techniques. This guide will walk you through the steps to get that flawlessly smooth finish.
A smooth surface isn’t just about aesthetics; it can also improve a print’s durability, make it easier to paint, and even enhance its functional properties. Before you begin, ensure your print is clean and free of support structures. Gather your tools: various grits of sandpaper (from coarse like 100-grit to fine like 1000-grit or higher), files, a rotary tool (optional), protective gear (mask, gloves, safety glasses), and your chosen filling material.
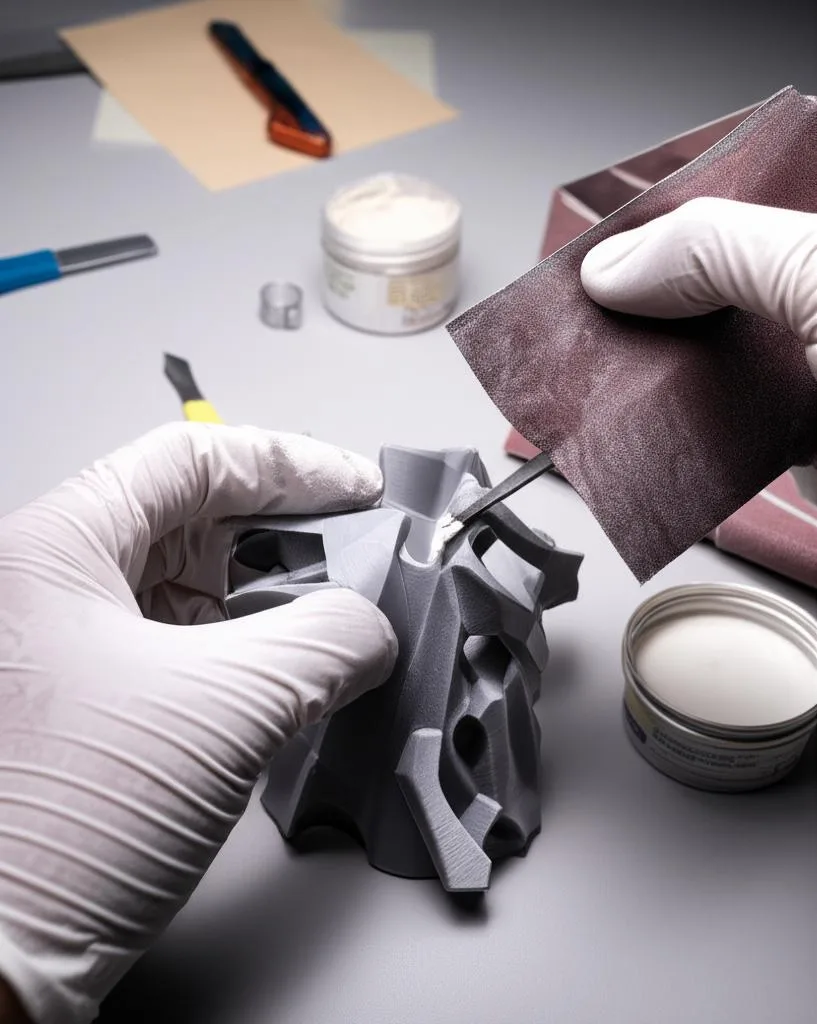
The grinding (or sanding) process is crucial for removing major imperfections and preparing the surface. Start with a coarser grit sandpaper to tackle prominent layer lines and bumps. Work in small sections, applying even pressure. For larger areas or stubborn flaws, a rotary tool with a sanding attachment can save time. Gradually move to finer grits, ensuring you remove marks from the previous grit. For a truly smooth finish, consider wet-sanding with higher grits (e.g., 400-grit and up), as it reduces dust and prevents clogging. Always clean the print thoroughly between grit changes.
Once the initial grinding has smoothed out major imperfections, you’ll likely notice tiny pinholes or residual layer lines. This is where filling comes in. Common filling materials include automotive body filler, specialized 3D print fillers, epoxy resin, or high-build primers. Apply a thin, even layer of your chosen filler. For small areas, a putty knife or a gloved finger works well. Allow the filler to dry completely as per the product’s instructions.
After the filler dries, sand it down again. Start with a medium grit (e.g., 220-grit) to smooth the filled areas, then progress to finer grits. You may need to repeat the 3D printing grinding filling cycle multiple times – fill, sand, fill, sand – until the surface is completely uniform. This iterative approach is key in professional post-processing. Once satisfied, a final light sanding with very fine grit sandpaper (2000-grit) can prepare the surface for painting or a clear coat. Proper `Post-processing` is an art that yields stunning results.
Achieving a perfectly smooth 3D print surface requires patience and attention to detail, but the results are undeniably rewarding. By mastering these `3D printing grinding filling` techniques, you can elevate the quality of your prints from good to outstanding, making them look professionally finished. Take your time, experiment, and soon you’ll be creating impressive, smooth 3D printed objects.
Frequently asked questions
Is it safe to sand 3D prints indoors, or do I need ventilation?
You should always sand in a well-ventilated area or outdoors. Sanding plastic (PLA, ABS, PETG) generates fine dust that can be harmful to breathe. Wear a dust mask or respirator, safety glasses, and gloves; wet-sanding with grits of 400 and above helps contain dust and prevents sandpaper from clogging.
Can I use wood filler instead of automotive body filler for filling layer lines?
Yes, wood filler can work for small gaps on prints made from PLA or PETG, but it may shrink more and adhere less well than automotive body filler or specialized 3D print fillers. For best results, test on a scrap piece first, and always sand the filler down with progressively finer grits to match the surrounding plastic surface.
How many times do I typically need to repeat the fill-and-sand cycle?
Most prints require two to three fill-and-sand cycles to achieve a completely uniform, showroom-ready surface. Start with coarse grit (100-grit) to remove major layer lines, apply a thin layer of filler, sand with medium grit (220-grit), then repeat with finer grits (400-grit and up) until pinholes and lines disappear.