Transforming a raw 3D print, especially those produced with FDM technology, from a visible-layer-line artifact into a smooth, professional-grade object is a rewarding process. While various post-processing techniques exist, manual sanding remains a foundational skill, offering unparalleled control and precision. This guide delves into the nuances of manual sanding 3D prints, equipping you with the knowledge to achieve truly seamless surfaces and elevate your finished projects.
Why manual sanding is indispensable for 3D prints

Explore the
Snapmaker U1
3D printing, particularly FDM (Fused Deposition Modeling), inherently leaves behind visible layer lines. These lines, while a testament to the additive manufacturing process, often detract from the aesthetic and tactile quality of the final product. Manual sanding is the most direct and accessible method for layer line removal and surface refinement. It allows for meticulous attention to detail, shaping, and texturing that other methods might not offer.
- Precision and control: Unlike automated methods, manual sanding gives you direct control over material removal, crucial for preserving fine details and intricate geometries.
- Cost-effectiveness: The initial investment in tools and materials for manual sanding is relatively low, making it an accessible option for hobbyists and professionals alike.
- Versatility: It can be applied to a wide range of filament types (PLA, ABS, PETG, etc.) and print sizes, adapting to various project needs.
- Foundation for further finishing: A well-sanded surface is the perfect canvas for priming, painting, clear coating, or other advanced 3D print finishing techniques, ensuring a flawless final look.
Essential tools and materials for manual sanding

Before you begin, gathering the right tools is paramount. The quality and type of your materials will significantly impact the efficiency and outcome of your sanding efforts.
Sandpaper: the cornerstone of smooth FDM prints
Choosing the correct sandpaper is critical. Sandpapers vary by abrasive material, backing, and most importantly, sandpaper grit.
- Abrasive materials:
- Aluminum oxide: A common, versatile abrasive suitable for dry sanding. It's durable and effective on most plastics.
- Silicon carbide: Often found in wet/dry sandpaper, it's sharper and breaks down more easily, exposing new cutting edges. Ideal for wet sanding and achieving very fine finishes.
- Backing: Paper-backed sandpaper is common, but cloth-backed options offer greater durability and flexibility, especially for wet sanding or conforming to curves.
- Grit progression: You'll need a range of grits, typically starting from a coarser grit (e.g., 200-400) to remove prominent layer lines and gradually moving to very fine grits (e.g., 1000-3000+) for a silky smooth FDM prints surface.
Sanding blocks and accessories
While freehand sanding is possible, using sanding blocks provides a more even and consistent finish, preventing unintended dips or flat spots.
- Rubber or foam sanding blocks: These provide a firm yet slightly yielding surface, ideal for larger flat areas or gentle curves. Their reusability and ergonomic design offer a good balance of features for general use.
- Small files and sanding sticks: Essential for reaching tight corners, small details, and intricate crevices that larger blocks cannot access. These can be purchased or DIYed by attaching sandpaper to craft sticks or small pieces of plastic.
- Masking tape: Useful for protecting areas you don't want to sand or creating crisp edges.
- Water spray bottle and container: For wet sanding, these are indispensable for keeping the surface lubricated and washing away abrasive particles.
Safety gear
Your health and safety should always be a priority.
- Dust mask or respirator: Fine plastic dust can be harmful if inhaled. A good quality dust mask is non-negotiable, especially when dry sanding.
- Safety glasses: Protect your eyes from flying debris or abrasive particles.
- Gloves: Protect your hands from abrasions and prolonged contact with water (during wet sanding).
Understanding sandpaper grit: the key to progression
Explore the
Snapmaker U1
Sandpaper grit refers to the size of the abrasive particles on the paper. A lower grit number indicates coarser particles, while a higher number signifies finer particles. The success of manual sanding hinges on a methodical progression through grits.
The science of grit numbers
Coarse grits (e.g., 80-200) are aggressive, designed to quickly remove material and level significant imperfections like prominent layer lines or support marks. Medium grits (e.g., 220-400) refine the surface left by coarser grits, reducing the depth of scratches. Fine grits (e.g., 600-1200) further smooth the surface, preparing it for priming or painting. Very fine and ultra-fine grits (e.g., 1500-3000+) are used for polishing and achieving a high-gloss finish, often with wet sanding.
Choosing your starting grit
The optimal starting grit depends heavily on the quality of your initial 3D print and the severity of the layer lines. For prints with very noticeable layer lines or rough textures, a grit around 200-320 might be appropriate. For smoother prints with only faint lines, you might start with 400 grit. The goal is to use the coarsest grit necessary to efficiently remove imperfections without leaving excessively deep scratches that will be difficult to remove in subsequent steps.
The importance of proper grit progression
Never skip more than one grit level in your progression (e.g., don't jump from 200 to 800). Each grit is designed to remove the scratches left by the previous, coarser grit. Skipping steps will leave deeper scratches that become increasingly difficult, if not impossible, to fully eliminate, resulting in a less than ideal final finish. A typical progression might look like: 220 > 320 > 400 > 600 > 800 > 1000 > 1500 > 2000 > 3000.
The manual sanding process: a step-by-step guide

Patience and method are your best allies in this process. Rushing will only lead to frustration and suboptimal results.
Step 1: preparation and safety first
Ensure your workspace is well-ventilated and clean. Don your safety glasses, dust mask, and gloves. Clean your 3D print thoroughly to remove any loose debris, dust, or residual support material. A quick wash with soap and water can be beneficial, especially for prints that might have oily residues.
Step 2: initial coarse sanding for layer line removal
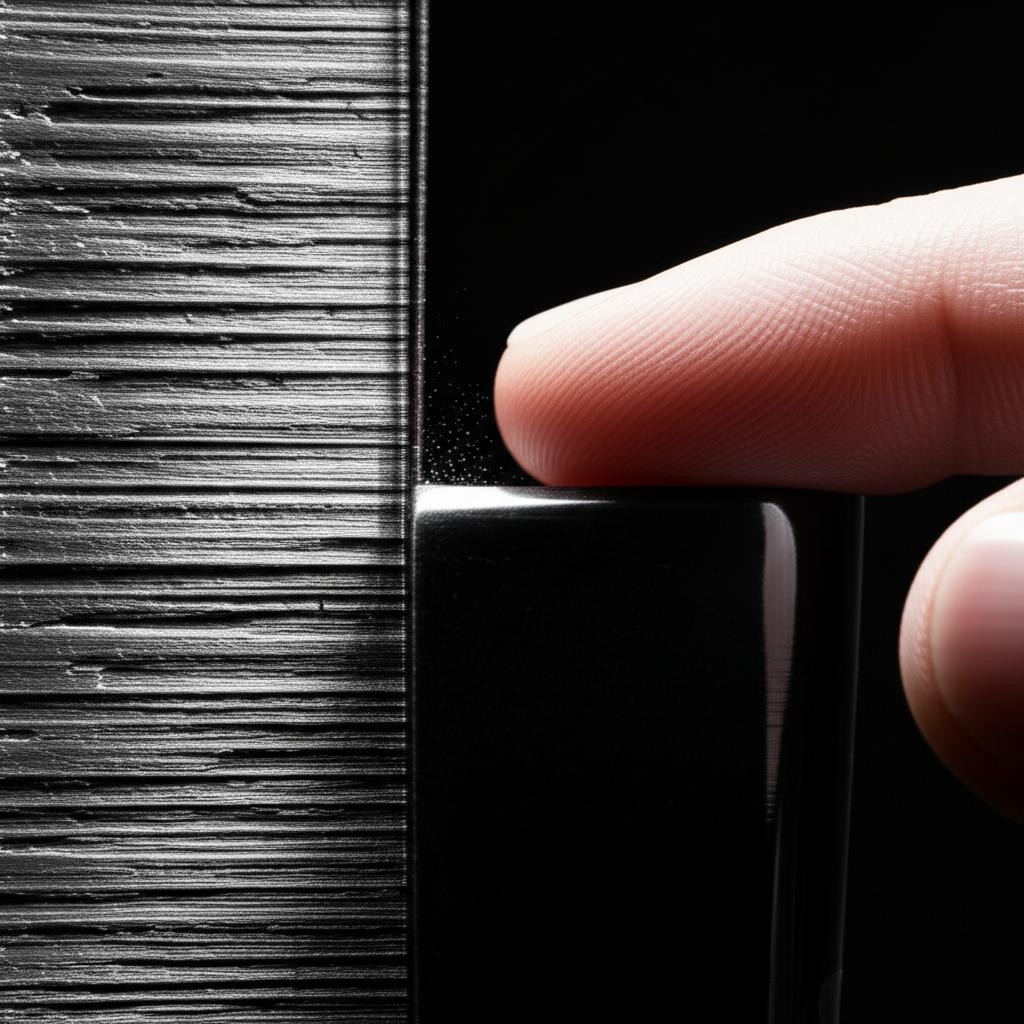
Attach your chosen starting grit sandpaper (e.g., 220-320) to a sanding block. Begin sanding with light, even pressure. For best results, sand in a circular motion or in a consistent direction. The goal here is to flatten the surface and remove the most prominent layer lines and imperfections. Avoid applying too much pressure, which can gouge the plastic or generate excessive heat, potentially deforming the print. Regularly check your progress by wiping away dust and visually inspecting the surface. You'll notice the surface becoming uniformly dull and the layer lines diminishing.
Step 3: progressing through grits
Once the entire surface has been uniformly treated with the initial coarse grit, clean the print thoroughly to remove all dust and abrasive particles from the previous step. Any remaining coarse grit can cause deep scratches when you move to a finer paper. Switch to the next finer grit (e.g., 400). When sanding with the new grit, change your sanding direction by 45-90 degrees from the previous step. This makes it easier to identify and remove the scratches left by the coarser grit. Continue this process, cleaning between each grit change, until you reach a grit of around 600-800.
Step 4: introducing wet sanding
For grits 600-800 and above, wet sanding becomes highly beneficial. Wet sanding offers several advantages:
- Reduces dust: The water captures plastic particles, preventing them from becoming airborne.
- Prevents clogging: Water flushes away sanding debris, keeping the sandpaper from clogging and maintaining its abrasive effectiveness.
- Cooling effect: It dissipates heat, reducing the risk of melting or deforming the plastic, especially crucial for thinner sections.
- Finer finish: It generally produces a smoother, more polished surface.
To wet sand, lightly spray the print surface and the sandpaper with water. Maintain a consistent wetness throughout the process. Continue progressing through your finer grits (e.g., 800, 1000, 1500, 2000, 3000+), changing sanding direction and cleaning the print thoroughly between each grit. For the finest grits, you might find that a very light touch is all that's needed to bring out a semi-gloss or even high-gloss sheen.
Step 5: dealing with intricate details and curves
For areas that are difficult to reach with a sanding block, use small sanding sticks, folded sandpaper, or even cotton swabs with sandpaper glued to them. For curves, allow the sandpaper to conform to the shape, using your fingers or a flexible foam block to apply even pressure. Be extra careful not to over-sand these areas, as they can easily lose their definition.
Step 6: final inspection and cleaning
After reaching your desired level of smoothness, give the print a final thorough wash to remove all sanding residue. Allow it to dry completely. Inspect the surface under good lighting, preferably with a strong, raking light source, to reveal any remaining imperfections or swirl marks. If you spot any, return to a slightly coarser grit and work your way back up.
Tips for optimal results and common challenges
Even with a methodical approach, certain techniques and awareness of potential pitfalls can significantly improve your outcome.
Maintaining consistent pressure and direction
Varying pressure can lead to uneven surfaces, creating dips or waves. Aim for light, consistent pressure. Changing sanding direction with each grit helps ensure that scratches from the previous grit are effectively removed and makes them easier to spot. For the final grits, a gentle circular motion can help achieve a uniform polish.
Avoiding flat spots and preserving details
When sanding curved surfaces, avoid concentrating pressure on a single point. Use a flexible sanding pad or your fingers to distribute pressure evenly over the curve. For sharp edges and small details, be extremely cautious. Masking tape can protect adjacent features, and using very fine sandpaper with a light touch is key to preserving crispness.
Managing dust and debris
When dry sanding, plastic dust can quickly accumulate and clog sandpaper, reducing its effectiveness. Regularly tap or brush off the dust from your sandpaper. A vacuum cleaner with a brush attachment can help keep your workspace clean. During wet sanding, ensure you frequently rinse the print and sandpaper to prevent a slurry of plastic and abrasive particles from scratching the surface.
Patience is key
Manual sanding is a time-consuming process. Rushing will inevitably lead to mistakes, requiring you to backtrack or even start over. Dedicate sufficient time to each grit, ensuring the surface is perfectly uniform before moving on. Think of it as a meditative process, where precision and care yield the best results.
Comparing approaches: wet vs. dry sanding and abrasive types

While both wet and dry sanding fall under the umbrella of manual sanding, they offer distinct features and benefits that may influence your choice depending on the project and desired outcome. Similarly, the type of abrasive material in your sandpaper has specific characteristics.
Wet sanding versus dry sanding
- Dry sanding:
- Features: Quicker initial material removal, easier to see progress (no water film), suitable for removing large imperfections. Generates significant dust.
- Considerations: Requires good ventilation and dust masks. Can generate heat, potentially deforming thin plastic parts. Sandpaper clogs faster.
- Best for: Initial coarse sanding (below 600 grit) to remove prominent layer lines and reshape the print.
- Wet sanding:
- Features: Virtually dust-free, provides a smoother finish, prevents heat buildup, extends sandpaper life by preventing clogging.
- Considerations: Requires water-resistant sandpaper (silicon carbide often preferred). Can be messier due to water and slurry. Progress might be harder to judge initially due to the wet surface.
- Best for: Finer grits (600 grit and above) to achieve a highly refined, polished surface, and for materials prone to heat deformation.
The decision to use wet or dry sanding often comes down to the stage of sanding and the specific properties you value. Many professionals utilize a combination, starting dry for coarse work and transitioning to wet for the finer finishing stages.
Different abrasive materials: aluminum oxide versus silicon carbide
- Aluminum oxide sandpaper:
- Features: Very durable, excellent for general-purpose sanding. Its grains fracture to expose new sharp edges, providing a consistent cut. Generally more affordable for a wide range of grits.
- Considerations: Less effective when wet. Can generate more heat than silicon carbide.
- Best for: Dry sanding, initial layer line removal, and general shaping of most plastics.
- Silicon carbide sandpaper:
- Features: Extremely sharp and brittle grains, making it very effective for cutting through materials quickly. Ideal for wet sanding as it resists clogging and maintains its cutting efficiency. Produces a very fine finish.
- Considerations: Can be slightly more expensive than basic aluminum oxide paper. Grains wear down faster than aluminum oxide, requiring more frequent paper changes for coarse work.
- Best for: Wet sanding, achieving high-gloss finishes, and working on harder plastics or composite materials.
While both types can be used, understanding their characteristics allows you to select the most efficient and effective option for each stage of your 3D print finishing process. For example, investing in a good set of silicon carbide wet/dry sandpaper is a feature many find indispensable for the final polishing steps, even if it represents a slightly higher initial cost compared to a basic dry sanding set.
When to stop sanding: preparing for the next step

The ultimate goal of manual sanding is not always to achieve a mirror-like finish directly. Often, it's about preparing the surface for subsequent treatments, such as priming and painting. If you plan to prime and paint your print, you typically don't need to sand beyond 600-800 grit. The primer itself will fill in very fine scratches and provide a uniform base. However, if you're aiming for a bare, polished plastic finish or plan to apply a clear coat directly, you'll want to continue sanding through the finer grits (up to 2000-3000+) to achieve that desired sheen.
A well-sanded 3D print is a testament to craftsmanship and attention to detail. By mastering the art of manual sanding, you unlock the full potential of your 3D printer, transforming raw plastic into truly professional and visually stunning objects. With the right tools, a systematic approach, and a good dose of patience, achieving smooth FDM prints and seamless surfaces is well within your grasp.