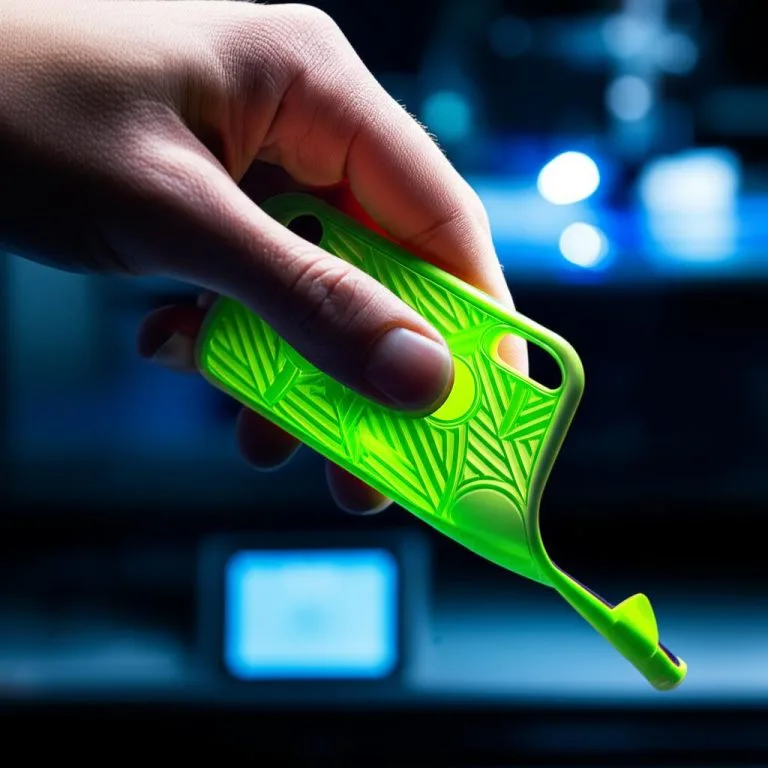
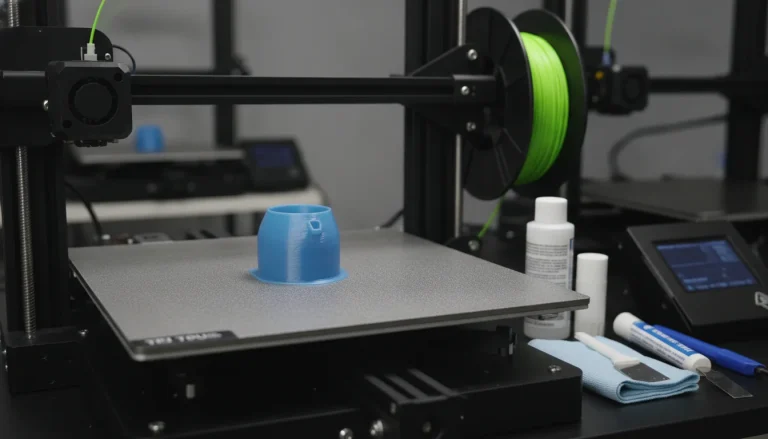
The landscape of manufacturing has been dramatically reshaped by 3D printing, moving beyond mere prototyping to the creation of truly functional end-use parts. Among these innovations, the ability to 3D print TPU gaskets has emerged as a game-changer for engineers, designers, and hobbyists alike. This guide delves into the nuances of producing custom, high-performance seals using Thermoplastic Polyurethane (TPU) filament, offering a pathway to achieving perfect seals for bespoke enclosures, intricate prototypes, and specialized components.
Understanding TPU: the material of choice for flexible seals
The consumer toolchanger 3D printer: the SnapSwap 4-toolhead system swaps heads in 5 seconds for true multi-color and multi-material printing, with smart calibration and auto filament loading.
- 4 toolheads · 5 s swap
- Up to 500 mm/s · 20,000 mm/s²
- 270 mm cube build volume
- Multi-color & multi-material

Thermoplastic Polyurethane (TPU) stands out in the realm of 3D printing filaments due to its unique combination of properties, making it an ideal candidate for creating flexible seals and gaskets. Unlike rigid plastics, TPU offers a rubber-like elasticity that is crucial for sealing applications.
- Flexibility and Elasticity: TPU’s defining characteristic is its ability to stretch significantly and return to its original shape without permanent deformation. This is vital for gaskets that need to compress and conform to irregular surfaces to form a tight seal.
- Durability and Abrasion Resistance: TPU boasts excellent resistance to wear, tear, and abrasion, ensuring that gaskets maintain their integrity even in demanding environments or with repeated use.
- Chemical Resistance: Many TPU formulations offer good resistance to oils, greases, and various chemicals, broadening their applicability in industrial and automotive settings.
- Temperature Range: While specific properties vary by formulation, TPU generally performs well across a reasonable temperature range, maintaining flexibility in cold conditions and stability at moderate heat.
These attributes collectively position TPU as a superior material for applications requiring a robust, flexible seal, often outperforming traditional methods in terms of customization and rapid production.
Designing effective flexible seals for 3D printing

Effective flexible seal design is paramount when embarking on a 3D print TPU gasket project. The unique properties of TPU, combined with the capabilities and limitations of FDM 3D printing, necessitate a thoughtful approach to design.
Considerations for gasket design
- Compression and Deflection: A gasket’s primary function is to compress and fill gaps. Design the gasket with an appropriate thickness and cross-section to allow for sufficient compression without over-compressing (which can lead to material fatigue) or under-compressing (resulting in a weak seal). Understanding the Shore hardness of your chosen TPU filament is key here.
- Groove Design for Retention: For optimal performance, gaskets are often seated within a groove. The groove should be slightly larger than the gasket to allow for easy installation but snug enough to hold it in place. Consider features like barbed edges or interlocking designs for enhanced retention.
- Wall Thickness and Infill: These settings significantly influence the gasket’s flexibility and strength. Thinner walls and lower infill densities generally result in more pliable gaskets, while thicker walls and higher infill provide more rigidity. Experimentation is often required to strike the right balance for your specific application.
- Surface Contact Area: Maximize the contact area between the gasket and the mating surfaces to ensure a robust seal. Smooth, consistent surfaces on both the gasket and the enclosure are crucial for preventing leaks.
- Stress Concentration Points: Avoid sharp corners or abrupt changes in geometry, as these can create stress concentration points, potentially leading to premature failure of the gasket. Incorporate fillets and rounded edges where possible to distribute stress more evenly.
Software and tools for design
Modern CAD software (e.g., Fusion 360, SolidWorks, Onshape) offers robust tools for designing custom rubber gaskets. Features like parametric modeling allow for easy adjustments and iterations. When designing for flexible materials, pay particular attention to:
- Draft Angles: While less critical for highly flexible materials than rigid ones, incorporating slight draft angles can aid in assembly, especially for complex geometries.
- Tolerance Analysis: Account for printer tolerances and material shrinkage. A slight interference fit is often desirable for a tight seal, but too much can make assembly difficult or cause material damage.
The 3D printing process for TPU gaskets

Successfully 3D printing functional TPU gaskets requires attention to specific hardware and software settings. TPU can be more challenging to print than rigid filaments like PLA or PETG, but with the right approach, excellent results are achievable.
Printer requirements
- Direct Drive Extruders: Highly recommended for printing flexible filaments. Direct drive systems minimize the distance the filament travels between the drive gears and the hotend, reducing the chances of buckling or jamming.
- Heated Bed: While not strictly essential for all TPUs, a heated bed (typically 40-60°C) improves first layer adhesion and reduces warping, leading to more reliable prints.
- Enclosure: An enclosure can help maintain a stable ambient temperature, which is beneficial for consistent layer adhesion and reducing drafts that might cause cooling inconsistencies.
Filament selection
TPU filaments come in various Shore hardness ratings, which directly correlate to their flexibility. A lower Shore hardness (e.g., 85A) indicates a softer, more flexible material, while a higher rating (e.g., 95A) is firmer. Choose a Shore hardness appropriate for your gasket’s intended compression and sealing requirements. Also, be mindful of:
- Brand Variations: TPU properties can vary significantly between manufacturers. It’s often wise to stick with a reputable brand once you find one that works well.
- Moisture Sensitivity: TPU is hygroscopic, meaning it absorbs moisture from the air. Wet filament can lead to poor print quality, stringing, and weakened parts. Always store TPU in a dry environment and consider drying it before printing, especially if it has been exposed to humidity.
Slicer settings optimisation
Slicer settings are critical for successful TPU prints and for achieving waterproof 3D printing.
- Temperature (Nozzle and Bed): Consult your filament manufacturer’s recommendations. Nozzle temperatures typically range from 220-240°C. A heated bed at 40-60°C is generally sufficient.
- Print Speed: Slow and steady wins the race with TPU. Printing at speeds between 20-40 mm/s often yields the best results, minimizing issues like stringing and inconsistent extrusion.
- Retraction Settings: TPU is prone to stringing due to its elasticity. Minimize retraction distance (0.5-2 mm) and speed (20-40 mm/s) or even disable retraction for simpler geometries. Excessive retraction can cause filament grinding or clogs.
- Infill Patterns and Density: For functional gaskets, 100% infill is often preferred to ensure maximum compression and a solid seal. However, for applications requiring more flexibility, a lower infill percentage with a suitable pattern (e.g., gyroid or rectilinear) can be used.
- Layer Height: A moderate layer height (0.2-0.28 mm) generally provides a good balance between print time and layer adhesion. Thinner layers can improve surface finish but may increase print time and the risk of delamination if not properly tuned.
- First Layer Adhesion: A perfect first layer is paramount. Ensure proper bed leveling and a slightly compressed first layer. Adhesives like glue stick or painter’s tape can aid adhesion, though many TPUs adhere well to bare glass or PEI sheets with a heated bed.
Achieving waterproof and airtight seals

When the goal is a truly waterproof 3D printing solution for your gaskets, specific considerations must be made during both design and printing to ensure the integrity of the seal.
Layer adhesion: the cornerstone of leak-proof prints
The strength of the bond between successive layers is the primary factor determining a 3D printed part’s ability to hold fluids or gases. For TPU gaskets, strong layer adhesion is non-negotiable.
- Optimal Extrusion Temperature: Ensure your nozzle temperature is high enough to properly melt the TPU, allowing it to fuse effectively with the previous layer. Too low, and you get weak bonds; too high, and you risk stringing and oozing.
- Slow Print Speed: Slower print speeds allow the hot plastic more time to bond with the underlying layer, resulting in stronger adhesion and fewer microscopic gaps.
- Consistent Extrusion: Calibrate your extruder’s E-steps and flow rate to ensure consistent material output. Under-extrusion can lead to gaps and porosity, compromising the seal.
Perimeter count for enhanced integrity
Increasing the number of perimeters (or wall lines) directly contributes to the robustness and impermeability of your TPU gasket. More perimeters create a thicker, more solid outer shell, reducing the likelihood of leaks through the infill or weak spots.
- For critical sealing applications, consider using 3-5 perimeters or even printing with 100% infill for maximum density and strength. This effectively creates a solid TPU part, minimizing any internal voids that could allow fluid ingress or egress.
Post-processing for sealing performance
While TPU generally requires minimal post-processing, a few techniques can further enhance its sealing capabilities:
- Cleaning: Remove any residual support material or minor blemishes that could interfere with the gasket’s contact surface.
- Surface Smoothing (Limited): Unlike some rigid filaments, TPU does not respond well to typical vapor smoothing techniques. However, ensuring a smooth first layer and carefully calibrated print settings can minimize surface imperfections directly from the printer.
- Sealants/Coatings (Optional): For extremely demanding applications, a thin layer of a compatible sealant (e.g., silicone-based) can be applied to the gasket surface to fill any microscopic pores and provide an extra layer of protection. This is often a last resort and should be tested for compatibility.
Testing methods
The ultimate test of a custom TPU gasket’s waterproof capabilities is rigorous testing:
- Water Submersion Test: Assemble the enclosure with the 3D printed gasket and submerge it in water. Check for bubbles indicating leaks. For sensitive electronics, consider placing a moisture indicator inside before submersion.
- Pressure Testing: For applications requiring resistance to internal or external pressure, a controlled pressure test can verify the gasket’s integrity under operational conditions.
- Visual Inspection: A thorough visual check for gaps, inconsistencies, or poor layer adhesion after printing can preemptively identify potential leak points.
Comparing 3D printed TPU gaskets with traditional custom rubber gaskets
The consumer toolchanger 3D printer: the SnapSwap 4-toolhead system swaps heads in 5 seconds for true multi-color and multi-material printing, with smart calibration and auto filament loading.
The decision to opt for a 3D print TPU gasket versus a traditionally manufactured custom rubber gasket involves weighing various factors, including cost, lead time, design flexibility, and material properties. Neither approach is inherently “better”; rather, the optimal choice depends heavily on the specific project requirements.
Cost structures
-
3D Printing:
- Filament Cost: Relatively low per-part cost for material, especially for small gaskets.
- Printer Depreciation/Maintenance: An ongoing cost, but spread across all parts produced.
- Electricity: Minimal per-part cost.
- Design Time: Initial investment in CAD design, but reusable for iterations.
- Setup Cost: Very low, as no specialized tooling is required beyond the printer itself.
- Scalability: Highly cost-effective for low-volume production, custom one-offs, and rapid prototyping. Costs per unit remain relatively stable regardless of volume (within the printer’s capacity).
-
Traditional Manufacturing (e.g., Die-cutting, Molding):
- Tooling Costs: Significant upfront investment for dies (die-cutting) or molds (injection molding/compression molding). These costs can range from hundreds to thousands of dollars.
- Material Bulk Purchase: Often requires purchasing raw material in larger quantities, which can reduce per-unit material cost but increases initial outlay.
- Labor Costs: Involved in setting up machines, running production, and quality control.
- Setup Cost: High due to tooling, but becomes negligible when spread over very large production runs.
- Scalability: Extremely cost-effective for high-volume production where tooling costs are amortized over thousands or millions of parts. Unit costs drop significantly with scale.
Lead times
- 3D Printing: Offers rapid prototyping and on-demand production. A design can be iterated and printed within hours or days, making it ideal for fast development cycles and urgent replacements.
- Traditional Manufacturing: Typically involves longer lead times. Tooling design and fabrication can take weeks or months. Once tooling is complete, production can be very fast, but the initial setup phase is extended.
Design flexibility and iteration
- 3D Printing: Provides unparalleled design freedom. Complex geometries, internal features, and intricate patterns are easily achievable. Design changes are implemented quickly and cheaply by simply modifying the CAD file and reprinting.
- Traditional Manufacturing: Design changes, especially after tooling has been created, can be prohibitively expensive and time-consuming, often requiring new dies or mold modifications. This makes traditional methods less suitable for projects with evolving designs.
Material properties and range
- 3D Printing: Limited by the available range of TPU filaments, although this range is continually expanding. Different Shore hardnesses are available, but the chemical resistance and temperature performance might not match the breadth of specialized elastomers.
- Traditional Manufacturing: Offers a much wider selection of rubber compounds (e.g., silicone, EPDM, neoprene, nitrile, Viton) each with specific properties regarding temperature resistance, chemical compatibility, and mechanical strength. This allows for highly specialized gaskets tailored to extreme environments.
Surface finish and precision
- 3D Printing: Parts will exhibit layer lines, which can affect the sealing surface if not managed with fine layer heights and careful calibration. Tolerances are generally good but may not match the sub-millimeter precision achievable with high-quality molding.
- Traditional Manufacturing: Can achieve very high precision and extremely smooth surface finishes, which are critical for certain high-pressure or vacuum sealing applications.
Applications and use cases for custom TPU gaskets

The versatility of 3D print TPU gaskets opens up a myriad of applications across various industries and personal projects.
- Prototyping and Research & Development: Rapidly test different gasket designs and material hardnesses without the expense and lead time of traditional manufacturing.
- Custom Electronics Enclosures: Create bespoke seals for electronic devices, ensuring protection against dust, moisture, and EMI/RFI, especially for unique form factors or low-volume production.
- Automotive Custom Parts: Fabricate seals for custom intake manifolds, sensor housings, or unique modifications where off-the-shelf gaskets are unavailable.
- Medical Devices (Non-critical): Produce custom seals for non-implantable medical equipment, laboratory apparatus, or ergonomic interfaces requiring flexibility and chemical resistance.
- Hobbyist Projects: From waterproof casings for drones to custom seals for RC boats, 3D printed TPU gaskets empower makers to bring complex projects to life.
- Repairs and Replacements: Recreate obsolete or hard-to-find gaskets for vintage machinery, appliances, or specialized equipment, extending their lifespan and functionality.
In conclusion, 3D printing TPU gaskets presents a powerful solution for creating custom, functional seals, particularly where design flexibility, rapid iteration, and low-to-medium volume production are key considerations. While traditional manufacturing excels in mass production with standardized designs and a broader material palette, 3D printing shines in its ability to quickly produce bespoke components that perfectly fit unique requirements. The choice between these methods ultimately hinges on a careful evaluation of project-specific needs, balancing cost structures, lead times, and the desired material and geometric properties for the application at hand.
Frequently asked questions
Can I print a TPU gasket on a Bowden extruder printer, or do I need direct drive?
While direct drive extruders are highly recommended and significantly reduce the risk of filament buckling and jamming, it is possible to print TPU on a Bowden setup with careful tuning. You must print very slowly (often below 20 mm/s), use minimal retraction (0.5–1 mm or even none), and ensure your filament path is as short and unrestricted as possible. Success rates are lower, and softer TPU formulations (e.g., Shore 85A) are much more difficult to feed reliably through a Bowden tube than firmer ones (e.g., Shore 95A).
Will a 100% infill TPU gasket automatically be waterproof?
Not automatically—100% infill eliminates large internal voids, which is essential, but waterproofness also depends on strong layer adhesion and the absence of microscopic gaps between perimeters. Even a fully solid print can leak if the extrusion temperature is too low, print speed is too fast, or the flow rate is slightly under-extruded, creating weak bonds between layers. For a reliable waterproof seal, you must combine high infill density with slow print speeds, optimal nozzle temperature, and sufficient perimeter count (3–5 walls).
How do I choose between 3D printing a TPU gasket and ordering a custom molded rubber gasket?
Choose 3D printing when you need one or a few custom gaskets quickly, your design is still evolving, or the geometry is complex and would be expensive to tool for molding. Choose traditional manufacturing (die-cutting or molding) when you need hundreds or thousands of identical gaskets, require specialized rubber compounds (silicone, EPDM, Viton) that TPU cannot match, or need the superior surface finish and tighter tolerances that molding provides. For low volumes, 3D printing has near-zero setup cost; for high volumes, tooling amortization makes molding cheaper per part.