Resin 3D printing, particularly SLA and DLP technologies, offers incredible detail and smooth surfaces right off the build plate. However, fresh resin prints often have a subtle matte or semi-gloss finish, which, while appealing in its own right, doesn’t always showcase the full potential of your intricate models. For those seeking to elevate their creations to a professional, almost glass-like aesthetic, achieving a high-gloss finish is the ultimate goal. This process not only enhances visual appeal, making colors pop and details stand out, but can also add a layer of protection to your prints. While it requires patience and attention to detail, the results of properly polishing resin prints are undeniably rewarding. Let’s dive into the meticulous steps required to transform your matte resin prints into stunning, reflective masterpieces.
Gathering your arsenal: essential tools and materials
The consumer toolchanger 3D printer: the SnapSwap 4-toolhead system swaps heads in 5 seconds for true multi-color and multi-material printing, with smart calibration and auto filament loading.
- 4 toolheads · 5 s swap
- Up to 500 mm/s · 20,000 mm/s²
- 270 mm cube build volume
- Multi-color & multi-material

Before embarking on your journey to a brilliant finish, it’s crucial to assemble all the necessary tools and materials. Having everything at hand will streamline the process and ensure you can move smoothly from one stage to the next. The choice of tools can impact both the effort required and the final quality, so consider your budget and the desired outcome.
Safety first: protecting yourself
- Nitrile gloves: Essential for handling resin prints and chemicals, protecting your skin from potential irritants.
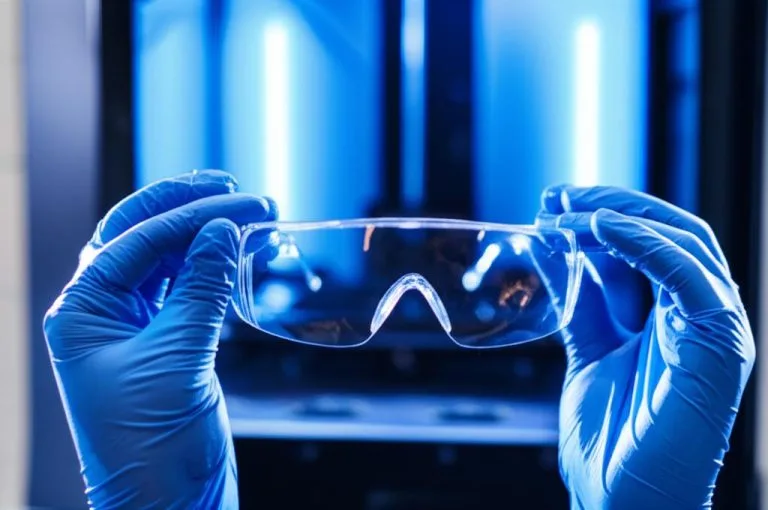
- Safety glasses/goggles: To shield your eyes from resin dust, polishing compounds, and any airborne particles during sanding or rotary tool use.
- Respirator or face mask: Particularly important during sanding to prevent inhaling fine resin dust. A P100 particulate respirator is highly recommended.
- Well-ventilated workspace: Always work in an area with good airflow to dissipate fumes from resin, IPA, and clear coats.
Cleaning and preparation supplies
- Isopropyl Alcohol (IPA) or resin cleaner: For thoroughly cleaning your prints post-cure.
- Soft microfiber cloths: Lint-free cloths are vital for cleaning and buffing without introducing new scratches.
- Warm water and mild soap: For rinsing and cleaning between sanding steps.
The sanding toolkit: building the foundation
Sanding is arguably the most critical phase, as it establishes the smoothness upon which the final gloss is built. You’ll need a comprehensive range of wet/dry sandpaper.
- Wet/dry sandpaper: Start with a relatively coarse grit (e.g., 400-600) and progressively move to much finer grits (800, 1000, 1500, 2000, 3000, 5000, and even 7000-12000 for an ultra-fine finish). Investing in a variety of grits is non-negotiable for a truly smooth surface.
- Sanding blocks or pads: These provide a flat, even surface for sanding, helping to prevent uneven pressure and gouging. Foam sanding pads can be particularly useful for curved surfaces.
- Small files or sanding sticks: For reaching intricate details and tight corners where larger sandpaper sheets can’t go.
- Small container for water: For wet sanding, keeping your sandpaper and print lubricated and clean.
Polishing compounds and tools: bringing out the shine
Once sanding is complete, polishing compounds do the heavy lifting to create that sought-after shine.
- Polishing compounds: A set of compounds ranging from coarse to fine (e.g., plastic polish, car headlight restoration kits, jeweler’s rouge, or dedicated resin polishing pastes). Brands like Novus, Meguiar’s, or even specialized dental polishing pastes can yield excellent results.
- Microfiber cloths or cotton pads: For applying and buffing polishing compounds by hand.
- Rotary tool (e.g., Dremel) with polishing attachments: A rotary tool with various felt bobs, cotton wheels, or buffing pads can significantly speed up the polishing process, especially for larger or more complex prints. However, care must be taken to avoid overheating the resin.
Optional: clear coat resin for a mirror finish and durability
For an unparalleled high-gloss finish and added protection, a clear coat can be the ultimate step.
- Clear coat resin: Options include spray-on clear coats (e.g., 2K automotive clear coat, specialized clear coat for plastics), brush-on UV resin, or even a dipping resin. Each has its pros and cons regarding application, curing, and durability.
- UV curing lamp or station: If using UV-curable clear coat resin, a UV light source is necessary for proper curing.
- Airbrush or spray booth (optional): For applying spray-on clear coats evenly and in a controlled environment.
Step-by-step guide to a high-gloss finish
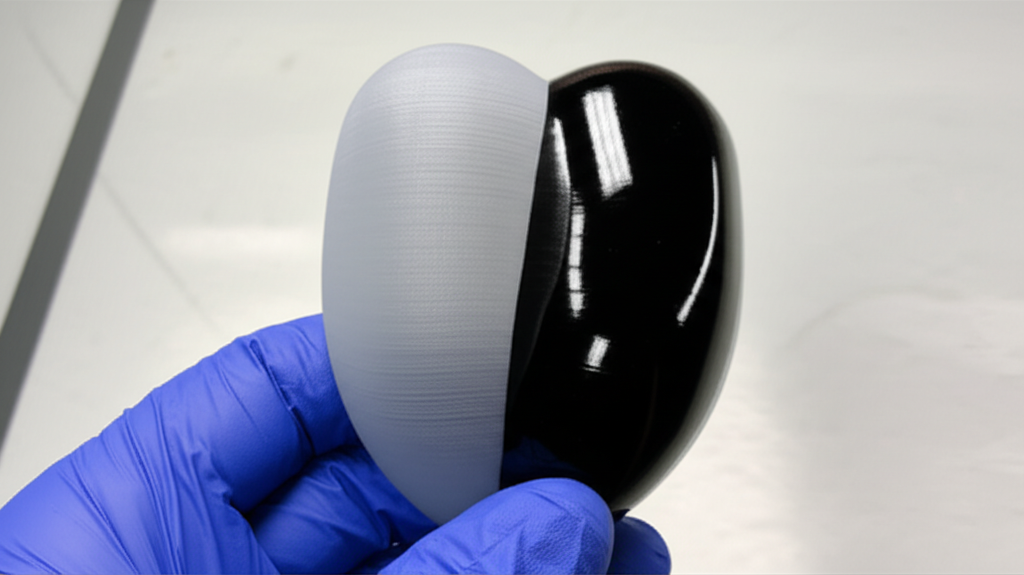
With your tools ready, let’s delve into the detailed process. Remember, patience is your greatest ally here.
Step 1: post-processing and initial curing
Before you even think about sanding, your resin print needs to be properly post-processed and fully cured. Inadequate curing can lead to sticky surfaces, poor adhesion of subsequent layers, and potential health hazards.
- Wash thoroughly: Remove all uncured resin from your print using IPA or a dedicated resin cleaner. Swirl the print in the cleaner, then rinse. Repeat if necessary until no tackiness remains.
- Dry completely: Allow the print to air dry or use compressed air to ensure no cleaning solution is left.
- Final cure: Place your print in a UV curing station, under a UV lamp, or in direct sunlight for a sufficient period (check your resin’s specifications). A fully cured print will feel hard and non-tacky. This is a crucial step for durability and safe handling.
Step 2: the meticulous art of sanding SLA prints
This is where the magic begins, transforming the raw surface into a smooth canvas. The goal of sanding SLA prints is to progressively remove layer lines, support marks, and any surface imperfections, creating a uniform, matte surface that is ready for polishing. Always use wet sanding techniques to minimize dust, lubricate the surface, and prevent sandpaper from clogging.
- Start coarse (400-600 grit): Begin with a lower grit sandpaper (e.g., 400 or 600). Dip the sandpaper and the print in water. Apply light, even pressure and sand in a consistent direction. For flat surfaces, use a sanding block. For curved areas, conform the sandpaper to the shape. The aim here is to remove visible layer lines and major imperfections.
- Clean and inspect: After each grit, thoroughly rinse the print under running water to remove all sanding residue. Dry it and inspect it carefully under good light. You should see a uniform matte finish with no remaining scratches from the previous, coarser grit. If you see any, go back to the previous grit and continue sanding.
- Progress to medium grits (800-1500 grit): Once you’re confident all coarse scratches are gone, move to the next finer grit (e.g., 800, then 1000, then 1500). Continue the wet sanding process, cleaning and inspecting between each step. At this stage, you’re refining the surface, making it progressively smoother. You might notice the print starting to feel smoother to the touch and less opaque.
- Refine with fine grits (2000-5000+ grit): This is where the surface truly begins to transform. As you move to 2000, 3000, and even 5000+ grit, the scratches become microscopic. The print will start to gain a subtle sheen, hinting at the gloss to come. For an exceptional finish, some artisans even go up to 7000 or 12000 grit micro-mesh pads. The finer the grit you finish with, the less work the polishing compounds will have to do, and the better your final high-gloss finish will be.
- Addressing intricate details: For tiny details, switch to sanding sticks, small files, or even strips of fine grit sandpaper wrapped around a toothpick. Patience is key here; rushing can damage delicate features.
Step 3: polishing for a brilliant shine
Once your print is uniformly smooth from the finest grit sanding, it’s time to bring out the shine with polishing compounds. This step fills in the microscopic scratches left by sanding and smooths the surface on a molecular level.
- Apply coarse polishing compound: Start with a coarse-grade polishing compound. Apply a small amount to a clean microfiber cloth or a polishing pad on your rotary tool.
- Hand polishing vs. rotary tool:
- Hand polishing: For smaller prints or delicate areas, hand polishing offers excellent control. Rub the compound onto the surface in small, circular motions, applying light to moderate pressure. Work in small sections.
- Rotary tool: For larger prints or to save time, a rotary tool (like a Dremel) with a felt bob or cotton wheel can be very effective. Use a low to medium speed setting to avoid generating too much heat, which can soften or damage the resin. Keep the tool moving constantly to prevent burning spots.
- Clean and inspect: After using the coarse compound, wipe off the residue with a clean microfiber cloth. Inspect the print; it should have a noticeable sheen, but may still show some faint haziness.
- Progress to finer compounds: Repeat the polishing process with a medium-grade compound, then a fine-grade compound. Each step will progressively increase the clarity and reflectivity of the surface. For a mirror-like finish, some may even use an ultra-fine jeweler’s rouge.
- Final buff: Use a fresh, clean microfiber cloth to buff the entire print to a brilliant shine.
Step 4 (optional): applying a clear coat resin for ultimate gloss and protection
For the absolute best high-gloss finish and added durability, applying a clear coat resin is an excellent option. This step seals the surface, provides a deeper, more uniform shine, and offers protection against scratches and UV degradation. It’s particularly useful for prints that will be handled frequently or exposed to the elements.
- Choose your clear coat:
- Spray-on clear coats: Automotive 2K clear coats offer excellent durability and a glass-like finish. They are typically solvent-based and require proper ventilation and a respirator. Acrylic clear coats are easier to use but may not be as durable.
- Brush-on UV resin: A thin layer of clear UV resin can be brushed on, then cured under a UV lamp. This offers good control and a thick, glossy layer.
- Dipping resin: For smaller, simpler prints, a dipping resin can create a smooth, even coat.
- Prepare the surface: Ensure your polished print is absolutely clean and free of any dust, fingerprints, or residue. Use compressed air and a tack cloth if necessary.
- Apply the clear coat:
- Spraying: Apply several thin, even coats rather than one thick coat. Follow the manufacturer’s instructions for drying times between coats. Maintain a consistent distance from the print to avoid drips or uneven coverage.
- Brushing: Use a high-quality soft brush to apply a thin, even layer of UV resin. Aim for full coverage without pooling.
- Cure the clear coat: If using a UV-curable clear coat, place the print under a UV lamp or in a curing station until fully hardened. For spray-on clear coats, allow ample time for full cure according to manufacturer guidelines (this can take hours or even days).
- Optional: further polishing the clear coat: For an absolutely flawless, mirror finish, you can lightly wet sand the cured clear coat with ultra-fine grits (e.g., 3000-5000+) and then polish it with fine compounds, just as you did with the raw resin print. This can remove any minor dust specks or orange peel texture from the clear coat application.
Tips for success and troubleshooting common issues

Achieving a perfect gloss is a skill that improves with practice. Here are some pointers to help you along the way.
General tips
- Patience is paramount: Rushing any step, especially sanding, will lead to a subpar finish. Take your time.
- Practice on test prints: Don’t start on your most important model. Use failed prints or test pieces to hone your technique.
- Work clean: Dust and debris are the enemies of a high-gloss finish. Keep your workspace and tools clean.
- Consistent pressure: Apply even, consistent pressure during sanding and polishing to avoid creating dips or uneven surfaces.
- Inspect frequently: Constantly check your progress under good lighting to spot imperfections early.
Troubleshooting common issues
- Swirl marks after polishing: This usually indicates that scratches from a coarser grit were not fully removed before moving to the next finer grit or polishing compound. Go back to a finer sanding grit (e.g., 2000 or 3000) and work your way up again.
- Cloudiness or haze: Often caused by insufficient polishing, or not using fine enough polishing compounds. It can also happen if the clear coat is applied too thickly or not cured properly. Re-polish with finer compounds or re-apply the clear coat correctly.
- Uneven shine: This suggests inconsistent sanding or polishing. The surface likely has areas that were not fully smoothed. Re-evaluate your sanding technique and ensure even coverage.
- Residue left behind: Ensure you are thoroughly cleaning your print between steps and wiping off all polishing compound residue with a clean microfiber cloth.
- Overheating the resin with a rotary tool: If you see the resin smudging or softening, you’re applying too much pressure or using too high a speed. Reduce pressure and speed, and keep the tool moving.
Conclusion

Transforming a matte resin print into a gleaming, high-gloss object is a deeply satisfying process that adds a professional touch to your 3D printed creations. While it demands a significant investment of time and meticulous effort, particularly in the sanding phase, the breathtaking results are well worth it. By carefully following these steps – from thorough post-curing and progressive wet sanding to diligent polishing and an optional clear coat resin application – you can achieve a truly stunning high-gloss finish. Embrace the journey, experiment with different compounds and techniques on test pieces, and soon you’ll be able to showcase your polishing resin prints prowess with pride.
Frequently asked questions
Can I skip the sanding steps and just use a clear coat to get a glossy finish?
No. A clear coat will only amplify the surface it is applied to, so it will not hide layer lines, support marks, or scratches. Without sanding progressively up to at least 2000 grit, the clear coat will cure over those imperfections, resulting in a glossy but uneven or hazy finish rather than a true mirror shine.
What is the safest way to polish small or delicate parts without breaking them?
For delicate features, avoid using a rotary tool entirely, as its torque can snap thin details. Instead, hand-polish using sanding sticks or strips of fine grit paper wrapped around a toothpick, then apply polishing compounds with a cotton swab or small microfiber cloth. Always wet-sand to reduce friction and the risk of snapping fragile sections.
Why does my print look cloudy after polishing, even though I sanded it smooth?
Cloudiness or haze usually means the scratches from your final sanding grit are still too deep for the polishing compound you used. You need to either sand one or two grits finer (e.g., go from 3000 to 5000+ grit) before polishing, or switch to a finer polishing compound. Insufficient curing of the resin before sanding can also cause a cloudy appearance.