Few things are as frustrating in the world of 3D printing as watching your carefully prepared model lift, warp, or detach from the print bed mid-print. It’s a common hurdle that can derail projects and waste precious filament. The cornerstone of a successful 3D print lies in its initial connection to the build plate – what we commonly refer to as 3D print adhesion. When your print isn’t sticking, it often points to a handful of easily identifiable and rectifiable bed adhesion issues. This guide will walk you through seven prevalent problems that cause prints to fail and offer practical solutions to help you achieve that coveted perfect first layer every time.
Understanding the crucial first layer
The first layer is arguably the most critical part of any 3D print. It sets the foundation, dictating the quality and success of everything that follows. If the first layer doesn’t adhere properly, subsequent layers will struggle to build upon it, leading to various failures. Addressing these first layer problems is key to consistent, high-quality prints.
7 common bed adhesion issues and their fixes
1. Improper bed leveling
One of the most frequent culprits behind print not sticking is an improperly leveled print bed. If the nozzle is too far from the bed, the filament won’t be pressed down enough to bond. If it’s too close, it can scrape the bed, prevent proper extrusion, or even damage the nozzle. Both scenarios lead to poor 3D print adhesion.
- The fix: Manually or automatically level your print bed. For manual leveling, use a piece of paper (typically 0.1-0.2mm thick) between the nozzle and the bed. Adjust until you feel slight resistance when moving the paper. Repeat this process at multiple points on the bed (e.g., corners and center). For printers with ABL (Automatic Bed Leveling), ensure your Z-offset is correctly calibrated after running the bed mesh.
2. Dirty print surface
Even the slightest amount of oil from fingerprints, dust, or residual filament can create a barrier between your print and the build plate, severely hindering bed adhesion issues. Over time, these contaminants accumulate and become a primary cause of first layer problems.
- The fix: Regularly clean your print surface. For most surfaces (glass, PEI, magnetic build plates), isopropyl alcohol (IPA) is your best friend. For stubborn grime, a gentle wash with warm water and dish soap, followed by a thorough rinse and air dry, can work wonders. Always ensure the bed is cool when cleaning with liquids to prevent thermal shock and potential damage.
3. Incorrect bed temperature
Different filament types require specific bed temperatures to adhere effectively. PLA, for instance, prefers a lower bed temperature (around 50-60°C) than ABS (100-110°C) or PETG (70-80°C). If the bed is too cold, the plastic won’t soften enough to bond. If it’s too hot, some filaments can become overly soft and prone to “elephant’s foot” or warping as they cool too slowly.
- The fix: Consult your filament manufacturer’s recommendations for the optimal bed temperature. Experiment within the suggested range to find the sweet spot for your specific printer and environment. A heated bed is crucial for most modern filaments to ensure good 3D print adhesion.
4. Insufficient or inappropriate adhesion aid
While some surfaces and filaments adhere well without assistance, many benefit from an adhesion aid. Without it, you might find your print not sticking, especially with larger prints or those prone to warping.
- The fix: Consider using an appropriate adhesion aid. Common options include:
- Glue stick (PVA-based): Versatile and effective for many filaments, especially PLA. Easy to apply and clean.
- Hairspray (unscented, strong hold): Good for a variety of materials, providing a thin, even coating.
- PEI sheets: Often provide excellent adhesion on their own, but can be enhanced with a light scrub with fine steel wool and IPA.
- Specialized adhesion sprays/liquids: Formulated for specific materials, offering robust adhesion.
Always ensure the chosen aid is compatible with your print surface and filament type. Apply a thin, even layer, and reapply as needed.
5. First layer speed and height (Z-offset) issues
The speed at which the first layer is printed, and its precise height (Z-offset), play a significant role in successful 3D print adhesion. Printing too fast doesn’t allow enough time for the molten plastic to bond with the bed. An incorrect Z-offset, even if the bed is level, means the nozzle isn’t at the optimal height for proper squish.
- The fix: Slow down your first layer print speed significantly (e.g., 10-25 mm/s). This allows the filament more time to adhere. Calibrate your Z-offset carefully. You want a slight “squish” – the filament should be flattened slightly against the bed, creating a smooth, continuous line without gaps or excessive ridges. Many slicers have specific settings for first layer speed and height.
6. Warping due to environmental factors
Temperature fluctuations, drafts, or a cold ambient environment can cause your print to cool unevenly, leading to shrinkage and lifting from the bed – a classic sign of bed adhesion issues. This is particularly common with materials like ABS, which are more prone to thermal contraction.
- The fix: Mitigate drafts and maintain a stable print environment. Enclosing your printer in an enclosure can help maintain a consistent temperature around the print, reducing warping. Avoid placing your printer near open windows, air conditioning vents, or in cold rooms. For materials highly susceptible to warping, a brim or raft can also increase the contact area with the bed, improving adhesion.
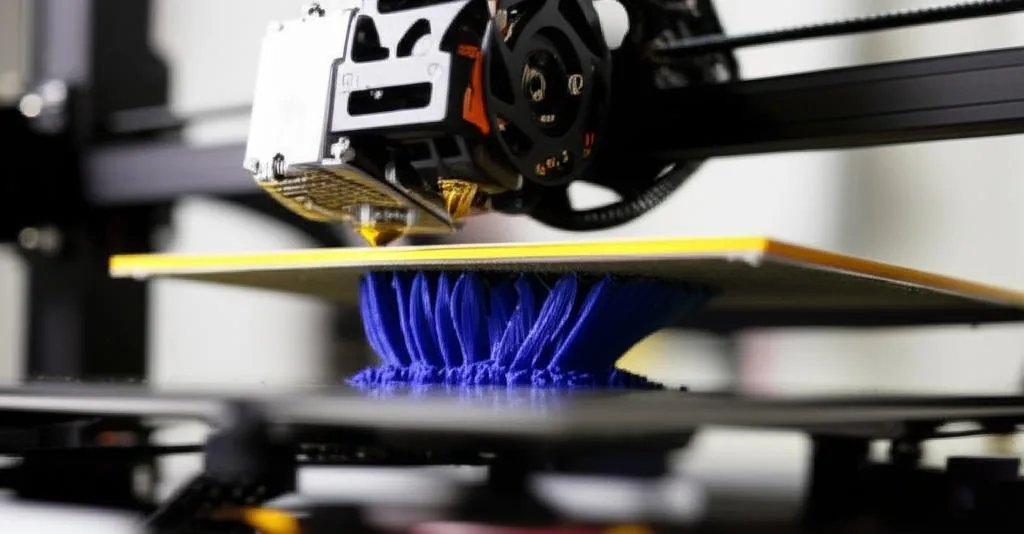
7. Under-extrusion on the first layer
If your first layer appears thin, stringy, or has gaps, you might be experiencing under-extrusion. This means not enough filament is being deposited onto the bed to form a solid, adhesive layer. This can stem from a partially clogged nozzle, incorrect flow settings, or even a worn nozzle.
- The fix:
- Check for clogs: Perform a “cold pull” or use a cleaning needle to clear any partial nozzle clogs.
- Calibrate E-steps and flow: Ensure your extruder motor is pushing the correct amount of filament (E-steps calibration) and that your slicer’s flow rate (or extrusion multiplier) is set appropriately for your filament.
- Inspect your nozzle: A worn nozzle can lead to inconsistent extrusion. Consider replacing it if it’s old or damaged.
- Increase first layer extrusion width: Some slicers allow you to slightly increase the first layer’s extrusion width, helping to ensure good contact and coverage.
Addressing under-extrusion is crucial for robust 3D print adhesion and overall print quality.
Final thoughts on troubleshooting adhesion
Overcoming bed adhesion issues is a rite of passage for many 3D printer users. It often boils down to a delicate balance of multiple factors working in harmony. Don’t be discouraged if your first attempts at troubleshooting adhesion don’t yield immediate results. Start by addressing one issue at a time, making small adjustments, and observing the impact. Keep a log of your settings and results – this will be invaluable for future prints. With a bit of patience and systematic experimentation, you’ll soon master the art of achieving flawless first layers, paving the way for countless successful 3D prints.