Few things are as frustrating for a 3D printing enthusiast as a stubborn nozzle clog. Just when your print is going smoothly, inconsistent extrusion, missing layers, or a complete halt in filament flow can bring your project to a grinding halt. While various methods exist for tackling these nuisances, the "cold pull" stands out as a remarkably effective, low-cost, and often overlooked technique for clearing debris and ensuring a clean hot end. It's a fundamental skill in any 3D printer owner's repertoire, crucial for routine maintenance and resolving those tricky partial clogs that cleaning needles just can't reach.
Understanding the cold pull method

At its core, a cold pull is a clever technique that leverages the thermal properties of filament to extract unwanted material from your 3D printer's hot end. Instead of trying to push a clog out, you're essentially creating a custom-fit cleaning tool from a piece of filament itself. The process involves heating the hot end to a temperature where the filament softens but isn't fully molten, then quickly cooling it down to a specific "pull" temperature. At this point, the filament inside the nozzle becomes semi-solid, adhering to any debris, carbonized material, or residual filament that might be stuck. A swift, firm pull then extracts this 'plug' along with the contaminants.
The beauty of the cold pull lies in its ability to clean the entire internal geometry of the nozzle and heat break, areas that are often inaccessible with other cleaning tools. It's particularly effective for removing carbonized filament, small bits of foreign material, or residual filament from previous prints that might be causing partial blockages or color contamination when switching materials.
When to perform a cold pull
Knowing when to deploy the cold pull method is key to its effectiveness. It's not just a last resort; it can be a proactive measure:
- Partial clogs: If you're experiencing under-extrusion, stringing, or inconsistent lines, but filament is still coming out, a cold pull is often the perfect solution.
- Filament debris: Sometimes, dust, dirt, or even manufacturing inconsistencies in your filament can introduce foreign particles into the nozzle.
- Preventative maintenance: Performing a cold pull periodically, especially after printing with abrasive filaments or materials prone to carbonization (like certain PETGs or PLA blends), can keep your hot end pristine.
- Switching materials: When moving from a high-temperature filament (e.g., ABS, PETG) to a lower-temperature one (e.g., PLA), residual high-temp material can cause clogs. A cold pull helps clear the path. Similarly, it's great for purging colors when changing filament hues.
Signs your nozzle might need a cold pull
Your printer often gives clear signals when it's struggling with a clog:
- Under-extrusion: Prints appear thin, weak, or have gaps where there should be solid infill.
- Inconsistent lines: Extruded lines vary in thickness, or the flow starts and stops intermittently.
- Clicking or skipping extruder: The extruder gear struggles to push filament through the restricted nozzle, often making a clicking sound as it slips.
- Poor print quality: General degradation in print quality, including layer adhesion issues, rough surfaces, or failed prints.
- Filament discoloration: If you notice dark, burnt specks in your extruded filament, it's a sign of carbonized material in the hot end.
Preparing for a successful cold pull
Before you dive in, a little preparation goes a long way to ensure safety and effectiveness.
Safety first
Remember, you'll be working with hot components. Always prioritize safety:
- Wear heat-resistant gloves: To protect your hands from the hot nozzle and heat block.
- Use eye protection: Just in case any small bits of filament or debris fly off.
- Ensure good ventilation: Some filaments can release fumes when heated.
- Be cautious: The hot end components can reach temperatures of 200°C or more. Avoid touching them directly.
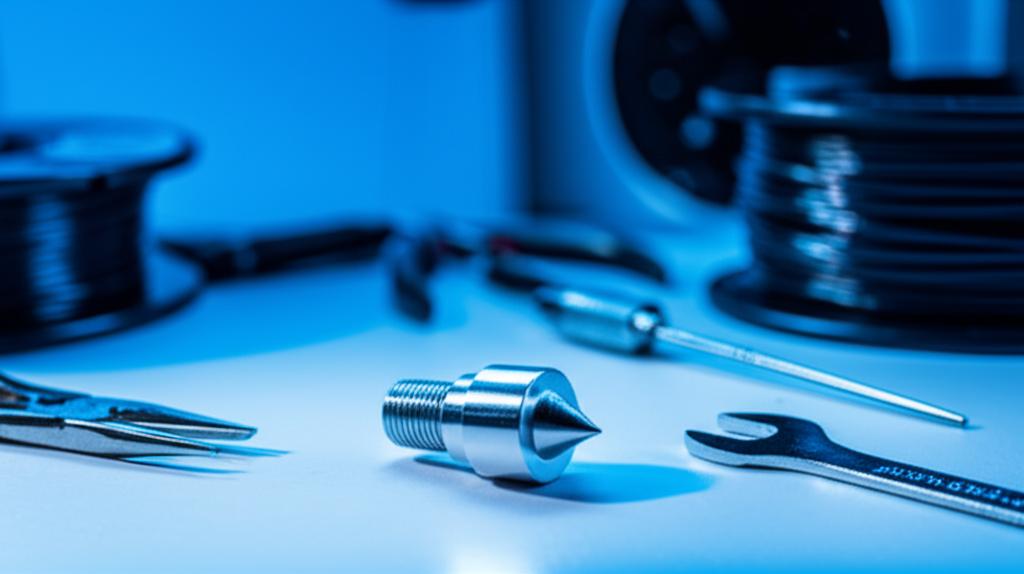
Essential tools and materials
Gathering your supplies beforehand will make the process smoother:
- Filament for the pull: Ideally, a strong, somewhat flexible filament like Nylon (PA), ABS, or PETG. PLA can work, but requires more precise temperature control.
- Pliers: For gripping the filament firmly during the pull. Needle-nose pliers or flush cutters can be helpful.
- Small cleaning brush: A brass wire brush is excellent for cleaning the exterior of the nozzle.
- Paper towels or a rag: For wiping away any extruded filament or debris.
- Your 3D printer: Of course!
Step-by-step guide to performing a cold pull
Follow these steps carefully to execute a successful cold pull and clear your nozzle.
- Heat up the hot end to printing temperature: Set your hot end to the typical printing temperature for the currently loaded filament. This ensures any material inside is fully molten and ready to be purged.
- Extrude a small amount of filament: Manually extrude about 10-20mm of filament. This helps push out any loose debris and ensures the hot end is completely filled with fresh, molten material.
- Remove the Bowden tube (if applicable) and/or release the extruder tension: If you have a Bowden setup, you'll need to disconnect the Bowden tube from the hot end to gain direct access to the filament. For direct drive extruders, simply release the tension on the extruder idler to allow free movement of the filament.
- Push the filament through manually to ensure a good melt and fill: With the Bowden tube removed (or tension released), manually push the filament down through the hot end. You should see a steady stream of molten plastic coming out of the nozzle. This ensures a complete fill and good adhesion to any internal debris.
- Reduce the hot end temperature to the "pull" temperature: This is the critical step. The ideal pull temperature is where the filament transitions from fully molten to a semi-solid, tacky state. This temperature varies significantly by filament type. (See the next section for specific recommendations).
- Wait for the temperature to stabilize: Give the hot end a minute or two to reach and stabilize at the new, lower pull temperature. This ensures even cooling throughout the nozzle.
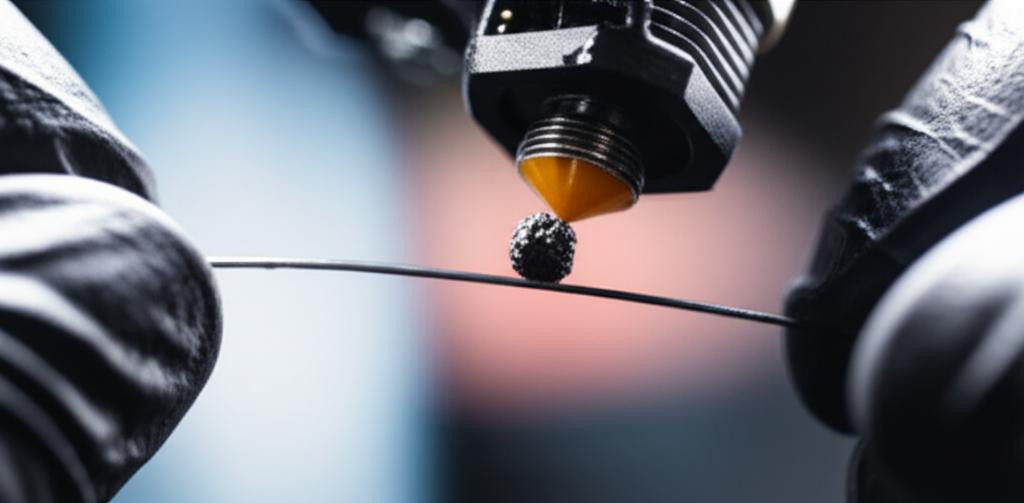
- Perform the pull: Once the temperature is stable, grip the filament firmly with your pliers just above the hot end. With a single, firm, and steady upward motion, pull the filament straight out of the hot end. Avoid yanking or twisting, as this can break the filament. The goal is to extract a 'plug' that has formed inside the nozzle.
- Inspect the pulled filament: Examine the tip of the extracted filament. It should have a clean, conical shape that mirrors the internal geometry of your nozzle. You'll often see carbonized bits, discolored residue, or other debris attached to the tip. This is a good sign – it means you've successfully pulled out contaminants.
- Repeat if necessary: If the first pull doesn't show a perfectly clean nozzle-shaped tip, or if you still suspect a clog, repeat the process. Sometimes it takes two or three pulls to get everything out. You can also try slightly adjusting your pull temperature up or down by 5°C if the filament keeps breaking or comes out too clean.
- Reload filament and test: Once satisfied, reattach the Bowden tube (if applicable), reload your desired filament, and perform a small test extrusion or print. You should see a consistent, clean flow.
Optimizing your cold pull: filament choices and temperatures
The success of your cold pull often hinges on choosing the right filament and the correct pull temperature.
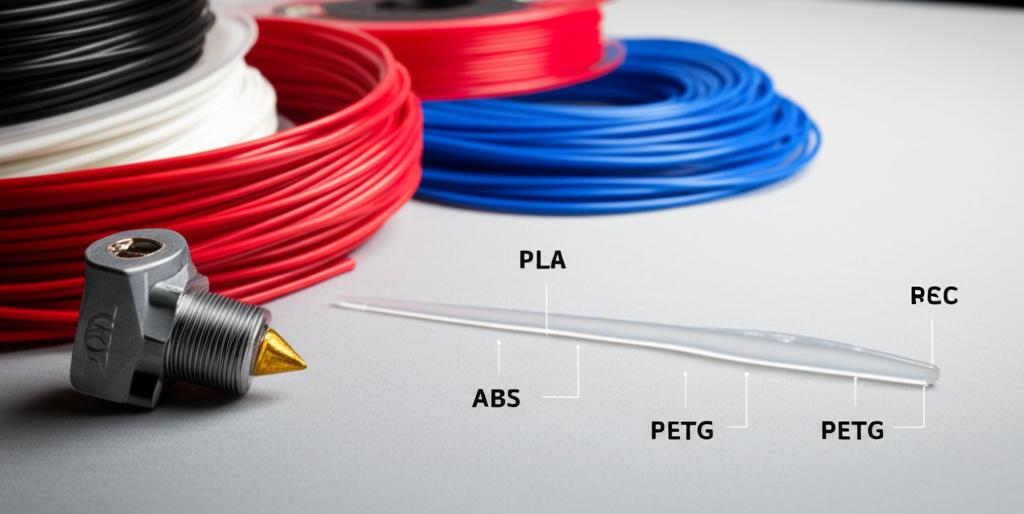
Best filaments for cold pulls
- Nylon (PA): Widely considered the gold standard for cold pulls. Nylon has excellent adhesion properties when semi-molten and is incredibly strong and flexible, making it less prone to breaking during the pull. It can effectively grab onto stubborn debris.
- ABS: A good alternative to Nylon. ABS is strong and melts at a higher temperature than PLA, allowing it to adhere well to various residues. It's generally more rigid than Nylon, so a slightly more precise pull temperature might be needed to prevent breakage.
- PETG: Also a viable option, offering a good balance of strength and adhesion. It tends to be a bit stickier than ABS, which can be an advantage.
- PLA: Can be used, but with more caution. PLA tends to be brittle and can break easily, especially if the temperature isn't perfectly dialed in. If you only have PLA, use it, but be prepared for potential breakage and possibly needing more attempts.
Recommended pull temperatures for common filaments
These are general guidelines; your specific printer and filament brand might require slight adjustments. Always start with the recommended printing temperature of the filament you're using for the pull, then reduce it to these ranges:
- PLA: Print at 200-210°C, then pull between 90-110°C.
- ABS: Print at 230-245°C, then pull between 120-140°C.
- PETG: Print at 230-245°C, then pull between 110-130°C.
- Nylon (PA): Print at 240-260°C, then pull between 130-160°C.
The exact pull temperature is often found by experimentation. If the filament breaks, the temperature might be too low. If it comes out too clean or stretches, it might be too high.
Troubleshooting common cold pull issues
Even with careful preparation, you might encounter a few hiccups:
- Filament breaks: This is usually a sign that the pull temperature is too low, making the filament too brittle. Increase the pull temperature by 5-10°C and try again. Alternatively, the pull might have been too sudden or not straight.
- Unable to pull filament: If the filament won't budge, it's likely too cold, or the clog is extremely severe. Reheat the hot end to printing temperature, manually push filament through, and then try the pull again at a slightly higher temperature.
- No improvement after pull: If the print quality doesn't improve, the clog might be beyond the scope of a cold pull. This could indicate a severely damaged nozzle, a clog further up in the heat break, or even a problem with your extruder.
- Filament comes out stretched or stringy: The pull temperature is likely too high, and the filament is still too molten to grab effectively. Lower the temperature by 5-10°C.
Comparing cold pull with other clog removal methods
The cold pull is a powerful tool, but it's one of several approaches to maintaining your hot end. Understanding its place among other techniques can help you choose the most appropriate action for your specific situation.
Cold pull: a cost-effective, preventative approach
The primary advantage of the cold pull is its simplicity and minimal resource requirement. It's a maintenance procedure that leverages materials you already have – filament – and requires no specialized tools beyond basic pliers. This makes it an incredibly cost-effective first line of defense against clogs.
- Advantages: Uses existing filament, requires minimal tools, highly effective for partial clogs and removing carbonized debris, excellent for purging material and color changes, relatively quick to perform.
- Cost implications: Essentially free, as it uses a small amount of existing filament.
- Best for: Minor to moderate clogs, preventative maintenance, changing filament types or colors.
Alternative and complementary methods
While the cold pull is versatile, some situations call for different or complementary strategies. The choice often depends on the severity and nature of the clog, as well as the user's comfort level with disassembling components.
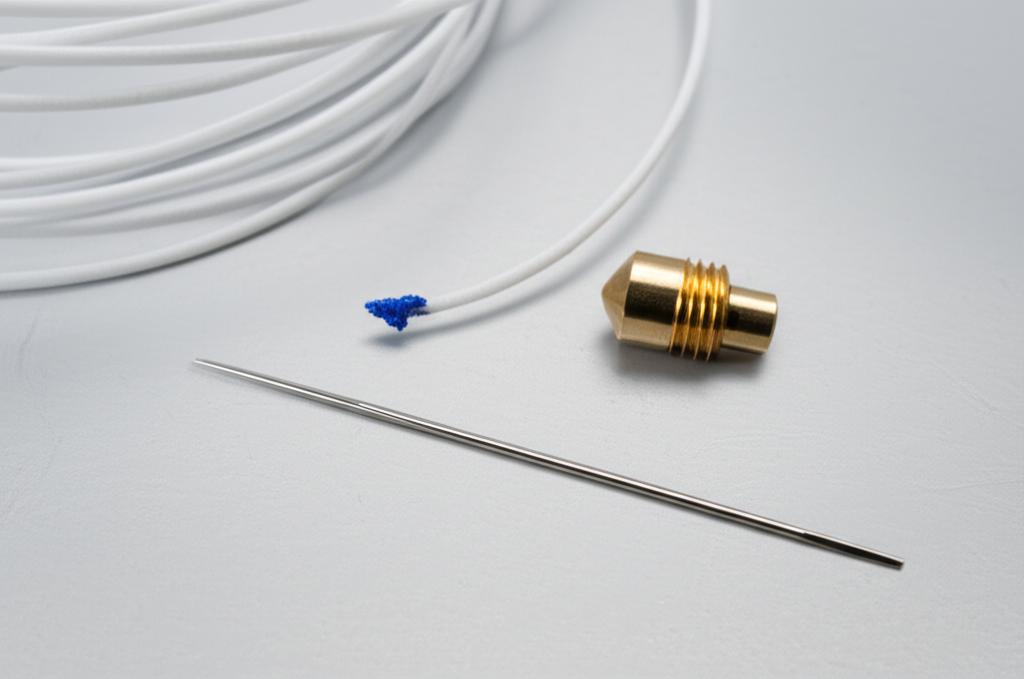
Nozzle cleaning needles
These thin, flexible needles (often 0.4mm or smaller) are designed to be inserted into the nozzle orifice to dislodge superficial clogs. They are quick to use and can clear blockages at the very tip of the nozzle.
- Features: Easy to use, good for surface-level obstructions.
- Cost implications: Very low cost, usually sold in packs.
- When to use: For immediate, visible clogs at the nozzle opening. Less effective for clogs higher up in the hot end or carbonized material.
Hot end disassembly and manual cleaning
For more severe or persistent clogs, completely disassembling the hot end and cleaning individual components (nozzle, heat break, heat sink) can be necessary. This involves heating the parts and carefully removing softened filament or debris with tools.
- Features: Most thorough cleaning method, allows inspection of all components.
- Cost implications: Requires basic hand tools (wrenches, hex keys). No direct material cost beyond cleaning supplies.
- When to use: When cold pulls and cleaning needles fail, or when there's a suspected clog in the heat break. More time-consuming and requires a higher level of technical comfort.
Nozzle replacement
Sometimes, a clog is so severe, or the nozzle itself is damaged (e.g., worn orifice, internal scoring), that replacement is the most straightforward and effective solution. Nozzles are consumable parts and will eventually wear out, especially with abrasive filaments.
- Features: Guarantees a clean, unworn extrusion path.
- Cost implications: Requires purchasing a new nozzle (cost varies widely depending on material and brand, from a few dollars to much more for hardened steel or specialty nozzles).
- When to use: For irreparable clogs, worn-out nozzles, or when troubleshooting indicates the nozzle itself is the root cause. It's the most definitive solution for nozzle-related issues.
Chemical cleaners
Certain specialized chemical solutions or filament types (e.g., cleaning filaments) are designed to dissolve or grab onto stubborn residues within the hot end. These are less common for general clogs but can be effective in niche situations.
- Features: Can reach hard-to-access areas, passive cleaning.
- Cost implications: Requires purchasing specific cleaning products or filaments.
- When to use: For specific types of difficult residues that resist mechanical removal. Always check compatibility with your printer's components.
Ultimately, the choice of method depends on the symptoms your printer exhibits, the resources at your disposal, and your comfort level with printer maintenance. A cold pull is often the best first step due to its low impact and high success rate for common clogs, potentially saving you the time and expense of more invasive procedures or component replacements.
Maintaining your 3D printer: preventing future clogs

An ounce of prevention is worth a pound of cure, especially in 3D printing. Incorporating good habits can significantly reduce the frequency of clogs:
- Proper filament storage: Keep filament in airtight containers with desiccant to prevent moisture absorption, which can lead to steam bubbles and clogs during printing.
- Regular cold pulls: Make cold pulls a part of your routine maintenance, especially after long prints or before switching to a new material.
- Clean your hot end regularly: Use a brass wire brush to clean the exterior of your nozzle and heat block, preventing plastic buildup from migrating into the nozzle.
- Use correct retraction settings: Excessive retraction can pull molten filament into the colder parts of the heat break, leading to heat creep and clogs.
- Invest in quality filament: Cheaper filaments can sometimes contain impurities or inconsistent diameters, increasing the risk of clogs.
- Ensure proper cooling: Adequate part cooling and hot end cooling are crucial. Heat creep (heat migrating up the hot end) is a major cause of clogs.
The cold pull method is more than just a repair technique; it's a fundamental part of proactive 3D printer maintenance. By understanding how and when to perform it, you empower yourself to keep your printer running smoothly, extend the life of your nozzles, and ultimately, enjoy a more reliable and frustration-free 3D printing experience. Mastering this simple yet effective procedure will undoubtedly save you time, filament, and countless headaches in the long run, proving its worth as an indispensable skill for any maker.