For professionals working with Autodesk 3ds Max, especially on intricate architectural visualizations, the dreaded “lag monster” is a familiar foe. Complex scenes, replete with high-polygon models, detailed textures, and elaborate lighting setups, can bring even powerful workstations to their knees, leading to frustrating slowdowns in the viewport and extended rendering times. This isn't just an inconvenience; it directly impacts productivity, creativity, and project deadlines. Understanding the root causes of these performance bottlenecks and implementing strategic optimization techniques is crucial for maintaining a smooth, efficient workflow.
This guide delves into advanced strategies for optimizing 3ds Max performance, focusing on practical tips for taming viewport lag and streamlining rendering processes in large-scale architectural projects. We'll explore hardware considerations, scene management best practices, and specific software settings that can make a world of difference.
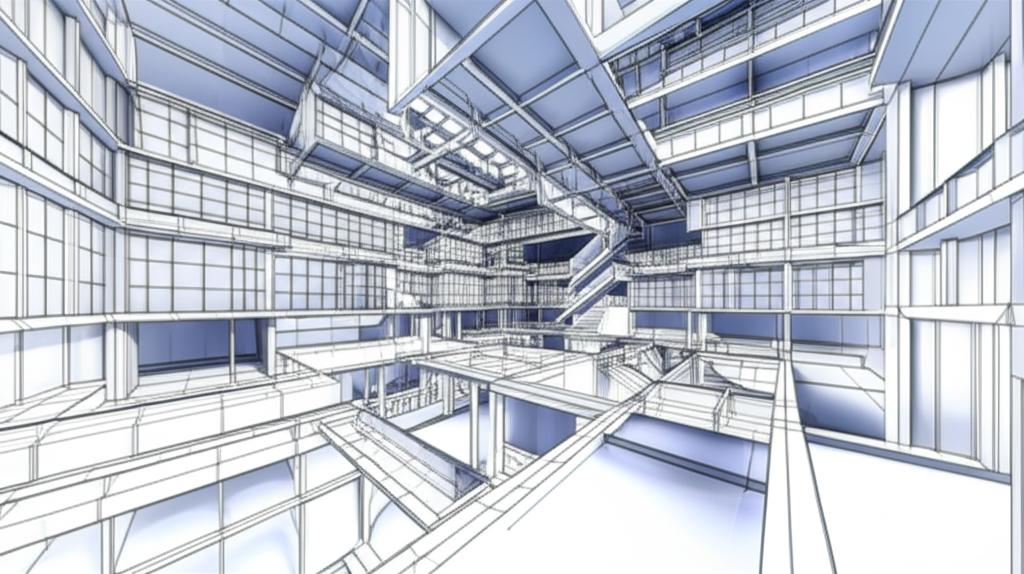
Understanding the performance puzzle in 3ds Max

Explore the
Snapmaker U1
Before diving into solutions, it's essential to grasp what contributes to performance issues. 3ds Max is a resource-intensive application, and its demands scale exponentially with scene complexity. Several factors play a role:
- Viewport display: The real-time rendering of geometry, textures, and effects in your active viewport. High polygon counts, numerous objects, complex materials, and active modifiers all tax the GPU and CPU.
- Scene complexity: The sheer number of polygons, objects, lights, cameras, and helper objects in your scene. Every element adds overhead.
- Memory usage: Textures, models, and scene data consume RAM. Insufficient RAM leads to constant swapping to disk, causing significant slowdowns.
- CPU workload: Calculations for modifiers, simulations, animation, and ultimately, rendering, are heavily CPU-dependent.
- GPU workload: Primarily responsible for drawing the viewport, but also crucial for GPU-accelerated renderers.
- Disk I/O: Loading and saving scenes, textures, and external assets depends on disk speed.
Hardware: The foundation of 3ds Max performance
While software optimization is vital, your hardware forms the bedrock of your 3ds Max experience. Investing in the right components can significantly impact your ability to handle large scenes efficiently. When considering hardware for 3D modeling and rendering, it's not just about raw power, but balanced components that work synergistically.
Central processing unit (CPU)
The CPU is the brain of your workstation, crucial for calculating modifiers, simulations, and most importantly, rendering. For architectural visualization, where render times are critical, a powerful multi-core CPU is paramount. Processors with a high core count excel in rendering tasks, as render engines can distribute the workload across multiple threads. However, a balance between core count and single-core clock speed is beneficial, as some viewport operations and modeling tasks still benefit from higher clock speeds. When evaluating CPUs, consider:
- Core count: More cores generally mean faster rendering, but diminishing returns can occur past a certain point for non-rendering tasks.
- Clock speed: Higher clock speeds benefit single-threaded operations and overall responsiveness.
- Cache size: Larger caches can improve performance by reducing the time the CPU spends waiting for data from RAM.
Graphics processing unit (GPU)
The GPU is primarily responsible for drawing the viewport in 3ds Max. A robust GPU ensures a smooth, responsive viewport experience, even with complex geometry and advanced display modes. For GPU-accelerated renderers (like V-Ray GPU or Corona Renderer's interactive rendering), the GPU becomes a rendering powerhouse. When selecting a GPU, key aspects include:
- VRAM: Graphics memory is crucial for displaying high-resolution textures and complex models in the viewport. More VRAM allows for larger and more detailed scenes without performance degradation. For GPU rendering, VRAM is often the bottleneck, as the entire scene must fit into it.
- CUDA/Stream Processors: These indicate the raw processing power for parallel computations, directly impacting GPU rendering speed.
- Architecture: Newer architectures often bring significant performance and efficiency improvements.
The choice between professional (e.g., NVIDIA Quadro, AMD Radeon Pro) and consumer-grade (e.g., NVIDIA GeForce, AMD Radeon) GPUs often comes down to budget and specific needs. Professional cards offer certified drivers, higher VRAM options, and better double-precision performance, but consumer cards often provide superior raw rendering power for their price point, making them a popular choice for many arch-viz artists.
Random access memory (RAM)
RAM is where 3ds Max stores active scene data, textures, and other temporary files. Insufficient RAM is a common cause of slowdowns, as the system resorts to using the much slower hard drive for virtual memory. For large architectural scenes, 32GB of RAM should be considered a minimum, with 64GB or even 128GB being highly recommended for truly massive projects. Look for:
- Capacity: Prioritize quantity.
- Speed: Faster RAM (e.g., DDR4 3200MHz or DDR5) can offer marginal performance gains, but capacity is generally more critical.
Storage: SSDs are non-negotiable
Solid-state drives (SSDs) are essential for a responsive 3ds Max experience. They dramatically reduce scene loading and saving times, texture loading, and overall system responsiveness compared to traditional hard disk drives (HDDs). NVMe SSDs, connected via PCIe, offer significantly faster speeds than SATA SSDs and are highly recommended for your operating system, 3ds Max installation, and active project files. HDDs can still be used for archival storage or less frequently accessed assets.
Viewport optimization techniques
Explore the
Snapmaker U1
A sluggish viewport is a major productivity killer. These techniques focus on making your interactive experience as smooth as possible.
1. Object display properties
- Display as box: For complex objects that aren't currently being worked on, right-click > Object Properties > check 'Display as Box'. This dramatically reduces the GPU load.
- See-through: Use 'See-Through' for objects you need to see behind without hiding them completely.
- Backface cull: Enable 'Backface Cull' in object properties for single-sided geometry to avoid drawing invisible polygons.
2. Layer management and scene explorer
Effective layer organization is not just for tidiness; it's a powerful optimization tool.
- Hide unnecessary layers: Use the Layer Explorer (or Scene Explorer) to hide entire categories of objects (e.g., furniture, entourage, distant context models) when not actively working on them.
- Freeze objects: Freezing objects prevents accidental selection and reduces some viewport overhead.
- Scene Explorer's filtering: Utilize the Scene Explorer's powerful filtering capabilities to quickly isolate and manage specific types of objects.
3. Adaptive degradation
Found under 'Customize' > 'Viewport Configuration' > 'Adaptive Degradation' tab, this feature automatically simplifies the viewport display when you navigate, ensuring a smoother experience. Adjust the 'Degradation Level' and 'Frames Per Second' threshold to find a balance between visual quality and responsiveness.
4. Nitrous viewport settings
The Nitrous viewport offers excellent performance, but its settings can be tweaked. Access them via 'Customize' > 'Viewport Configuration' > 'Display Performance' tab.
- Disable unnecessary effects: Turn off 'Shadows', 'Ambient Occlusion', and 'Exposure Control' in the viewport unless you specifically need them for preview.
- Texture display: Reduce the 'Texture Maps' quality or set it to 'Shaded' instead of 'Realistic' when working on geometry.
- Display statistics: Enable 'Show Statistics' (right-click on viewport label > Configure Viewport Layout > Statistics) to monitor polygon and frame rates, helping you identify performance bottlenecks.
5. Isolate selection
When working on a specific part of a complex scene, use 'Isolate Selection' (Alt+Q) to temporarily hide everything else. This dramatically reduces the number of polygons the viewport has to draw, providing instant performance gains.
Scene management and modeling practices
Good modeling habits and scene organization are fundamental to optimal performance.
1. Use proxies for high-poly assets
This is arguably one of the most impactful optimization techniques for large scenes. Proxies replace high-polygon models (trees, furniture, cars, entourage) with lightweight bounding boxes, simplified meshes, or point clouds in the viewport, while the full geometry is only loaded at render time. Most modern renderers (V-Ray, Corona, FStorm) have their own highly optimized proxy systems:
- V-Ray Proxy: Excellent for converting mesh objects into .vrmesh files.
- Corona Proxy: Similar functionality for Corona Renderer.
- Forest Pack / RailClone: These plugins are specialized for scattering and distributing large numbers of proxy objects efficiently, ideal for vegetation or repetitive architectural elements.
Converting detailed assets into proxies can drastically reduce viewport lag and memory usage.
2. Instance vs. copy
When duplicating objects, always use 'Instance' instead of 'Copy' or 'Reference' whenever possible. Instances share the same mesh data in memory, meaning 3ds Max only stores the geometry once, regardless of how many instances you have. This significantly reduces RAM usage and file size. Copies, on the other hand, create unique geometric data for each duplicate.
3. External references (XRef)
For collaborative projects or extremely large scenes, XRef (External Reference) is invaluable. It allows you to link external 3ds Max files into your current scene without fully merging them. This means:
- Reduced file size: Your main scene file remains smaller.
- Improved stability: Issues in an XRef scene don't necessarily corrupt your main scene.
- Collaborative workflow: Multiple artists can work on different parts of a project simultaneously, with changes updating automatically.
Use XRefs for large building components, site context, or detailed interior elements.
4. Clean geometry and polygon count
While modern hardware can handle millions of polygons, unnecessary density still impacts performance. Regularly audit your scene for:
- Excessive subdivisions: Use modifiers like 'TurboSmooth' or 'OpenSubdiv' judiciously. Apply them only when needed and at appropriate iteration levels.
- Hidden geometry: Delete or optimize geometry that will never be seen by the camera.
- Unused objects: Periodically clean up your scene using 'File' > 'Clean Up' or 'Asset Tracking' to remove unreferenced objects.
- Merge objects: Combine smaller, static objects into single meshes where appropriate to reduce the number of individual objects in the scene.
5. Units setup
Ensure your system units and display units are correctly set and consistent across all imported models. Mismatched units can lead to scaling issues, display artifacts, and potentially performance problems, especially when importing external assets.
Material and texture optimization

Materials and textures are often overlooked performance culprits.
1. Efficient texture sizes
High-resolution textures consume significant VRAM and RAM. Use textures at appropriate resolutions:
- Match resolution to screen/render size: A texture on a distant object doesn't need to be 8K.
- Use bitmap paging: In 'Customize' > 'Preferences' > 'Files' tab > 'Bitmap Paging', enable this to load only necessary parts of large textures into memory.
- Convert formats: JPEG is often more memory-efficient than uncompressed formats like TIFF or TGA for final renders, though PNG or EXR are preferred for alpha channels or HDR data.
2. Material complexity
Complex materials with numerous layers, blend maps, or extensive procedural maps can increase render times. Simplify materials where visual impact is minimal. Use instances of materials where possible to reduce memory footprint.
Lighting and rendering optimization

While the focus is on viewport lag, efficient rendering is the ultimate goal. These tips contribute to faster final output.
1. Optimize light sources
- Limit light count: Too many lights, especially complex photometric or area lights, can slow down rendering. Use them strategically.
- Exclude objects: Use the 'Exclude' option in light properties to prevent lights from affecting objects where their contribution isn't needed or desired.
- Shadows: High-quality shadows are render-intensive. Optimize shadow settings (e.g., reduce samples for less critical lights) or disable them for distant, unimportant lights.
2. Render settings
Each renderer (V-Ray, Corona, etc.) has its own set of optimization parameters. Familiarize yourself with them:
- Adaptive sampling: Utilize adaptive sampling methods that focus render power where it's most needed (e.g., areas with high contrast or noise).
- Global Illumination (GI): Experiment with different GI engines and settings. For example, in V-Ray, Irradiance Map + Light Cache is often faster than Brute Force for exterior architectural scenes.
- Render elements: Render elements are useful for post-production but add overhead. Only include those you actually need.
3. Distributed rendering/render farms
For large-scale projects with tight deadlines, distributed rendering (using multiple machines on a network) or cloud-based render farms can drastically reduce render times. This is a significant investment in terms of hardware or service costs, but it offers unparalleled scalability for professional production.
Software maintenance and plugins

1. Keep 3ds Max and drivers updated
Autodesk regularly releases updates and service packs that include performance enhancements and bug fixes. Similarly, keep your GPU drivers updated to the latest stable version from NVIDIA or AMD, as these often contain crucial optimizations for 3D applications.
2. Useful plugins and scripts
Several third-party plugins and scripts can aid in performance optimization:
- Scene Cleaner scripts: Many free and paid scripts help remove corrupt data, unused assets, and optimize scene elements.
- Polygon reduction tools: Plugins like 'Polygon Cruncher' can intelligently reduce polygon counts without significant loss of detail.
- Asset tracking tools: Better management of external files and textures.
Conclusion
Taming the lag monster in 3ds Max for complex architectural scenes is not a one-time fix but an ongoing process that requires a multi-faceted approach. It's a blend of strategic hardware investment, diligent scene management, smart modeling practices, and a deep understanding of 3ds Max's settings and your chosen renderer. By consistently applying these advanced optimization tips, you can significantly reduce viewport lag, accelerate rendering times, and ultimately create a more efficient, enjoyable, and productive workflow. The goal is to spend less time waiting and more time creating, ensuring your professional 3D rendering tips translate into stunning, timely visualizations.
