Polycarbonate (PC) stands out as a formidable material in the realm of 3D printing, particularly when the goal is to produce robust, high-performance parts. Renowned for its exceptional strength, rigidity, and impressive heat resistance, PC filament is a go-to choice for engineering-grade applications where parts must withstand significant mechanical stress or operate in elevated temperature environments. However, harnessing the full potential of a polycarbonate 3D print requires a nuanced understanding of its unique characteristics and a diligent application of best practices to ensure optimal PC strength and reliable mechanical properties, especially focusing on critical aspects like layer adhesion.
Understanding polycarbonate: an engineering marvel

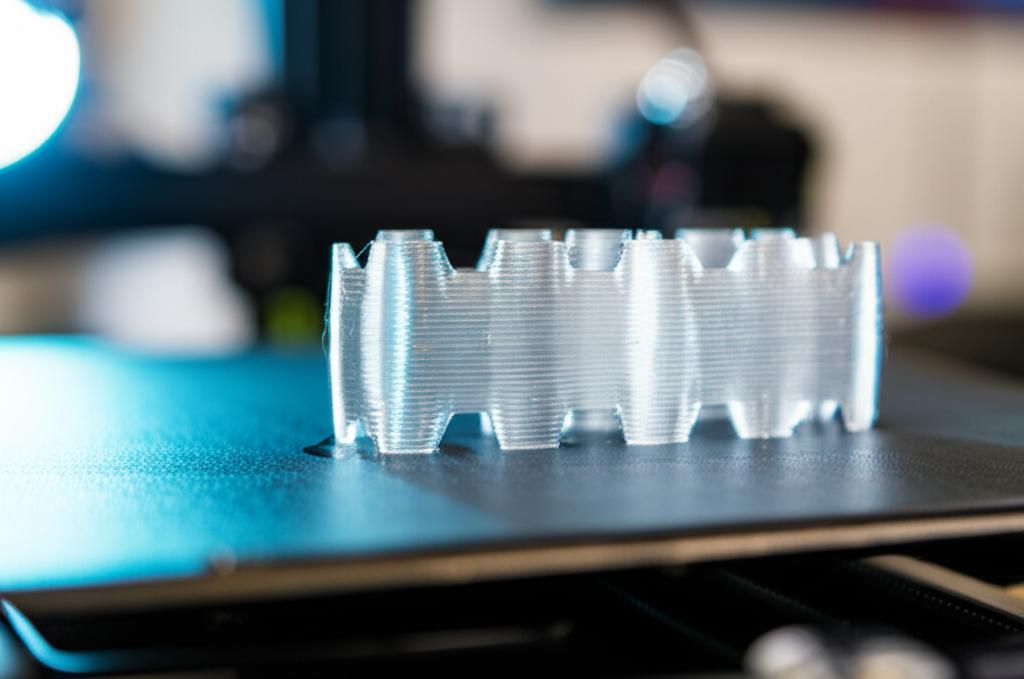
Polycarbonate is a thermoplastic polymer characterized by its transparency, toughness, and high glass transition temperature. In 3D printing, these attributes translate into parts that are not only durable but can also endure impacts and high temperatures far better than common filaments like PLA or ABS. Its high-performance capabilities make it ideal for functional prototypes, industrial tooling, automotive components, and protective gear. The challenge, however, lies in its demanding printing requirements, which often deter novice users.
Why PC is chosen for high-performance parts
- Exceptional Strength-to-Weight Ratio: PC offers a compelling balance of high impact resistance and stiffness without excessive weight.
- High Heat Deflection Temperature: Parts maintain their structural integrity at temperatures where other plastics would deform.
- Dimensional Stability: PC parts tend to retain their shape and size under varying conditions, crucial for precision applications.
- Electrical Insulation Properties: Useful for components in electronics.
- Transparency: While not always the primary concern for engineering parts, transparent PC options are available.
Overcoming common challenges in polycarbonate 3D printing
While the benefits of a polycarbonate 3D print are clear, the material presents several hurdles that must be addressed to achieve successful, strong parts. These primarily revolve around its tendency to warp, its susceptibility to moisture, and the difficulty in achieving consistent layer adhesion.
Moisture absorption: the silent killer of PC strength
Polycarbonate is hygroscopic, meaning it readily absorbs moisture from the air. Moist filament can lead to a host of problems during printing, including:
- Bubbling and popping sounds from the nozzle.
- Poor layer adhesion, significantly compromising PC strength.
- Inconsistent extrusion and stringing.
- Brittle parts with reduced mechanical properties.
Best Practice: Always store PC filament in a dry environment, ideally in a sealed bag with desiccant. Before printing, it's highly recommended to dry the filament in a dedicated filament dryer or a convection oven at around 70-80°C for several hours (e.g., 4-6 hours) to ensure it's completely dry. This step is non-negotiable for maximizing PC strength.
Warping: the battle against thermal stress
PC has a high glass transition temperature, which means it requires high printing temperatures. This, combined with its tendency to shrink as it cools, makes it highly prone to warping – where the edges of the print lift from the build plate. Warping can ruin a print and severely compromise the structural integrity of the part.
Best Practice: A heated build chamber is almost essential for larger PC prints. For smaller parts, a well-enclosed printer can significantly help. The enclosure helps maintain a consistently warm ambient temperature around the print, slowing down the cooling process and reducing thermal stress. Additionally, ensuring proper build plate adhesion is paramount.
Pre-printing best practices for robust PC parts
Success with polycarbonate 3D print often begins before the first layer is even laid down. Meticulous preparation can make all the difference in achieving high-performance parts.
Printer enclosure: a critical component
As mentioned, an enclosure is vital. It maintains a stable, elevated temperature around the print, which is crucial for preventing warping and improving layer adhesion. Without it, the rapid cooling of printed layers can lead to internal stresses and eventual delamination, directly impacting PC strength.
Build plate preparation: securing the foundation
Achieving strong adhesion to the build plate is fundamental for preventing warping. Several surfaces and adhesion aids work well with PC:
- PEI (Polyetherimide) Sheets: Often considered the gold standard for PC. A lightly textured PEI sheet heated to 110-130°C provides excellent adhesion.
- Garolite (G10/FR4): Another effective surface, particularly when heated.
- PVA Glue Stick or ABS Slurry: Applying a thin layer can significantly improve adhesion on glass or other surfaces.
- High Bed Temperatures: Typically, a bed temperature of 100-130°C is required. Experiment within this range based on your specific PC filament and printer setup.
Optimizing print settings for maximum PC strength

Fine-tuning your printer's settings is where you truly unlock the mechanical properties of a polycarbonate 3D print. Each parameter plays a role in the final part's integrity.
Nozzle temperature: the heart of layer adhesion
Polycarbonate requires high extrusion temperatures to flow smoothly and bond effectively. Too low a temperature will result in poor layer adhesion and a brittle part. Too high, and you risk degradation or excessive stringing.
- Typical Range: 260-310°C. Consult your filament manufacturer's recommendations first.
- Impact on Strength: Higher temperatures generally lead to better layer adhesion, which is critical for overall PC strength.
Bed temperature: preventing warp and promoting bond
As discussed, a hot bed is essential. It keeps the initial layers warm, reducing thermal shock and improving adhesion to both the bed and subsequent layers.
- Typical Range: 100-130°C.
- Consideration: An enclosed printer allows for even higher bed temperatures without excessive heat loss, further aiding in warp prevention.
Print speed: balancing detail and strength
While faster prints are tempting, slowing down is often beneficial for polycarbonate. Slower speeds allow each layer more time to properly melt and bond with the previous one, enhancing layer adhesion and overall PC strength.
- Recommended Range: Start around 30-60 mm/s.
- Impact: Slower speeds can also improve dimensional accuracy and surface finish.
Cooling fan: less is often more
Unlike PLA, where cooling is crucial for overhangs and bridging, excessive cooling with PC can be detrimental. Rapid cooling can cause layers to shrink unevenly, leading to warping and reduced layer adhesion.
- General Rule: Use minimal to no cooling fan, especially for the first few layers and for parts that prioritize strength over aesthetic overhangs.
- Exception: Very small details or extreme overhangs might require a small amount of cooling, but use it sparingly.
Layer height and infill: engineering for specific loads
These settings directly influence the mechanical properties and weight of your high-performance parts.
- Layer Height: Thicker layers (e.g., 0.2-0.3mm) can sometimes lead to stronger parts due to better inter-layer fusion, but at the cost of detail. Thinner layers (e.g., 0.1-0.15mm) offer finer detail but might require more precise temperature control for good layer adhesion.
- Infill Density and Pattern: For maximum PC strength, higher infill densities (e.g., 50-100%) are often used. Patterns like rectilinear, grid, or gyroid offer good strength characteristics.
- Wall Thickness (Perimeters): Increasing the number of perimeters (outer walls) significantly contributes to the part's overall strength and rigidity. Aim for at least 3-5 perimeters for engineering-grade parts.
Post-processing for enhanced mechanical properties
While often overlooked, post-processing can further refine the mechanical properties and PC strength of your printed parts.
Annealing: stress relief and potential strength boost
Annealing involves heating a printed part in a controlled environment (like an oven) to a temperature below its glass transition temperature, then slowly cooling it. This process can:
- Relieve Internal Stresses: Reduces the likelihood of future warping or cracking.
- Improve Dimensional Stability: Helps the part retain its shape.
- Potentially Increase Strength: For some materials, annealing can improve crystallinity, leading to increased strength and stiffness. However, it can also introduce some shrinkage or deformation, so careful experimentation is needed.
Method: Place the part in a cold oven, heat it to a specific temperature (e.g., 100-120°C for PC, check filament specific guidelines), hold for 1-2 hours, then allow it to cool slowly with the oven. Monitor for deformation.
Troubleshooting common polycarbonate printing issues

Even with best practices, issues can arise. Here's a quick guide to common problems and their potential solutions when working with a polycarbonate 3D print.
Persistent warping
- Check Enclosure: Is it sealed well? Is the ambient temperature inside high enough?
- Increase Bed Temperature: Incrementally raise the bed temperature within the recommended range.
- Improve Bed Adhesion: Reapply adhesion aids, ensure the PEI sheet is clean, or try a different build surface.
- Slow Down First Layers: Print the initial layers very slowly to maximize adhesion.
- Brim/Raft: Use a wide brim or a raft to increase the contact area with the build plate.
Poor layer adhesion (brittle parts)
- Dry Filament: Re-dry your filament thoroughly. This is the most common culprit.
- Increase Nozzle Temperature: Raise the extrusion temperature in 5°C increments.
- Reduce Print Speed: Allow more time for layers to fuse.
- Minimize Cooling: Turn off or significantly reduce part cooling.
- Check for Under-extrusion: Ensure your extruder is calibrated and not skipping steps.
Stringing and oozing
- Retraction Settings: Increase retraction distance and speed.
- Nozzle Temperature: Slightly reduce nozzle temperature (if not compromising layer adhesion).
- Dry Filament: Moist filament can cause excessive stringing.
Applications of strong polycarbonate 3D prints

The ability to produce high-performance parts with excellent PC strength opens doors to numerous applications across various industries:
- Automotive: Prototypes for dashboards, light housings, and under-the-hood components.
- Aerospace: Jigs, fixtures, and non-critical components requiring high strength and heat resistance.
- Industrial Manufacturing: Tooling, custom fixtures, and end-use parts for machinery.
- Medical Devices: Sterilizable components and durable prototypes.
- Consumer Goods: Durable housings, protective covers, and functional parts.
Conclusion

Printing with polycarbonate filament is undoubtedly more challenging than working with standard materials, but the rewards of achieving exceptional PC strength and robust mechanical properties are well worth the effort. By meticulously addressing moisture control, maintaining a stable thermal environment, optimizing print settings for superior layer adhesion, and considering post-processing techniques, makers can consistently produce high-performance parts that stand up to rigorous demands. Embracing these best practices transforms the perceived difficulty of a polycarbonate 3D print into a pathway for creating truly engineering-grade components.
