In the intricate world of 3D printing, achieving truly flawless prints often feels like an elusive quest. While many factors contribute to print quality, one of the most impactful yet frequently overlooked advanced calibration techniques is pressure advance (or linear advance, depending on your firmware). This clever feature is your secret weapon against the dreaded corner blobs, inconsistent extrusion, and fuzzy details that can plague even the most meticulously tuned machines. By mastering pressure advance, you're not just tweaking a setting; you're fundamentally enhancing your printer's ability to extrude plastic precisely when and where it's needed, leading to remarkably sharper corners, smoother surfaces, and overall superior print consistency.
Understanding the physics: why pressure advance is necessary

To truly appreciate the magic of pressure advance, it's essential to grasp the underlying physics at play within your hotend. Imagine your hotend as a long, narrow tube filled with molten plastic. When the extruder motor pushes filament into this tube, it creates pressure. This pressure is what forces the molten plastic out of the nozzle. However, this system isn't instantaneous.
- Pressure Build-up: When your printer suddenly accelerates or changes direction (like approaching a corner), the extruder needs to push more plastic to maintain a consistent flow. This rapid increase in demand leads to a momentary pressure build-up within the hotend. If not compensated, this excess pressure will cause more plastic than necessary to be extruded at the corner, resulting in a visible blob or bulge.
- Pressure Release: Conversely, when your printer decelerates or finishes a line, the demand for plastic decreases. The residual pressure in the hotend continues to push plastic out of the nozzle for a fraction of a second, even after the extruder has slowed down. This can lead to under-extrusion at the start of new lines or a slight thinning of lines after corners, contributing to inconsistent wall thickness.
This inherent lag between the extruder's command and the actual plastic flow is the root cause of many print quality issues, particularly those related to sharp changes in print speed or direction. The extruder simply can't react instantly to these dynamic changes, and that's where pressure advance steps in.
How pressure advance works: anticipating extrusion needs

Pressure advance is a sophisticated algorithm designed to counteract this hotend pressure lag by dynamically adjusting the extruder's movement based on anticipated changes in print speed and acceleration. Instead of simply reacting to commands, it proactively modifies extrusion rates.
Here's the core concept:
- Anticipatory Extrusion: When the printer's firmware detects that the print head is about to accelerate (e.g., at the start of a line or before a corner), pressure advance tells the extruder to push a little extra filament before the speed change fully occurs. This pre-emptive push builds up the necessary pressure in the hotend, ensuring that by the time the nozzle reaches the higher speed or the corner, the pressure is already optimized for consistent flow.
- Pre-emptive Retraction/Reduction: Conversely, when the printer is about to decelerate (e.g., at the end of a line or after a corner), pressure advance tells the extruder to slightly reduce its feed rate or even retract a tiny amount before the speed change. This helps to relieve the pressure in the hotend, preventing excess plastic from oozing out as the print head slows down.
The degree of this anticipatory adjustment is controlled by a single parameter, often referred to as the 'K-factor' (in Marlin's Linear Advance) or the 'Pressure Advance value' (in Klipper). A higher value means more aggressive pre-emptive extrusion/retraction, while a lower value means less. Finding the correct value for your specific printer, hotend, and filament combination is key to unlocking its full potential.
The tangible benefits: what pressure advance delivers
Implementing and properly calibrating pressure advance can dramatically elevate the quality of your 3D prints, transforming them from good to truly exceptional. The benefits are numerous and immediately noticeable:
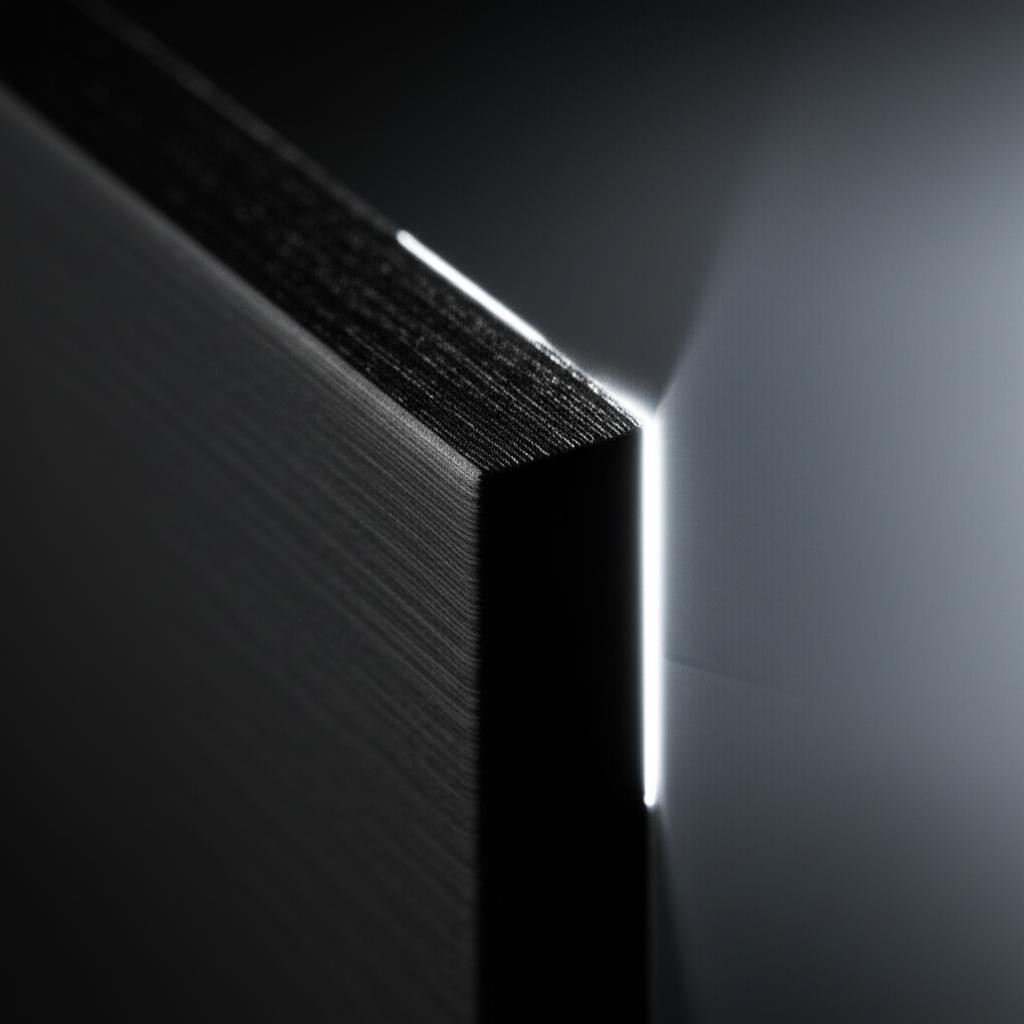
- Sharper, Cleaner Corners: This is perhaps the most celebrated benefit. By eliminating the pressure build-up at corners, pressure advance ensures that the nozzle extrudes just the right amount of plastic, resulting in perfectly sharp, crisp edges without any unsightly blobs or rounded off appearances.
- Reduced Ringing and Ghosting: While often associated with mechanical issues, inconsistent extrusion due to pressure fluctuations can exacerbate ringing (vibrations visible on surfaces). By smoothing out the extrusion flow, pressure advance helps to mitigate these artifacts, leading to cleaner, more uniform walls.
- Improved Dimensional Accuracy: Over-extrusion at corners can subtly alter the dimensions of your prints. By precisely controlling the plastic flow, pressure advance contributes to more accurate part dimensions, which is crucial for functional prints and assemblies.
- Smoother Surface Finishes: The overall consistency of extrusion across various print speeds and geometries translates into a noticeably smoother and more aesthetically pleasing surface finish, free from tiny imperfections caused by pressure variations.
- Enhanced Print Consistency: Whether you're printing intricate details or large, simple objects, pressure advance ensures that your printer maintains a uniform extrusion rate, leading to more reliable and consistent results from one print to the next.
In essence, pressure advance allows your printer to print faster and with greater accuracy, without sacrificing quality. It's a game-changer for anyone striving for professional-grade 3D prints.
Implementing pressure advance: Klipper vs. Marlin
While the core concept of pressure advance remains the same, its implementation and calibration process differ significantly between popular 3D printer firmware solutions like Klipper and Marlin. Understanding these differences is crucial for effective setup.
Klipper's pressure advance
Klipper, a modern and highly configurable firmware, implements pressure advance as a core feature, offering a flexible and intuitive calibration process.
- Overview of Klipper's Approach: Klipper offloads much of the processing from the printer's mainboard to a more powerful host computer (like a Raspberry Pi). This allows for more sophisticated algorithms and real-time control. Pressure advance in Klipper is known for its responsiveness and ease of tuning.
- Configuration in
printer.cfg: The pressure advance value is set in your Klipper configuration file (printer.cfg) under the[extruder]section. The parameter is simplypressure_advance. For example:pressure_advance: 0.05. You can easily change this value and apply it without reflashing your firmware. - Calibration Method: Klipper offers a built-in calibration method that generates a test print with varying pressure advance values along its length. You print a single line or a series of lines, and as the print head moves, Klipper automatically adjusts the
pressure_advancevalue. You then visually inspect the printed line to find the point where the extrusion looks most consistent and the corners are cleanest. Klipper's documentation provides detailed instructions and G-code for this process, often involving a long, thin test line printed at different speeds. - Advantages: Real-time adjustment without firmware recompilation, highly responsive control, and a streamlined calibration procedure that is often considered more user-friendly than Marlin's for this specific feature. Klipper also supports per-extruder pressure advance, which is useful for multi-extruder setups.
Marlin's linear advance (K-factor)
Marlin, the long-standing and widely adopted firmware, includes a similar feature known as Linear Advance, controlled by a 'K-factor'.
- Overview of Marlin's Approach: Linear Advance in Marlin works on the same principle of anticipating pressure changes. It's an optional feature that needs to be enabled during firmware compilation.
- Enabling
LINEAR_ADVANCEin Firmware: To use Linear Advance, you must enable#define LINEAR_ADVANCEin yourConfiguration_adv.hfile within the Marlin source code, and then recompile and reflash your printer's firmware. This is a more involved process than Klipper's configuration. - Configuration via G-code: Once enabled, the K-factor can be set using the
M900G-code command. For example,M900 K0.05sets the K-factor to 0.05. This value can often be stored in EEPROM (M500) for persistence. - Calibration Method: Marlin's calibration typically involves printing a test pattern (often a series of parallel lines or a square) where the K-factor is progressively increased. Many online generators can create the necessary G-code for these test prints. You visually inspect the lines, looking for the point where the extrusion is most uniform and the corners are sharpest, then select the K-factor corresponding to that section.
- Advantages: Widely available on most 3D printers, effective when properly calibrated, and a mature feature within the Marlin ecosystem.
Key differences and considerations
- Firmware Architecture: Klipper's host-based architecture allows for more dynamic and real-time adjustments, while Marlin's embedded approach requires firmware recompilation for initial activation.
- Calibration Workflow: Klipper's built-in calibration G-code is often seen as more straightforward for beginners, as it automates the value changes during a single print. Marlin's approach often involves generating specific G-code files or manual adjustments between test prints.
- Flexibility and Fine-tuning: Both systems offer excellent control, but Klipper's ability to change parameters on the fly without reflashing provides a slight edge in iterative tuning.
Neither solution is inherently "better" or "worse"; the choice often comes down to your preferred firmware ecosystem, technical comfort level, and the specific capabilities of your printer hardware. Both Klipper's Pressure Advance and Marlin's Linear Advance are highly effective tools for improving print quality when correctly implemented.
A step-by-step guide to calibrating pressure advance

Calibrating pressure advance is an iterative process that requires patience and keen observation. Before you begin, ensure your printer is in good working order.
Prerequisites for success
Pressure advance works best when other fundamental calibration steps have been completed. Trying to calibrate pressure advance on an uncalibrated machine is like building a house on sand.
- Well-calibrated E-steps (Flow Rate): Your extruder must be pushing the correct amount of filament. Calibrate your E-steps first, and then fine-tune your flow rate (extrusion multiplier) for your specific filament. This is paramount.
- Optimized PID Tuning: Ensure your hotend temperature is stable and consistent. PID tuning helps achieve this.
- Proper Retraction Settings: While pressure advance helps with oozing at the end of lines, it's not a replacement for good retraction. Tune your retraction distance and speed to minimize stringing and blobs during travel moves.
- Consistent Filament Diameter: Use high-quality filament with a consistent diameter for the most reliable results. Inconsistent filament can throw off even the best pressure advance settings.
The calibration process
The general steps are similar for both Klipper and Marlin, though the specific G-code and tools will differ.
Choose a calibration method
- For Klipper: Utilize Klipper's official documentation for pressure advance calibration. It typically involves printing a single line at varying speeds or a pattern where the
pressure_advancevalue is incremented automatically. - For Marlin: Use an online Linear Advance calibration pattern generator (search for "Marlin Linear Advance calibration pattern generator"). These tools will create G-code that prints a series of lines or a square pattern, with a different K-factor applied to each section.
- For Klipper: Utilize Klipper's official documentation for pressure advance calibration. It typically involves printing a single line at varying speeds or a pattern where the
Prepare the test print
- Ensure your bed is level and clean.
- Load the G-code for your chosen test pattern onto your printer.
- Use your preferred filament. Remember that different filaments (even different colors of the same type) may require slightly different pressure advance values.
Execute the test print
Start the print and observe carefully. For Klipper's method, you'll see the quality change along a single line. For Marlin's method, you'll compare different segments of the print.
Iterative adjustment and visual assessment
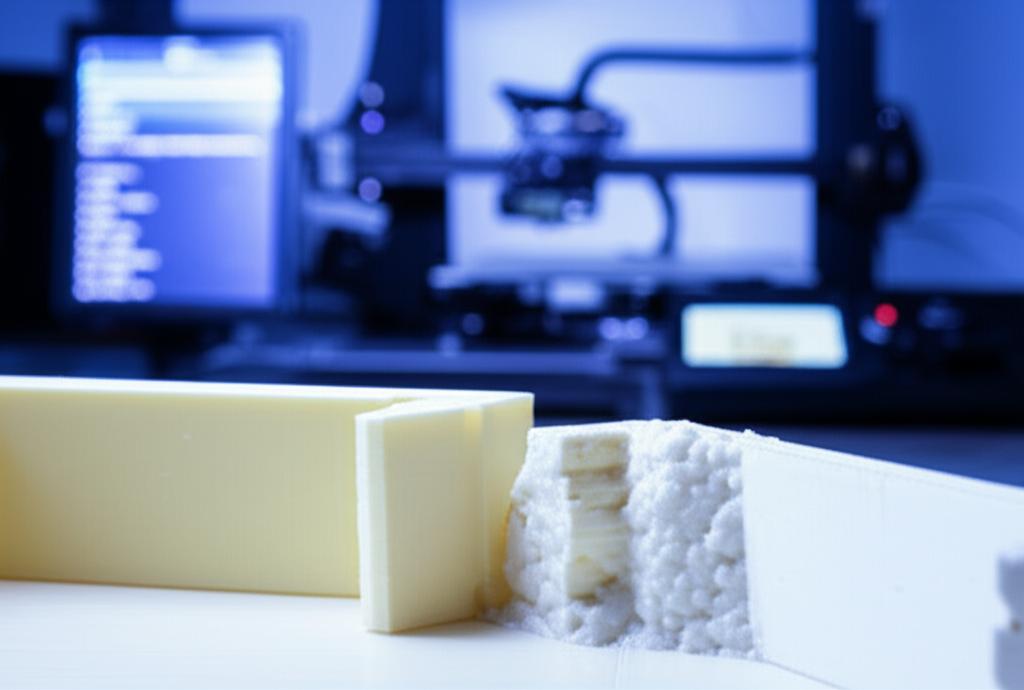
This is the most critical step. You're looking for the point where the corners are the sharpest, the lines are the most consistent, and there's no noticeable over-extrusion (blobs) or under-extrusion (gaps) at the start or end of segments.
- Too Low (K or PA value): You'll still see corner blobs, rounded corners, or slight over-extrusion at the end of lines.
- Too High (K or PA value): You might see under-extrusion at the start of lines, gaps after corners, or even a 'pinched' appearance at corners.
- Just Right: The corners will be crisp and sharp, and the line width will be consistent throughout the print, even around changes in direction.
Make small adjustments, re-print the test, and re-evaluate until you're satisfied. It's often helpful to take pictures or videos to compare different values.
Save the setting
- For Klipper: Once you've found your ideal
pressure_advancevalue, update it in yourprinter.cfgfile and save. Restart Klipper for the change to take effect. - For Marlin: Use the
M900 K[your_value]G-code command (e.g.,M900 K0.05) and thenM500to save it to EEPROM. This will make the setting persistent across reboots.
- For Klipper: Once you've found your ideal
Troubleshooting common pressure advance issues

Even with careful calibration, you might encounter some hiccups. Here are common issues and how to address them:
- Still seeing blobs or gaps? If your corners aren't perfect, your K/PA value might still be slightly off. Re-evaluate your test print, perhaps with smaller increments. Also, ensure other calibrations (E-steps, flow) are spot on, as they can mask pressure advance issues.
- Under-extrusion after corners or 'pinched' corners? Your K/PA value might be too high. This means the extruder is retracting too much or reducing flow too aggressively before/after a corner. Reduce the value and re-test.
- Over-extrusion at starts of lines? Your K/PA value might be too low. The hotend isn't building up enough pressure pre-emptively, leading to a surge when the print head speeds up. Increase the value slightly.
- Interaction with retraction: Pressure advance and retraction work hand-in-hand. If your retraction settings are poor (too high or too low distance/speed), they can interfere with pressure advance. Ensure retraction is well-tuned before fine-tuning pressure advance.
- Filament-specific issues: Different filaments have different viscosities and flow characteristics. A value that works for PLA might not be ideal for PETG or ABS. It's highly recommended to calibrate pressure advance for each filament type you use regularly.
Advanced tips for optimizing pressure advance

Once you've got the basics down, consider these advanced tips to further refine your results:
- Per-filament calibration: As mentioned, each filament type (and sometimes even brand or color) has unique properties. Dedicate time to calibrate pressure advance for each filament you use regularly. You can often save these settings as part of your slicer profiles or within your printer's configuration (especially with Klipper's flexibility).
- Considering different nozzle sizes: A larger nozzle diameter will generally require a higher K/PA value because it needs to move more plastic, leading to greater pressure fluctuations. Recalibrate if you change nozzle sizes.
- Interaction with input shaping (Klipper): If you're using Klipper, input shaping is another advanced feature that tackles ringing and ghosting caused by printer vibrations. Pressure advance and input shaping complement each other beautifully. Tune pressure advance first for extrusion consistency, then input shaping for vibration control.
- Balancing speed and quality: Pressure advance allows you to print at higher speeds while maintaining quality. Once calibrated, experiment with increasing your print speeds and acceleration settings. You might be surprised at how fast you can print without sacrificing corner sharpness.
Conclusion: elevating your 3D printing game
Pressure advance, whether as Klipper's pressure_advance or Marlin's linear_advance, is a powerful and essential tool for any serious 3D printing enthusiast. It directly addresses the fundamental challenge of maintaining consistent extrusion during dynamic print moves, transforming your prints from good to exceptional. While it requires a bit of patience and careful calibration, the payoff is immense: perfectly sharp corners, smooth surfaces, enhanced dimensional accuracy, and an overall level of print consistency that truly elevates your 3D printing game.
Don't let the technical jargon intimidate you. Take the time to understand the concept, follow the calibration steps for your specific firmware, and observe the results. You'll soon wonder how you ever printed without it. Happy printing!