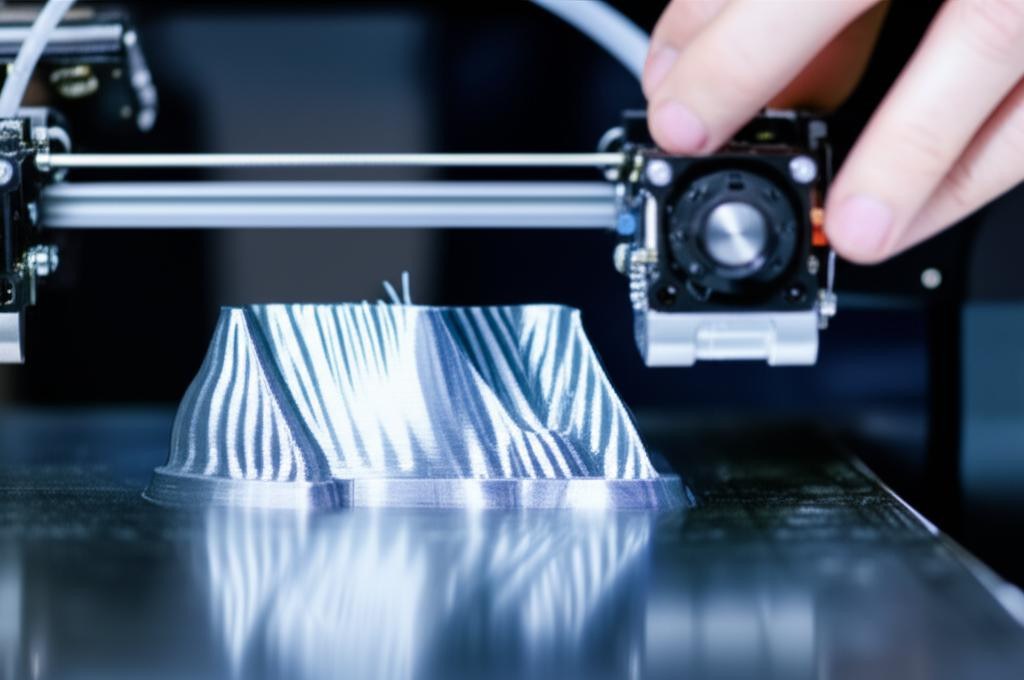
Achieving truly flawless 3D prints goes beyond merely hitting "print" and hoping for the best. While calibrating your printer's E-steps ensures the extruder motor pushes the correct length of filament, the *actual* volume of plastic extruded can still be off, leading to a myriad of print imperfections. This is precisely where flow rate calibration, specifically the meticulous adjustment of your extrusion multiplier, becomes not just important, but absolutely indispensable. It's a critical, yet often overlooked, step in the journey towards mastering your 3D printer. This fine-tuning process profoundly impacts every facet of your print quality, from surface finish and part strength to the ever-important dimensional accuracy. Consider it the ultimate precision adjustment for your printer's material delivery system, ensuring every single layer is laid down with exacting thickness, resulting in prints that are consistently crisp, robust, and true to their digital design.
Understanding flow rate and the extrusion multiplier in 3D printing

Explore the
Snapmaker U1
In the realm of 3D printing, "flow rate" refers to the precise volume of molten plastic extruded by your hotend over a given period. While your slicer software calculates a desired flow based on parameters like line width, layer height, and print speed, the physical reality can often deviate. This discrepancy arises from various factors: subtle inconsistencies in filament settings (e.g., actual vs. advertised filament diameter), variations in the extruder gear's grip, and even minute manufacturing tolerances within your nozzle. The extrusion multiplier (often simply labeled "Flow" or "Flow Rate" within your slicer's settings) is a crucial percentage value that serves as a global scalar for the amount of filament extruded. A default value of 1.0 (or 100%) instructs your printer to extrude exactly what the slicer originally calculated. However, if your prints consistently exhibit signs of over-extrusion – appearing bulky, showing excessive stringing, or having rough, uneven surfaces – it's a clear indicator that this value needs to be decreased. Conversely, symptoms of under-extrusion, such as visible gaps between perimeters, weak or brittle layers, and poor layer adhesion, strongly suggest that the extrusion multiplier needs to be increased to compensate for insufficient material delivery.
Why meticulous flow rate calibration is essential for superior prints
Investing the time in proper flow rate calibration yields substantial dividends in the quality and reliability of your 3D prints:
- Elevated print quality: Correct flow is the antidote to numerous over-extrusion artifacts. It eliminates unsightly issues like "elephant's foot" (where the first few layers bulge outwards), reduces stringing and oozing, and prevents blobs or zits on surfaces. The result is consistently smoother surfaces, sharper corners, and cleaner, more defined details, transforming a mediocre print into a professional-looking piece.
- Unparalleled dimensional accuracy: For engineering prototypes, functional parts, or any print where precise tolerances are paramount, accurate flow is non-negotiable. When the amount of plastic extruded is perfect, the actual dimensions of your printed part will precisely match your CAD model. This ensures components fit together seamlessly, mechanisms operate as intended, and designs translate faithfully from screen to physical object.
- Robust and durable parts: Optimal flow ensures that each layer adheres perfectly to the one beneath it, without either excessive material causing internal stresses or insufficient material leading to voids. This ideal balance results in prints that are structurally sound, significantly stronger, and more durable, capable of withstanding the stresses of their intended application.
- Mitigation of common printing issues: Many frustrating 3D printing tips and troubleshooting guides often point back to flow rate. Over-extrusion can lead to increased back pressure, potentially causing frustrating nozzle clogs or extruder skipping. Under-extrusion, on the other hand, is a prime culprit for poor layer adhesion, leading to delamination and print failure. Proper calibration significantly reduces the occurrence of these common headaches.
- Adaptability to filament variations: No two spools of filament are truly identical. Even within the same brand and material type, slight variations in actual filament diameter (e.g., a "1.75mm" filament might be 1.73mm or 1.78mm), material density, or additive content can affect how it extrudes. Calibrating the extrusion multiplier allows you to tailor your printer's output precisely to the unique characteristics of each specific filament, maximizing its potential.
A comprehensive, step-by-step guide to flow rate calibration

Before embarking on flow rate calibration, it is absolutely paramount that your E-steps (extruder steps per millimeter) are already accurately calibrated. This foundational step ensures that your extruder motor physically pushes the correct *length* of filament. Flow rate calibration then fine-tunes the *volume* of that filament. Once your E-steps are dialed in, you are ready to tackle the extrusion multiplier with confidence.
1. Meticulous preparation of your slicer settings
Begin by opening your preferred slicer software, whether it's PrusaSlicer, Cura, Simplify3D, or another. For the most accurate and straightforward test, we will be printing a simple, single-wall calibration cube. Carefully configure the following parameters:
- Nozzle diameter: Double-check that this setting precisely matches the actual nozzle installed on your hotend (e.g., 0.4mm). An incorrect nozzle diameter here will fundamentally skew all subsequent calculations.
- Layer height: Opt for a standard, commonly used layer height, typically 0.2mm. Consistency is key here; avoid unusually thick or thin layers for this specific test.
- Line width (or extrusion width): This is arguably the most critical setting for this calibration. Explicitly set this value to be *equal* to your nozzle diameter (e.g., 0.4mm for a 0.4mm nozzle). Many slicers default to a slightly higher line width (e.g., 0.45mm or 0.48mm for a 0.4mm nozzle) to improve layer adhesion or print speed. For calibration purposes, this default can lead to inaccurate results, as we need a known target thickness.
- Perimeters/Walls: Set this to 1. We want to print a hollow cube with just one outer wall.
- Top/Bottom layers: Set both to 0. We don't want any solid top or bottom surfaces, as they would interfere with measuring the single wall.
- Infill: Set to 0%. Again, we want a hollow structure.
- Print speed: Use a moderate print speed that you typically employ for your everyday prints (e.g., 50-60mm/s). Avoid excessively high or low speeds, as they can sometimes introduce their own extrusion anomalies.
- Initial extrusion multiplier: Set this to 1.0 (or 100%). This is our baseline from which we will make adjustments.
- Cooling: Ensure cooling is enabled and set to typical values, as cooling can affect how the plastic settles.
2. Design or acquire and slice a suitable test cube
You can either quickly design a simple cube in your favorite CAD software (a 20mm x 20mm x 20mm cube is a widely accepted standard) or download a pre-made single-wall calibration cube STL file from repositories like Thingiverse. The crucial aspect is that it should be designed to be hollow and result in a single perimeter when sliced with the settings from step 1. This ensures that when you print it, you'll have a clean, isolated wall whose thickness you can accurately measure without interference from infill or multiple perimeters.
3. Execute the test print with care
Load the specific spool of filament that you intend to calibrate. Remember, flow rate is highly dependent on the filament itself, so using the exact material you'll be printing with is crucial. Initiate the print of your single-wall test cube. Pay close attention to the first layer; ensuring excellent bed adhesion is vital, as a single-wall print can be particularly prone to warping or detaching if the first layer isn't perfect. Allow the print to complete without interruption.
4. Precisely measure the wall thickness of the printed cube
Once the print has finished and cooled completely (allowing for any thermal contraction), carefully remove it from the print bed. Using a high-quality pair of digital calipers, measure the thickness of the single wall at multiple points – aim for at least 3-5 distinct measurements around the perimeter of the cube. It's important to avoid measuring directly at the corners, as these areas can sometimes exhibit slight variations in thickness due to changes in print direction or acceleration/deceleration. Calculate the average of all your measurements to get the most representative wall thickness.
Practical Example: Let's assume your slicer's target line width was meticulously set to 0.4mm. However, after printing and measuring, your average measured wall thickness consistently comes out to be 0.48mm. This indicates over-extrusion.
5. Calculate your optimized new extrusion multiplier
Now, it's time for the straightforward but critical calculation. Employ the following formula to derive your new, optimized extrusion multiplier:
New Extrusion Multiplier = (Target Line Width / Measured Wall Thickness) * Current Extrusion Multiplier
Let's apply this to our example:
- Target Line Width: 0.4mm (This is what you *told* the slicer to extrude)
- Measured Wall Thickness: 0.48mm (This is what actually *printed*)
- Current Extrusion Multiplier: 1.0 (or 100%, our starting point)
New Extrusion Multiplier = (0.4 / 0.48) * 1.0 = 0.833
Based on this calculation, your new extrusion multiplier should be set to approximately 0.833 (or 83.3%). If, conversely, your measured wall thickness was 0.38mm (indicating under-extrusion), the calculation would be (0.4 / 0.38) * 1.0 = 1.052, meaning you would increase your extrusion multiplier to 105.2%.
6. Implement the new setting in your slicer software
Navigate back to your slicer's filament settings or print settings. Locate the "Extrusion Multiplier" or "Flow" parameter – its exact name and location can vary between slicers (e.g., often found under a "Filament" tab, "Print Settings" -> "Advanced," or "Material" settings). Input your newly calculated value. It is absolutely crucial to save these settings, ideally as a new, distinct filament profile or a specific print profile. This prevents you from inadvertently losing your calibrated settings and allows you to easily switch between profiles for different filaments.
7. Verify the calibration and perform fine-tuning
The calibration process isn't complete until you've verified your adjustments. Print another test cube, this time utilizing your newly set extrusion multiplier. Measure the walls again using your digital calipers. Ideally, the measured thickness should now be remarkably close, if not identical, to your target line width (e.g., 0.4mm). If there's still a minute deviation, you can repeat the entire process, using your newly adjusted value as the "Current Extrusion Multiplier" in the formula. Sometimes, a very minor manual adjustment (e.g., nudging it up or down by 0.01) after the initial calculation can truly dial it in. Beyond the test cube, print a more complex model – perhaps one with intricate details or critical interlocking parts – to ensure that the changes have had the desired positive effect across a variety of geometries and print conditions.
Advanced considerations and essential 3D printing tips for flow rate
Explore the
Snapmaker U1
- Filament Specificity is Key: Never assume that a calibrated flow rate for one filament will work perfectly for another. Always perform this calibration for each new type, brand, or even batch of filament you acquire. Different materials (PLA, PETG, ABS, etc.) and even color variants can have distinct extrusion characteristics.
- Nozzle Changes and Recalibration: If you ever swap your nozzle for a different size (e.g., from 0.4mm to 0.6mm) or even replace an old one with a new one of the same size, it's highly advisable to recalibrate your flow rate. New nozzles, even if nominally the same size, can have slight variations in their orifice diameter or internal geometry.
- Temperature and Speed Interplay: While flow rate calibration directly addresses the volume of material, print temperature and speed are closely intertwined. Ensure your print temperature is optimized for your filament *before* you begin flow calibration, as an incorrect temperature can affect the plastic's viscosity and how it flows and settles. Similarly, significantly changing print speeds after calibration might necessitate a quick re-check.
- The Importance of First Layer Calibration: A perfectly calibrated first layer (often controlled by your Z-offset) is fundamental. Issues like a squished or gappy first layer can sometimes be misdiagnosed as flow problems. Ensure your initial layer height and adhesion are impeccable before proceeding with flow rate calibration for subsequent layers.
- Environmental Factors: While less direct, ambient temperature and humidity can subtly influence filament properties and, consequently, extrusion behavior. Storing filament properly in dry conditions is a good practice.
- Visual Inspection and Iteration: Don't rely solely on measurements. Develop a keen eye for visual cues on your prints. Are corners sharp? Are flat surfaces uniformly smooth? Do infill and perimeters connect seamlessly without gaps or overlaps? Flow rate calibration is often an iterative process; don't be afraid to make small adjustments based on visual feedback from real-world prints.
Mastering flow rate calibration is not just another item on a checklist; it's a cornerstone skill for anyone serious about elevating their 3D printing tips and results. By taking the time to precisely adjust your extrusion multiplier, you gain an unparalleled level of control over your printer's output. This meticulous approach leads directly to significantly improved print quality, unwavering dimensional accuracy, and ultimately, a more satisfying and successful 3D printing experience across all your projects. It's a small investment of time that consistently pays dividends in stunning, functional, and reliable prints.