Achieving flawless 3D prints often feels like a delicate dance between numerous settings, each capable of introducing subtle imperfections or outright failures. Among the most common and frustrating issues that plague 3D printing enthusiasts are stringing and blobs. These unwelcome artifacts not only detract from the aesthetic appeal of a printed object but can also compromise its structural integrity. While various factors contribute to their appearance, two fundamental slicer settings stand out as primary culprits and, consequently, primary solutions: nozzle temperature and retraction settings. Understanding how these two parameters intertwine and mastering their calibration is paramount for anyone aspiring to elevate their print quality from acceptable to exceptional.
Demystifying stringing and blobs
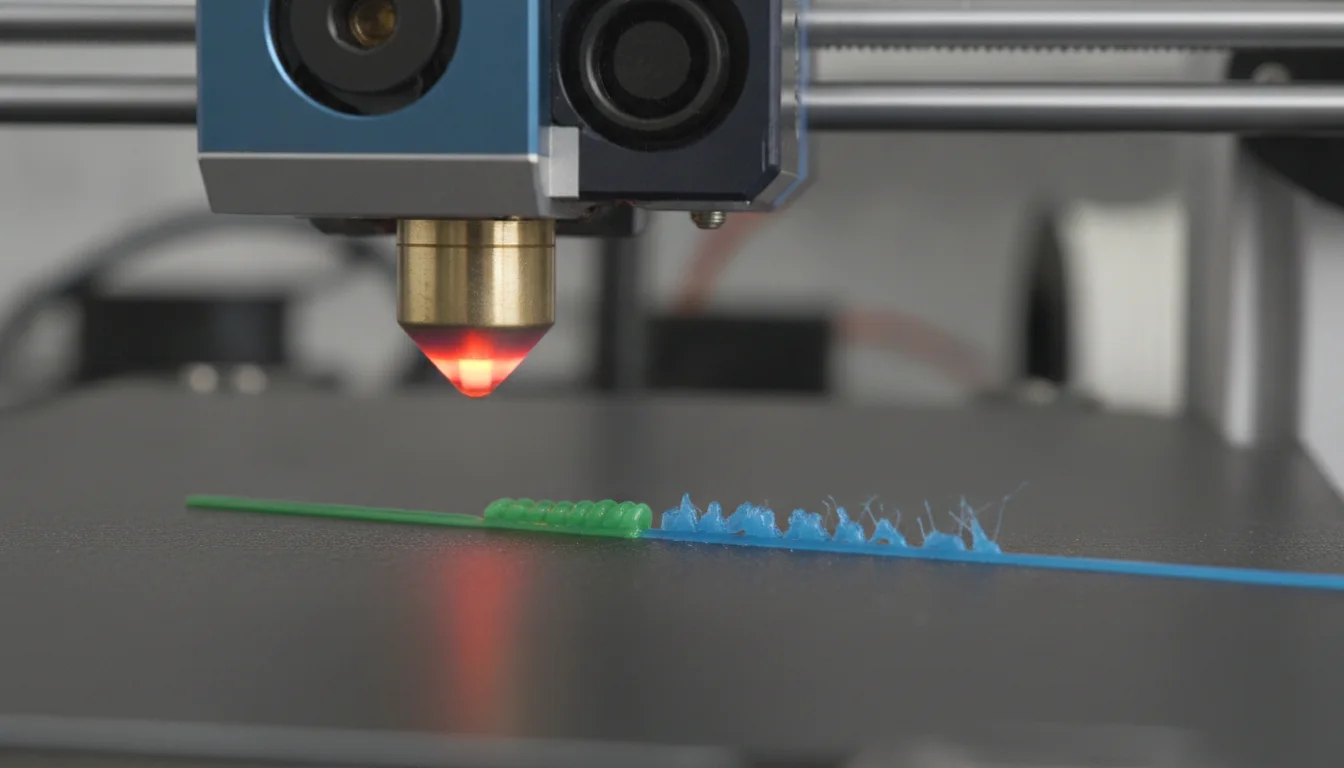
Before diving into the solutions, it’s crucial to clearly define the problems at hand and understand their visual characteristics on a printed part.
What is stringing (oozing)?
Stringing, also commonly referred to as oozing or hairs, manifests as fine wisps or strands of plastic left behind between distinct parts of a 3D print. These unwanted threads occur when the print head moves from one point to another without extruding, but molten filament leaks passively from the nozzle. Imagine pulling a piece of hot cheese – the strings that form are analogous to what happens in 3D printing. This phenomenon is particularly noticeable when printing models with multiple separated features or intricate geometries that require frequent travel moves. The presence of stringing necessitates tedious post-processing, often involving heat guns or meticulous trimming, to achieve a clean finish.
What are blobs (zits/pimples)?
Blobs, sometimes called zits or pimples, are small, raised imperfections that appear on the surface of a 3D print. Unlike stringing, which is a travel-related issue, blobs are typically localized deposits of excess plastic. They often occur at the start or end points of an extrusion path, where the printer pauses briefly before moving on, or as a result of inconsistent pressure within the hotend. While some blobs can be attributed to specific slicer settings like ‘randomized seam’ or ‘aligned seam’ (where they are a deliberate, albeit imperfect, start/stop point), others are indicative of deeper issues related to over-extrusion, pressure build-up, or poorly calibrated retraction. They detract significantly from surface smoothness and overall print quality.
The critical role of nozzle temperature
The temperature at which your 3D printer’s nozzle operates is arguably one of the most impactful settings, directly influencing filament viscosity, flow characteristics, and ultimately, print quality. It’s a delicate balance, and even a few degrees can make a world of difference.
Filament viscosity and flow dynamics
At its core, nozzle temperature dictates how fluid the molten plastic becomes. Higher temperatures reduce the filament’s viscosity, making it more liquid-like and easier to push through the nozzle. While this can be beneficial for achieving higher print speeds or ensuring good layer adhesion, it also increases the propensity for the plastic to ooze out when it shouldn’t, directly contributing to stringing. Conversely, lower temperatures increase viscosity, making the plastic thicker and less prone to dripping. However, pushing the temperature too low can lead to insufficient flow, resulting in under-extrusion, poor layer bonding, and even nozzle clogging.
Impact of excessively high nozzle temperatures
- Increased oozing and stringing: The most direct consequence. Highly fluid filament struggles to stay within the nozzle during travel moves.
- Reduced cooling time: Hotter plastic takes longer to solidify, potentially leading to warping, sagging, or poor bridging performance, especially on overhangs.
- Thermal degradation: Some filaments, particularly PLA, can begin to degrade or “burn” at excessively high temperatures, leading to discolored, brittle prints, and even nozzle clogs from carbonized material.
- Reduced detail: Overly hot filament can spread too much, blurring fine details and sharp corners.
Consequences of overly low nozzle temperatures
- Under-extrusion: The extruder struggles to push viscous plastic through the nozzle, resulting in thin, weak lines or gaps in layers.
- Poor layer adhesion: Insufficiently hot plastic doesn’t melt and bond properly with the previous layer, leading to weak parts that delaminate easily.
- Increased back pressure and clogs: The resistance from the highly viscous plastic can put undue stress on the extruder motor and lead to blockages within the hotend.
- Nozzle grinding: The extruder gear may strip the filament, losing its grip and causing inconsistent extrusion or complete stoppage.
Material-specific temperature considerations
The optimal temperature range is highly dependent on the type of filament being used, as each material possesses unique thermal properties:
- PLA (Polylactic Acid): Generally prints at cooler temperatures (190-220°C). It is quite prone to stringing if printed too hot, as its low viscosity becomes problematic.
- PETG (Polyethylene Terephthalate Glycol): Notorious for stringing, PETG typically requires higher temperatures (220-250°C) than PLA. Its inherent stickiness and higher melting point make it a common culprit for oozing if not meticulously calibrated.
- ABS (Acrylonitrile Butadiene Styrene): Requiring even higher temperatures (230-260°C), ABS can string, but often presents less of a challenge than PETG in this regard, due to different flow characteristics and usually being printed in an enclosed environment.
- TPU/Flexible Filaments: These materials often print at moderate temperatures (210-240°C) but their elasticity can complicate retraction. They can be very stringy if not managed properly.
- Exotic Filaments: Materials like Nylon, PC, or composites often have very specific temperature requirements, and deviating from them can quickly lead to stringing or other print failures.
Finding the optimal nozzle temperature
The journey to the perfect temperature begins with the filament manufacturer’s recommendations, which serve as an excellent starting point. However, variations between printers, hotends, and even batches of filament necessitate further calibration. The most effective tool for this is a temperature tower.
A temperature tower is a specialized calibration print designed to print a series of features at different temperatures, typically decreasing in 5°C or 10°C increments as the print progresses upwards. By observing the quality of overhangs, bridges, and the presence of stringing at each temperature segment, you can visually identify the sweet spot for your specific filament and printer combination. Look for the temperature that offers the best balance of layer adhesion, surface finish, and minimal stringing.
Mastering retraction settings
The world’s first desktop full-color 3D & UV printer. Back the Kickstarter campaign with a refundable $50 deposit for VIP pricing.
Retraction is the printer’s primary defense against stringing. It’s a crucial mechanism that, when properly tuned, can transform a stringy mess into a pristine print. However, miscalibrated retraction can introduce its own set of problems, including blobs and clogs.
What is retraction?
Retraction is a process where the extruder motor briefly pulls the filament backward, away from the hotend, before the print head makes a non-extruding travel move. This action relieves the pressure built up in the nozzle and hotend, preventing molten plastic from oozing out during the travel. Once the print head reaches its next printing location, the filament is pushed back down (unretracted) to resume extrusion.
Retraction distance: The length of the pull
The retraction distance specifies how far the filament is pulled back. This is arguably the most critical retraction parameter.
- Too little retraction distance: If the filament is not pulled back far enough, insufficient pressure is relieved, and oozing will still occur, leading to stringing.
- Too much retraction distance: Over-retracting can pull molten plastic too far into the cold end of the hotend, where it can solidify and cause blockages (heat creep). It can also lead to air gaps in the nozzle, resulting in under-extrusion at the start of new lines, or create excessive pressure changes that manifest as blobs or inconsistent extrusion. Additionally, excessive retraction increases print time and can cause the extruder gears to grind away at the filament, leading to insufficient grip.
Direct drive vs. Bowden setups
The optimal retraction distance differs significantly between direct drive and Bowden extruder setups:
- Direct Drive: With the extruder motor mounted directly on the print head, the path from the gears to the nozzle is very short. This means less filament needs to be retracted to relieve pressure, typically ranging from 0.5mm to 2mm.
- Bowden: In a Bowden setup, the extruder motor is mounted remotely, pushing filament through a long PTFE tube to the hotend. This tube can compress and stretch, introducing slack. Consequently, Bowden systems require significantly longer retraction distances, often between 4mm and 8mm, to effectively relieve pressure at the nozzle.
Retraction speed: How fast to pull
Retraction speed dictates how quickly the filament is pulled back and pushed forward.
- Too slow retraction speed: If the filament retracts too slowly, the molten plastic has more time to ooze out before the pressure is fully relieved, rendering the retraction ineffective.
- Too fast retraction speed: Conversely, retracting too quickly can cause problems. It can strip or grind the filament, leading to inconsistent extrusion. High speeds can also cause the extruder motor to skip steps, or create sudden, drastic pressure changes within the hotend that result in blobs or inconsistent extrusion at the start of new lines.
Optimal retraction speeds typically fall within the 20-60 mm/s range, but this can vary based on the specific printer, hotend, and filament.
Advanced retraction settings
Modern slicers offer additional settings that can fine-tune retraction behavior:
- Retraction minimum travel: This setting prevents the printer from performing tiny, unnecessary retractions when the travel distance is very short. It can reduce wear on the extruder and potentially minimize blobs caused by frequent pressure changes.
- Combing mode (Cura) / Wipe (PrusaSlicer): These features attempt to keep the nozzle within the boundaries of the printed part during travel moves. The idea is that any oozing will occur over already printed areas, thus hiding potential strings. While effective for some prints, it can sometimes lead to slight surface blemishes or “scarring” if not perfectly tuned.
- Coasting: Coasting stops extrusion slightly before the end of an extrusion path. The remaining pressure in the nozzle pushes out the last bit of plastic. This can be very effective at reducing blobs at the end of lines, especially with materials prone to oozing.
- Z-Hop (Lift Z): This setting lifts the nozzle slightly on the Z-axis during travel moves. Its primary purpose is to prevent the nozzle from dragging across the print surface, which can cause collisions or leave marks. While not directly a retraction setting, a Z-hop can sometimes exacerbate stringing by increasing the travel time during which oozing can occur, though it can also help prevent stringing by breaking any contact between the nozzle and the print.
The intricate interplay: Temperature and retraction
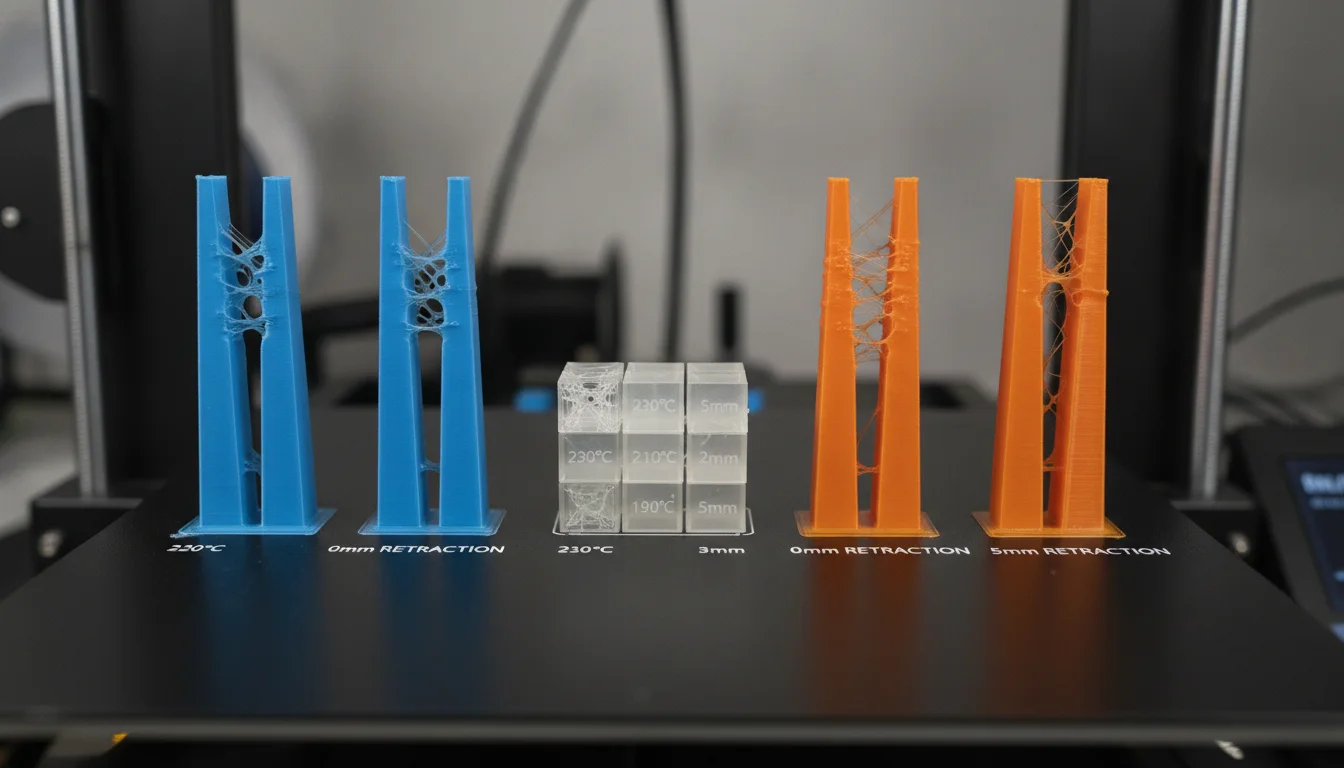
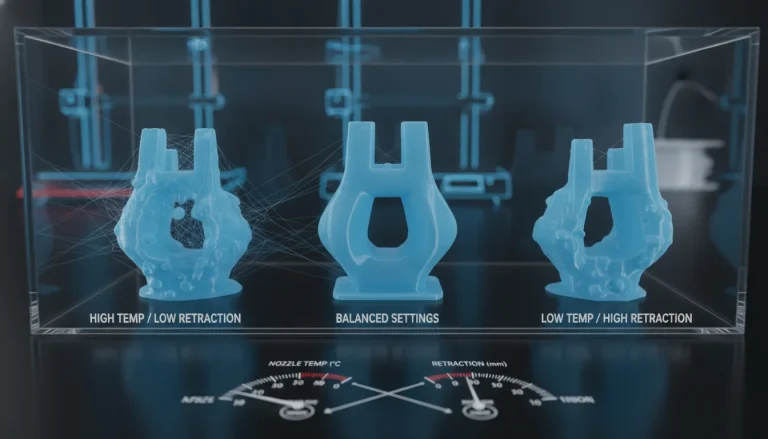
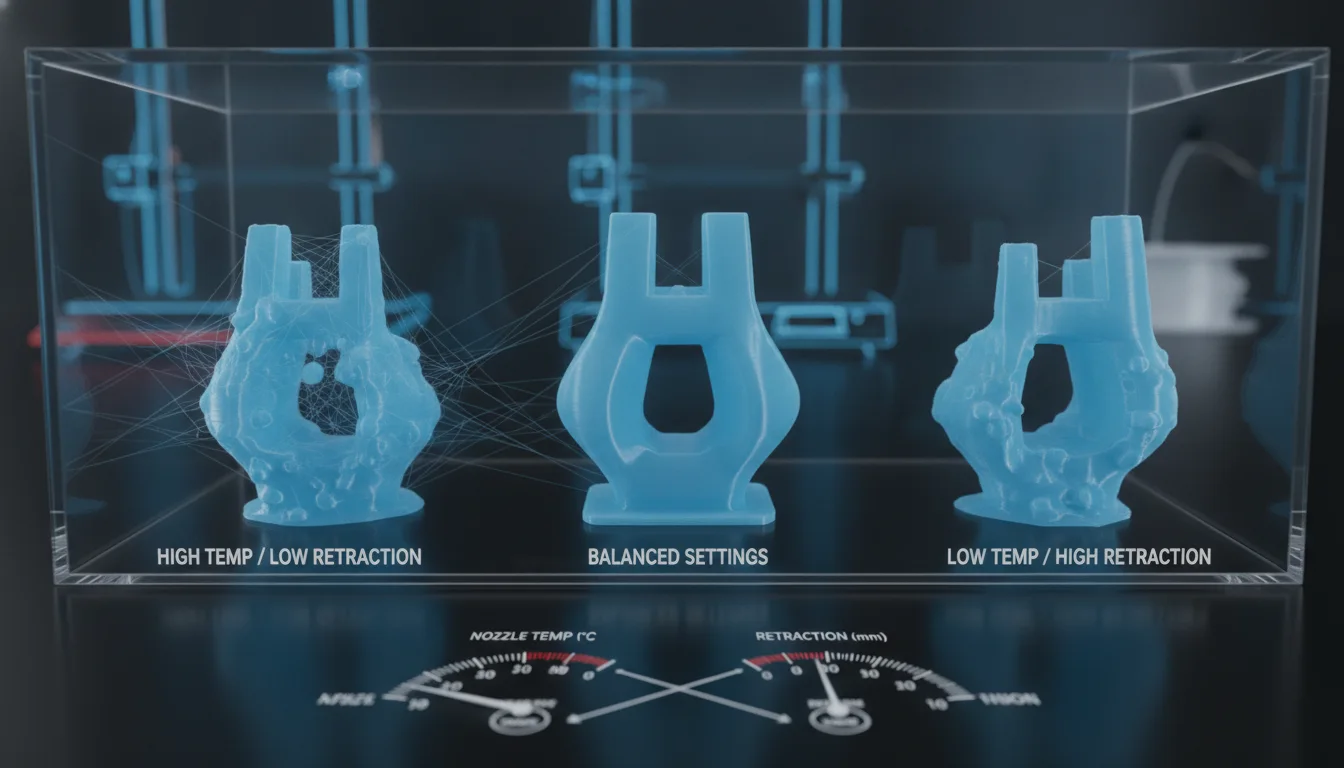
It’s a common misconception that nozzle temperature and retraction settings can be calibrated in isolation. In reality, they are two sides of the same coin, deeply intertwined and influencing each other’s optimal values. A change in one often necessitates an adjustment in the other.
The synergistic relationship
Consider the fundamental principle: stringing is caused by molten plastic oozing out. Nozzle temperature dictates how molten (viscous) that plastic is, while retraction settings determine the mechanical action taken to counteract that oozing. If your filament is very fluid (high temperature), it will require a more aggressive retraction strategy to prevent stringing. Conversely, if your filament is less fluid (lower temperature), a less aggressive retraction might suffice, or even be preferred to avoid issues like under-extrusion at the start of new lines.
High temperature scenarios and retraction adjustments
When printing at the higher end of a filament’s recommended temperature range (perhaps for better layer adhesion or faster printing), you’ll likely encounter increased oozing. To combat this, you’ll typically need to increase your retraction distance and/or speed. However, there’s a ceiling to how far you can push retraction before introducing other problems like clogs or filament grinding. It’s a balancing act: find the highest temperature that gives you good print characteristics, then tune retraction to minimize stringing at that temperature. If stringing persists even with optimized, yet safe, retraction settings, it might be an indicator that your temperature is simply too high for that specific filament.
Lower temperature scenarios and retraction considerations
Printing at the lower end of the temperature spectrum reduces oozing, potentially allowing for shorter or slower retraction settings. In some cases, reducing retraction might even be beneficial to prevent under-extrusion at the start of new lines, as there’s less pressure to relieve. However, don’t assume that lower temperatures automatically eliminate the need for retraction altogether. Some degree of retraction is almost always necessary to achieve clean prints, even with less viscous filament. The risk here is pushing the temperature too low, which, as discussed, introduces severe issues like poor layer adhesion and clogs, negating any benefits in stringing reduction.
The iterative calibration process
Given their interconnectedness, finding the perfect balance requires an iterative, systematic approach:
- Start with temperature: Begin by calibrating your nozzle temperature using a temperature tower. Aim for the lowest temperature that still provides excellent layer adhesion, good surface finish, and minimal signs of under-extrusion or clogging. This establishes a baseline for filament viscosity.
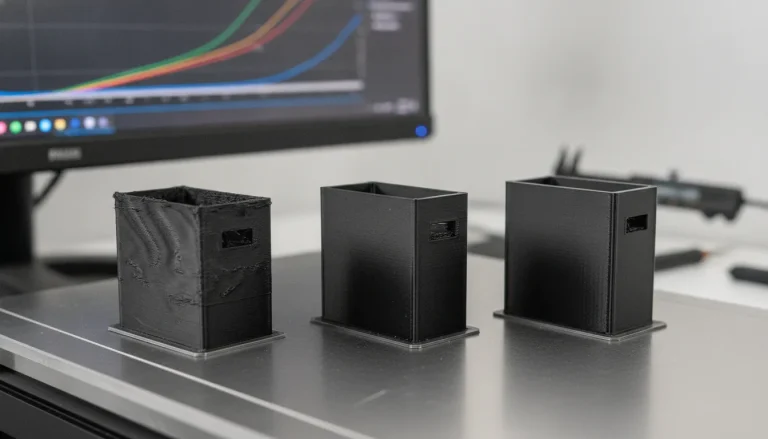
- Then tune retraction: Once you’ve settled on an optimal temperature, move on to retraction calibration using dedicated retraction test prints (e.g., small towers with multiple posts). Adjust retraction distance and speed incrementally until stringing is minimized without introducing blobs, grinding, or clogs.
- Fine-tune and re-evaluate: After optimizing both, print a more complex model that tests both stringing and surface quality. You might find that minor adjustments to either temperature or retraction (or even other settings) yield further improvements. Always make one change at a time to isolate its effect.
This feedback loop is crucial. A setting that works perfectly for one filament at a specific temperature might fail miserably for another, or even the same filament at a slightly different temperature. Patience and methodical testing are your best allies.
Beyond temperature and retraction: Other influencers
The world’s first desktop full-color 3D & UV printer. Back the Kickstarter campaign with a refundable $50 deposit for VIP pricing.
While nozzle temperature and retraction are paramount, other slicer settings and environmental factors can also contribute to or alleviate stringing and blobs. A holistic approach to print quality requires considering these additional variables.
- Filament moisture: This is a silent killer of print quality. Damp filament, especially hygroscopic materials like PETG or Nylon, will boil and expand in the hotend. This creates steam bubbles that burst out of the nozzle, leading to inconsistent extrusion, popping sounds, severe stringing, and blobs. Always ensure your filament is dry, using a filament dryer or a dehydrator if necessary.
- Print speed and travel speed: Faster travel speeds reduce the time available for filament to ooze out, thus mitigating stringing. Conversely, very slow travel speeds can exacerbate the issue. Print speed itself can also indirectly affect stringing; higher print speeds might necessitate slightly higher temperatures for proper flow, which in turn demands more aggressive retraction.
- Extrusion multiplier / Flow: If your extrusion multiplier is set too high, the printer will push out more plastic than necessary. This over-extrusion can contribute to blobs, especially at the start/end of lines, and can also make stringing worse by increasing the overall pressure in the hotend. Calibrating your E-steps and flow rate is a fundamental first step for any print quality troubleshooting.
- Nozzle wear and condition: A worn, damaged, or partially clogged nozzle can cause inconsistent extrusion, leading to both stringing and blobs. Over time, the nozzle orifice can widen or become irregular, affecting flow predictability. Replacing old nozzles or performing cold pulls can often resolve these issues.
- Part cooling: Adequate cooling helps solidify extruded plastic quickly. While primarily important for overhangs and bridges, good part cooling can also help reduce stringing by rapidly cooling any oozing plastic before it can form long strands. However, too much cooling can lead to poor layer adhesion, especially with materials like ABS.
- Z-seam alignment: The Z-seam is where each layer starts and ends. If not managed, this can appear as a visible line of blobs or slight imperfections. Slicer settings like ‘aligned’, ‘randomized’, or ‘sharpest corner’ can influence its appearance. While not a direct cause of stringing, an optimized Z-seam can hide some minor inconsistencies.
A systematic approach to calibration
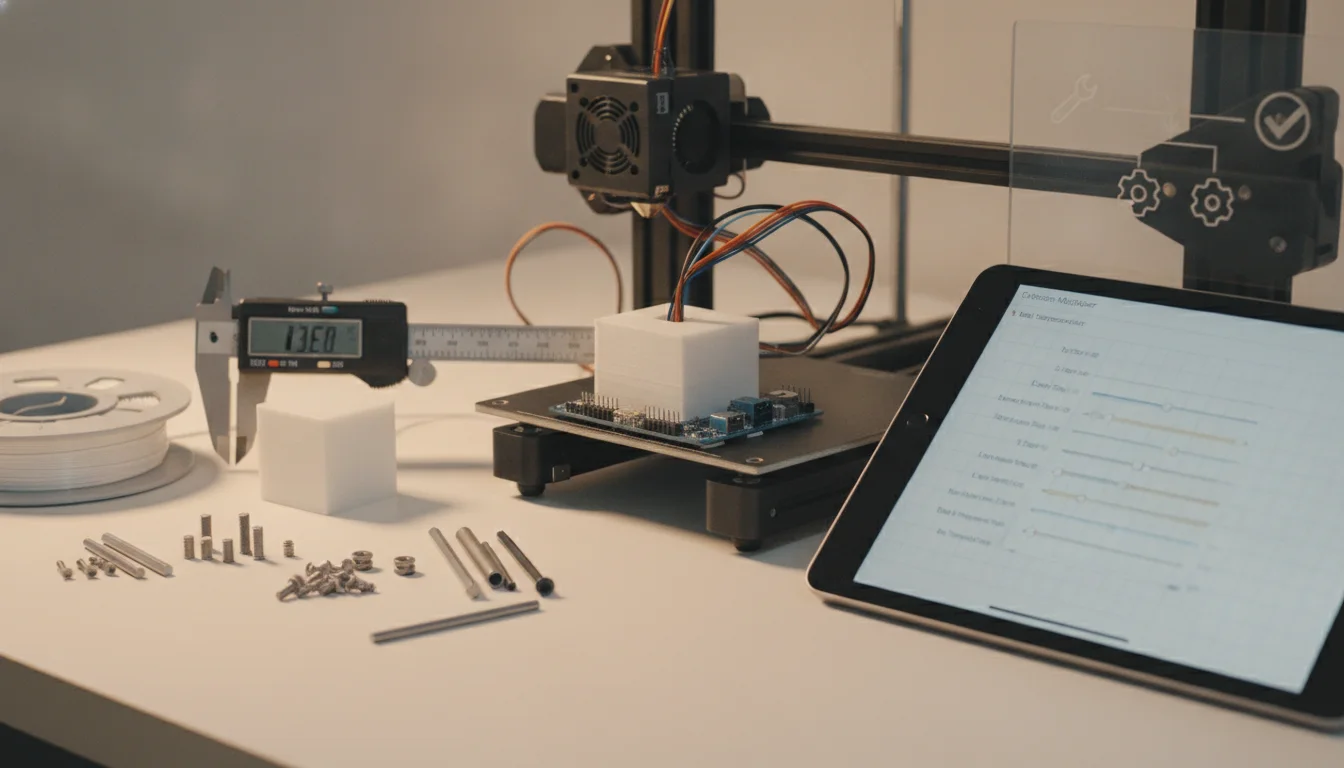
Tackling stringing and blobs requires a structured, step-by-step methodology. Randomly changing settings will likely lead to frustration and wasted filament. Here’s a recommended calibration workflow:
- Baseline settings: Start with a known good profile for your printer and filament, or use the manufacturer’s recommended settings as a starting point. This provides a stable foundation to build upon.
- Dry your filament: Before making any other adjustments, ensure your filament is bone dry. This eliminates a major variable that often mimics stringing or exacerbates it.
- Calibrate E-steps and flow: Verify that your extruder is pushing out the correct amount of filament. An accurate E-step calibration followed by a flow rate calibration (measuring actual wall thickness) is crucial for consistent extrusion and preventing over/under-extrusion related blobs.
- Temperature tower: Print a temperature tower for your specific filament. Analyze the results to identify the lowest temperature that yields optimal layer adhesion, surface finish, and minimal signs of under-extrusion. This will be your target nozzle temperature.
- Retraction tests: Once your temperature is dialed in, print retraction test models (e.g., retraction towers, comb tests). Adjust retraction distance and speed incrementally, focusing on eliminating stringing without introducing new issues like gaps, clogs, or excessive blobs at the start/end of lines. Remember to differentiate between direct drive and Bowden needs.
- Evaluate and refine: Print a benchmark model that highlights both stringing and surface quality. If issues persist, consider minor adjustments to other factors like travel speed, coasting, or wipe settings. Always make one change at a time and test thoroughly.
- Document your settings: Keep a log of your successful settings for each filament brand and type. This will save you immense time and effort in the future.
Conclusion
Eliminating stringing and blobs is a hallmark of a finely tuned 3D printer and a skilled operator. While these issues can be incredibly frustrating, they are almost always solvable through a systematic approach to calibration. Nozzle temperature and retraction settings stand as the primary levers to pull, their intricate relationship demanding careful attention and iterative adjustment. By understanding the underlying principles of filament flow, meticulously calibrating these key parameters, and considering other contributing factors, you can significantly elevate your print quality, transforming common imperfections into a distant memory. Embrace the journey of calibration; it’s an essential part of mastering the art of 3D printing.
Frequently asked questions
Can too much retraction cause blobs instead of fixing them?
Yes. Excessive retraction distance or speed can create air gaps in the nozzle or cause sudden pressure changes, which often manifest as blobs or under-extrusion at the start of new extrusion lines. Over-retracting can also pull molten filament into the cold zone of the hotend, causing a partial clog that worsens surface quality.
Do I need to re-calibrate temperature and retraction for every new spool of the same filament type?
Generally yes, especially if you switch brands or colors. Different batches and pigments can alter a filament’s flow characteristics, so the temperature tower and retraction test prints should be repeated for each new spool to find its specific sweet spot. Even a 5°C difference can significantly change stringing behavior.
Is stringing always caused by temperature or retraction, or can the slicer itself be at fault?
While temperature and retraction are the primary causes, slicer settings like travel speed, combing mode, and coasting also play a role. A travel speed that is too slow gives filament more time to ooze, while disabling combing can force the nozzle across open gaps where strings become visible. Always check these settings if temperature and retraction tuning alone doesn’t solve the problem.