In the intricate world of 3D printing, achieving flawless results hinges on a multitude of factors, each playing a critical role in the final output. Among these, the precision of filament extrusion stands as a cornerstone of print quality. When your printer fails to extrude the correct amount of material, you’re left grappling with a frustrating issue known as under-extrusion. This common problem manifests as weak layers, gaps in prints, poor adhesion, and an overall lack of structural integrity and aesthetic appeal. While various culprits can contribute to under-extrusion, one of the most fundamental and often overlooked causes is an inaccurately calibrated extruder, specifically its E-steps per millimeter (E-steps).
E-steps calibration is not merely a tweak; it’s a foundational adjustment that ensures your 3D printer’s extruder motor pushes precisely the amount of filament it’s instructed to. Think of it as teaching your printer the exact dimensions of its filament-feeding mechanism. Without this crucial calibration, all subsequent print settings, no matter how meticulously dialed in, will be built upon a shaky foundation, leading to chronic under-extrusion issues that no amount of flow rate adjustment can truly fix. This comprehensive guide will walk you through the entire E-steps calibration process, offering insights, best practices, and troubleshooting tips to help you achieve accurate extrusion and unlock the full potential of your 3D printer.
Understanding under-extrusion and its tell-tale signs
A retro-styled turntable and add-on speaker system with concrete and wood enclosure options. Currently running on Kickstarter.
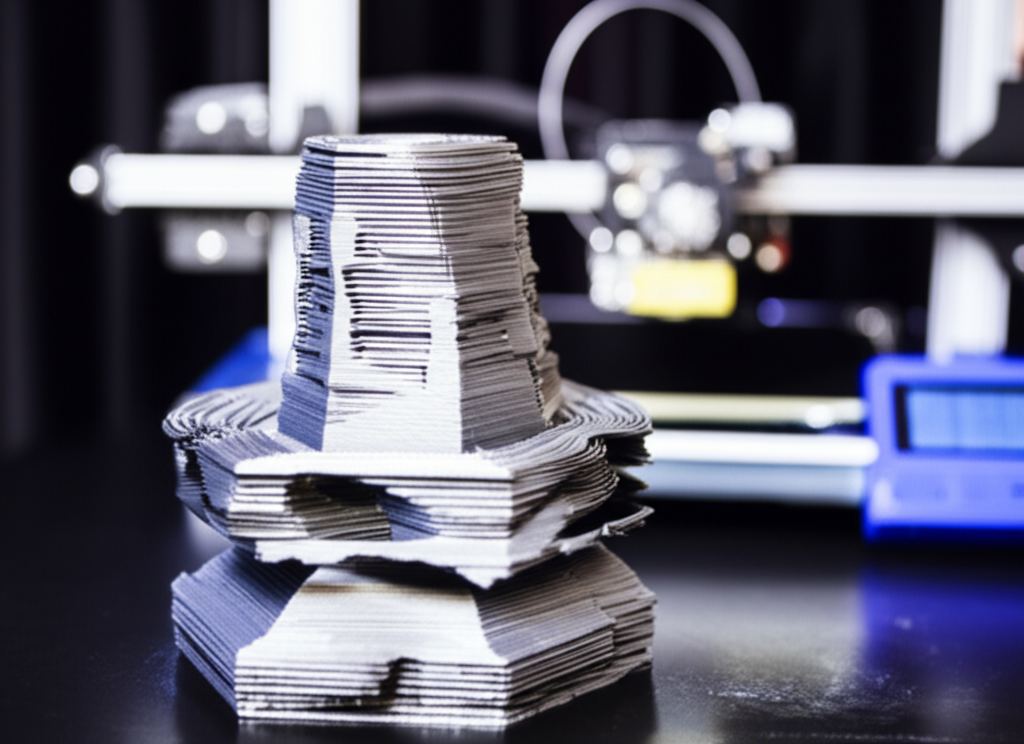
Before diving into the solution, it’s vital to recognize the symptoms of under-extrusion. If you’ve ever pulled a print off your build plate only to find it riddled with imperfections, chances are you’ve encountered this issue. Common indicators include:
- Gaps between infill and perimeters: The internal structure doesn’t meet the outer walls cleanly.
- Weak layer adhesion: Prints easily delaminate or break apart, indicating insufficient material bonding between layers.
- Stringing and blobs: While often associated with retraction, under-extrusion can sometimes exacerbate these issues due to inconsistent pressure.
- Inconsistent line width: Extruded lines appear thinner or vary in thickness across a layer.
- Rough or porous surfaces: The outer walls of your print feel rough to the touch and may show small holes or gaps.
- Missing layers or sections: In severe cases, entire parts of a layer might be missing.
- Poor top layer infill: The final top surface may not be solid, showing gaps or an incomplete fill pattern.
- Dimensional inaccuracies: Parts may come out smaller than designed, especially in wall thickness.
While E-steps calibration addresses a mechanical cause of under-extrusion, it’s worth noting that other factors can also contribute, such as a clogged nozzle, incorrect print temperature, too high print speed, or a worn-out extruder gear. However, E-steps calibration should always be one of your first troubleshooting steps, as it establishes the fundamental accuracy of your extruder’s material delivery.
What are E-steps and why are they so important?
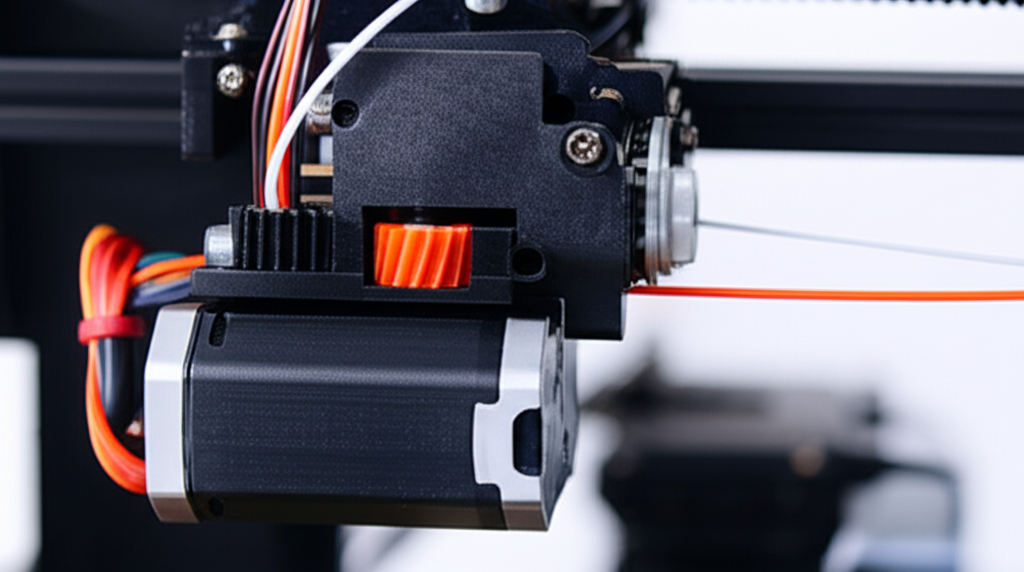
The term “E-steps” is short for “extruder steps per millimeter.” In essence, it’s a firmware setting that tells your 3D printer’s stepper motor how many steps it needs to take to push precisely one millimeter of filament through the hotend. Every stepper motor moves in discrete steps. When combined with the gearing of your extruder (if applicable) and the diameter of the drive gear, these steps translate into a specific length of filament being advanced.
Most 3D printers come with default E-step values pre-programmed by the manufacturer. While these defaults might be a good starting point, they are often generic and may not be perfectly accurate for your specific extruder assembly, which can vary slightly due to manufacturing tolerances, different motor types, or even modifications you’ve made (e.g., changing to a geared extruder). An incorrect E-steps value means your printer is either pushing too little filament (under-extrusion) or too much (over-extrusion) for every millimeter it’s told to extrude, directly impacting print quality and dimensional accuracy.
The mechanics behind E-steps
To fully appreciate the importance of E-steps, a brief look at the underlying mechanics is helpful:
- Stepper Motor: The extruder motor moves in precise increments (steps). A typical motor might have 200 steps per revolution.
- Microstepping: Modern stepper motor drivers can divide each physical step into smaller microsteps (e.g., 1/16th or 1/32nd microstepping), allowing for smoother, more precise movement.
- Drive Gear: This gear, attached to the stepper motor shaft (or an intermediate gear in a geared extruder), grips the filament and pushes it. Its effective diameter is crucial.
- Gear Ratio (for geared extruders): If your extruder uses a gear reduction system (common in direct drive extruders like Bondtech or E3D Hemera), the motor’s steps are multiplied by this ratio before reaching the drive gear.
The E-steps value essentially bundles all these factors into a single number that the printer uses to calculate how many motor pulses are needed to extrude a specific length of filament. Calibrating E-steps is about finding that perfect number for your specific machine.
Tools you’ll need for accurate E-steps calibration
A retro-styled turntable and add-on speaker system with concrete and wood enclosure options. Currently running on Kickstarter.
Performing an accurate E-steps calibration requires a few basic tools. These are generally inexpensive and readily available, making this a cost-effective way to significantly improve your print quality.
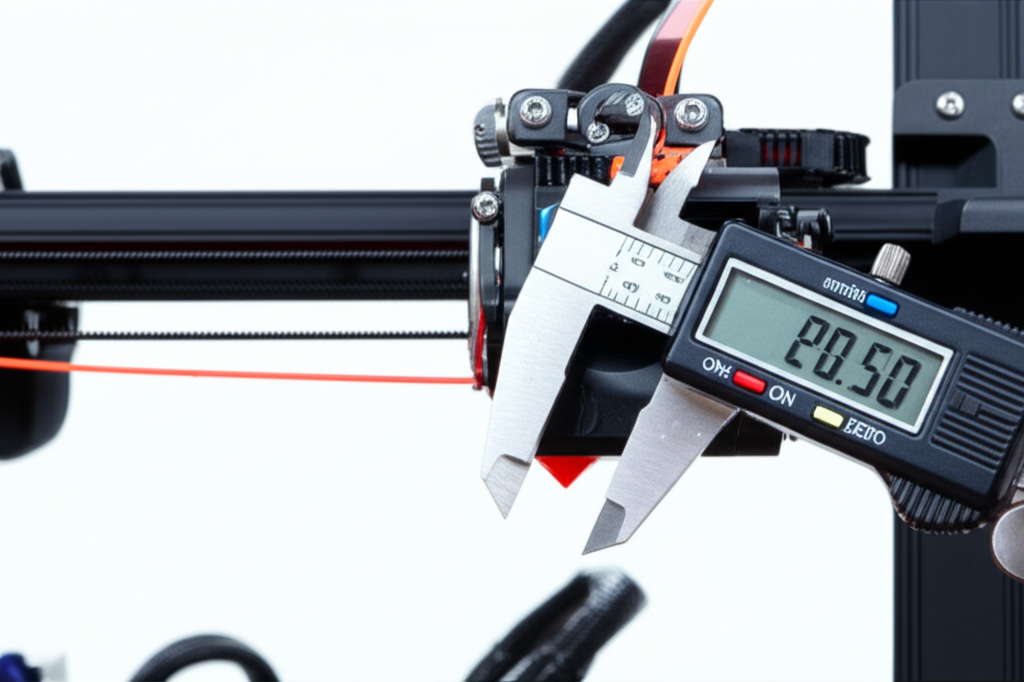
- Digital Calipers: Absolutely essential for precise measurements. While a ruler can work in a pinch, digital calipers offer far greater accuracy (down to 0.01mm) which is critical for this process.
- Permanent Marker or Fine-Tip Pen: For marking the filament accurately.
- Ruler or Measuring Tape: Useful for initial rough measurements, but calipers are preferred for the final check.
- Calculator: For crunching the numbers in the calibration formula.
- Terminal Software: You’ll need a way to send G-code commands to your printer and read its responses. Popular options include:
- Pronterface (Printrun): A standalone application that connects to your printer via USB.
- OctoPrint Terminal: If you use OctoPrint, its built-in terminal is perfect.
- Repetier Host: Another popular host software with a terminal interface.
- Marlin/Klipper/RepRapFirmware Web Interface: Some modern firmwares offer web-based control.
- Filament: The same type of filament you typically use for printing. Consistency is key.
The primary “cost” associated with this calibration is the potential purchase of digital calipers, which are a valuable investment for any 3D printing enthusiast, extending their utility far beyond just E-steps calibration for tasks like dimensional verification of prints or measuring nozzle diameters. Other tools are either free (software, calculator) or common household items.
The definitive step-by-step E-steps calibration guide
This process is straightforward but requires careful attention to detail for optimal results. Follow these steps precisely:
Step 1: Prepare your printer
- Heat the Hotend: Turn on your printer and heat the hotend to the typical printing temperature for the filament you are using (e.g., 200°C for PLA, 230°C for PETG). This ensures the filament can flow freely and accurately, mimicking real printing conditions.
- Load Filament: Ensure filament is loaded and properly threaded through the extruder and hotend.
- Disable Stepper Motors (Optional but Recommended): In some cases, you might want to disable stepper motors (M18 or M84) to allow for easier filament movement if you need to manually push or pull it slightly, but for the extrusion test, this isn’t strictly necessary.
- Remove Bowden Tube (if applicable and convenient): For Bowden setups, it’s often easier to disconnect the Bowden tube from the hotend side (or even remove the hotend entirely) and let the filament extrude into the air. This eliminates any back pressure from the hotend and nozzle, giving you the purest measurement of what the extruder is pushing. If you choose this, ensure the hotend is still heated to prevent a cold filament plug. If removing the Bowden tube is too much hassle, you can extrude through the nozzle, but be aware that any nozzle restriction could slightly affect the measurement, though for E-steps, it’s usually negligible.
Step 2: Connect to your printer via terminal software
Open your chosen terminal software (Pronterface, OctoPrint, etc.) and establish a connection with your 3D printer via USB or network. You should see a console window where you can send G-code commands and receive responses.
Step 3: Get your current E-steps value
Send the following G-code command to your printer:
M92
The printer will respond with its current steps per millimeter settings for all axes (X, Y, Z, E). Look for the ‘E’ value. For example, you might see something like M92 X80.00 Y80.00 Z400.00 E93.00. Note down your current E-steps value (e.g., 93.00).
Step 4: Mark the filament
- Mark 120mm from Extruder Entry: With the filament loaded and the hotend heated, use your digital calipers to measure exactly 120mm from a fixed point on your extruder’s entry point (e.g., where the filament enters the extruder body or the top of the Bowden coupler). Make a clear mark on the filament with your permanent marker. Marking 120mm ensures you have a 20mm buffer beyond the 100mm you intend to extrude, making it easier to measure the remaining length accurately.
- Why 120mm and not 100mm? If you only mark 100mm and your printer under-extrudes, the mark might disappear into the extruder, making measurement difficult. A 20mm buffer prevents this.
Step 5: Extrude a known length of filament
Now, you’ll instruct your printer to extrude exactly 100mm of filament. Send these G-code commands one by one:
M83: Sets the extruder to relative mode. This means subsequent extrusion commands will be relative to the current position, not absolute. This is generally safer for manual extrusion tests.G92 E0: Resets the extruder’s current position to zero. This is crucial for accurate measurement.G1 E100 F100: This is the extrusion command.
G1: General motion command.E100: Extrude 100mm of filament.F100: Set the feed rate (speed) to 100 mm/minute. This is a very slow speed, chosen to minimize any potential skipping or resistance issues that could affect accuracy. For some extruders, you might even go slower (e.g., F50).
Wait for the printer to finish extruding. It will take about a minute with an F100 feed rate. Do not manually push or pull the filament during this process.
Step 6: Measure the actual extruded length
- Measure Remaining Filament: Once the extrusion stops, use your digital calipers to measure the distance from your original 120mm mark to the fixed point on the extruder entry.
- Calculate Actual Extruded Amount: Subtract this new measurement from your initial 120mm mark.
Example: If your initial mark was 120mm from the extruder, and after extruding, the mark is now 22mm from the extruder, then your printer actually extruded 120mm – 22mm = 98mm.
Step 7: Calculate the new E-steps value
Now comes the math! Use the following formula to calculate your new, corrected E-steps value:
New E-steps = (Current E-steps * Desired Extrusion Length) / Actual Extruded Length
Using the example from Step 3 and Step 6:
- Current E-steps = 93.00
- Desired Extrusion Length = 100mm
- Actual Extruded Length = 98mm
New E-steps = (93.00 * 100) / 98 = 94.897959...
Round this to two decimal places for practical use (e.g., 94.90).
Step 8: Apply and save the new E-steps value
Send the new E-steps value to your printer using the M92 command, followed by M500 to save it to the EEPROM (your printer’s non-volatile memory). If your printer does not use EEPROM (e.g., Klipper firmware), you will need to edit its configuration file directly.
For Marlin (and similar firmware):
M92 E94.90
M500
If your printer uses Klipper, you would edit the printer.cfg file and change the rotation_distance under the [extruder] section, then restart Klipper. The calculation for Klipper is slightly different: rotation_distance = (current_rotation_distance * actual_extrude_distance) / requested_extrude_distance. It’s often easier to think of it as rotation_distance = (number_of_motor_steps_per_revolution * microsteps) / E_steps_value. For calibration, you’d effectively be finding the correct E-steps and then converting it to rotation_distance if needed, or using the formula: new_rotation_distance = old_rotation_distance * (actual_length / target_length).
After sending M500, it’s good practice to send M503 again to verify that the new E-steps value has been correctly loaded from EEPROM.
Step 9: Verify your calibration (repeat the process)
To ensure your calibration is accurate, repeat Steps 4 through 6 with the new E-steps value. Ideally, when you extrude 100mm, your printer should now extrude exactly 100mm (meaning your mark should be 20mm from the extruder entry point after the test). If it’s still slightly off, repeat the calculation with the new current E-steps value until you achieve consistent 100mm extrusion.
Advanced considerations and troubleshooting
While E-steps calibration is a powerful fix for under-extrusion, understanding its nuances and related settings can further refine your print quality.
E-steps vs. flow rate: When to adjust which?
This is a common point of confusion. Think of it this way:
- E-steps calibration: This is a mechanical calibration. It tells your printer how many motor steps are required to physically move a specific length (e.g., 1mm) of raw filament into the hotend. This value should be as accurate as possible and generally only needs to be set once for your specific extruder hardware. It’s about the absolute amount of filament moved.
- Flow Rate (or Extrusion Multiplier): This is a slicer setting, typically expressed as a percentage (e.g., 100%). It acts as a multiplier on top of your E-steps. It’s used for fine-tuning the amount of plastic actually deposited on the print bed, compensating for slight variations in filament diameter, melt flow characteristics, or even nozzle wear.
Rule of thumb: Calibrate your E-steps first and get it as close to perfect as possible. Once E-steps are calibrated, use the flow rate in your slicer to make minor adjustments (typically ±5%) if you notice slight under or over-extrusion with specific filaments or print settings. You should rarely need to adjust E-steps once it’s set correctly for your hardware, unless you change significant components of your extruder or hotend assembly.
Filament diameter variation
Even “1.75mm” filament can vary slightly in diameter (e.g., 1.72mm to 1.78mm). While E-steps ensures the length of filament is correct, the volume of plastic extruded also depends on the filament’s actual diameter. Most slicers allow you to input the exact filament diameter. Measuring your filament with calipers at several points and averaging the readings, then inputting this average into your slicer, can significantly improve volumetric accuracy. This works in conjunction with accurate E-steps.
Nozzle wear and its impact
Over time, especially with abrasive filaments, your nozzle can wear down, causing its internal diameter to increase. A 0.4mm nozzle might become a 0.45mm nozzle. This effectively leads to under-extrusion relative to what the slicer expects. While E-steps won’t directly compensate for this (as it’s still pushing the correct length of filament), it’s a factor to consider if you suddenly experience under-extrusion with an old nozzle. Replacing worn nozzles is a maintenance item that complements accurate E-steps.
Bowden vs. direct drive extruders
The E-steps values will differ significantly between Bowden and direct drive setups:
- Bowden Extruders: Often have lower E-step values (e.g., 90-100 steps/mm) because the motor is directly driving a simple hobbed gear.
- Direct Drive Extruders (especially geared ones): Can have much higher E-step values (e.g., 380-420 steps/mm for a Bondtech-style geared extruder, or even 800+ for some planetary gear systems) due to the gear reduction multiplying the motor’s steps.
The calibration process remains the same regardless of the extruder type, but be prepared for vastly different numerical results.
Multiple extruders
If your printer has multiple extruders (e.g., for multi-color or multi-material printing), each extruder will have its own E-steps value (E0, E1, E2, etc.). You must calibrate each extruder independently, as they are separate mechanical systems and may have slightly different characteristics.
Firmware differences and E-steps storage
- Marlin: Most common firmware. E-steps are typically stored in the EEPROM. Commands
M92 E[value]to set andM500to save. - Klipper: Uses a configuration file (
printer.cfg) on a host computer (like a Raspberry Pi). E-steps are represented asrotation_distance. Changes are made by editing the file and restarting Klipper. There’s no EEPROM on the printer board itself for these settings. - RepRapFirmware (Duet boards): Settings are stored in a configuration file (
config.g) on the SD card. Changes are made by editing the file or using M-commands and then saving withM500(which writes toconfig.g).
Always consult your printer’s specific firmware documentation for the exact method of applying and saving E-steps values.
When to re-calibrate E-steps
While E-steps is a “set it and forget it” setting for most users, there are specific instances where re-calibration is highly recommended:
- Firmware Updates: Some firmware updates can reset settings to default. Always check after an update.
- Extruder Component Changes: If you replace your extruder motor, drive gear, or the entire extruder assembly, you absolutely need to re-calibrate.
- Hotend Changes: While less common, a significant change in hotend geometry or thermistor characteristics could theoretically impact extrusion behavior enough to warrant a check.
- Persistent Under/Over-Extrusion: If you’ve tried everything else and still face issues, a quick E-steps check is always a good idea.
Common mistakes to avoid during calibration
- Not saving the new value: Forgetting
M500on Marlin-based printers means your changes will be lost after a power cycle. - Inaccurate measurements: Using a flimsy ruler instead of calipers, or not being precise with your marks, will lead to incorrect calibration.
- Extruding too fast: A high feed rate (F value) can cause the motor to skip steps, leading to an inaccurate measurement. Stick to F100 or lower.
- Cold hotend: Trying to extrude with a cold hotend will damage your extruder or lead to wildly inaccurate results.
- Ignoring other under-extrusion causes: While E-steps is fundamental, don’t forget to check for clogged nozzles, heat creep, or incorrect temperatures if issues persist.
The benefits of accurate extrusion
The effort invested in E-steps calibration pays dividends in the form of dramatically improved print quality and reliability. By ensuring your printer extrudes the exact amount of filament required, you will experience:
- Enhanced Print Quality: Smoother, more consistent walls, better top layer infill, and fewer visible gaps or imperfections.
- Stronger Parts: Proper layer adhesion and material density lead to prints that are structurally sounder and less prone to breaking.
- Improved Dimensional Accuracy: Objects will be closer to their designed dimensions, which is crucial for functional parts and assemblies.
- Reduced Filament Waste: Less under-extrusion means fewer failed prints and less material ending up in the bin.
- Consistent Results: Once calibrated, you can rely on your printer to perform predictably, reducing the need for constant troubleshooting.
- Easier Slicer Tuning: With a mechanically accurate extruder, your slicer’s flow rate setting becomes a precise tool for fine-tuning, rather than a band-aid for fundamental issues.
Conclusion: A cornerstone of 3D printing excellence
E-steps calibration is a foundational process that every 3D printer owner should understand and perform. It’s a free, yet incredibly impactful, adjustment that directly addresses one of the most common and frustrating print quality issues: under-extrusion. By taking the time to precisely calibrate your extruder, you’re not just fixing a problem; you’re elevating your printer’s performance, ensuring accurate filament delivery, and paving the way for consistently high-quality, reliable 3D prints. Make it a routine check, especially after hardware changes, and watch your printing endeavors transform from a battle against imperfections to a satisfying journey of creation.
Frequently asked questions
Will calibrating E-steps fix under-extrusion if my nozzle is partially clogged?
No. E-steps calibration corrects how much filament the extruder motor pushes, but a clogged nozzle physically blocks flow regardless of motor steps. The article lists a clogged nozzle as a separate cause of under-extrusion that should be checked if issues persist after calibration. Always rule out clogs before or alongside E-steps adjustment.
Do I need to re-calibrate E-steps when switching from PLA to PETG filament?
No. E-steps is a mechanical calibration of your extruder hardware (motor, gears, drive gear diameter) that stays constant for a given printer setup. The article notes this value should only need setting once unless you change extruder components or update firmware. Filament-specific fine-tuning is done via the slicer’s flow rate setting, not E-steps.
What happens if I forget to send the M500 command after setting new E-steps?
Your new E-steps value will be lost when the printer is power-cycled, reverting to the old default. The article explicitly warns that forgetting M500 on Marlin-based printers means changes are not saved to EEPROM. Always verify with M503 after saving to confirm the new value is stored.