Few things are as frustrating in 3D printing as watching a promising print slowly devolve into a blobby mess or a brittle failure. Often, the culprit behind these common 3D print defects is over-extrusion – a phenomenon where your printer pushes out too much filament for the intended volume. This isn’t just an aesthetic issue; it can lead to structural weaknesses, dimensional inaccuracies, and even nozzle clogs. Understanding how to identify, diagnose, and rectify over-extrusion is a fundamental skill for anyone looking to achieve consistent, high-quality prints. This comprehensive guide will walk you through the essential steps to troubleshoot and calibrate your way to perfect prints.
What exactly is over-extrusion?
The world’s first desktop full-color 3D & UV printer. Back the Kickstarter campaign with a refundable $50 deposit for VIP pricing.
At its core, over-extrusion occurs when your 3D printer extrudes more plastic than necessary for a given layer or feature. Imagine trying to spread too much butter on a slice of toast – it oozes over the sides and creates an uneven surface. In 3D printing, this excess material has nowhere to go, so it either builds up, creating unsightly blobs and bumps, or it compresses, leading to brittle prints, poor surface finish, and issues with part fitment. It’s a delicate balance; under-extrusion is equally problematic, but over-extrusion often manifests in distinct, visible ways that can initially be puzzling.
Common symptoms of over-extrusion
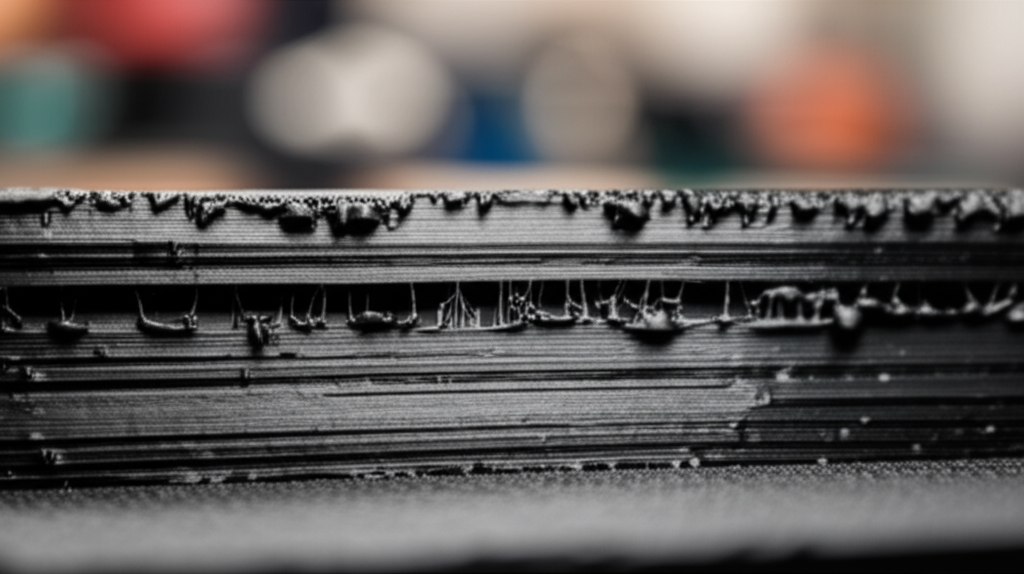
Identifying over-extrusion starts with recognizing its tell-tale signs. While some symptoms can overlap with other 3D print defects, a combination of these often points directly to an extrusion problem:
- Blobby or lumpy surfaces: The most obvious sign. Excess plastic accumulates on the print surface, creating uneven textures, zits, or large blobs.
- Pronounced layer lines: While some layer lines are normal, over-extrusion makes them overly prominent, almost like ridges, due to too much material being squeezed into each layer.
- Stringing and oozing: Though often associated with retraction settings, over-extrusion can exacerbate stringing as there’s simply more molten plastic available to ooze between print moves.
- Dimensional inaccuracy: Parts will be slightly larger than designed, making assembly difficult or impossible for multi-part models. Holes may be smaller than intended.
- Brittle prints: Counter-intuitively, prints can become brittle because the excessive material creates internal stress and poor layer adhesion in certain areas, leading to delamination or easy breakage.
- Nozzle clogging: Persistent over-extrusion can force too much material through the nozzle, potentially leading to partial or complete clogs over time.
- Elephant’s foot: The base of your print flares outwards, often caused by the first layer being squished too much due to over-extrusion or an incorrect Z-offset.
Why does over-extrusion happen? Understanding the root causes
The world’s first desktop full-color 3D & UV printer. Back the Kickstarter campaign with a refundable $50 deposit for VIP pricing.
Over-extrusion isn’t usually a single, isolated problem; it’s often the result of one or more miscalibrated settings or hardware issues. Pinpointing the exact cause is crucial for an effective fix:
Incorrect flow rate (extrusion multiplier)
Your slicer’s flow rate or extrusion multiplier setting dictates how much plastic is extruded relative to the theoretical amount. If this value is set too high, your printer will consistently push out more material than needed. This is one of the most common causes of over-extrusion and often the first place to look.
Improper filament diameter setting
Slicer software relies on an accurate filament diameter to calculate the volume of plastic to extrude. If your filament is, for example, 1.75mm, but your slicer is set to 1.70mm, the slicer will assume the filament is thinner and command the extruder to push more material to compensate, resulting in over-extrusion.
Nozzle temperature too high
When filament is printed at too high a temperature, it becomes more fluid and can flow out of the nozzle more easily, sometimes leading to more material being extruded than intended for a given movement. This can also contribute to stringing and poor bridging.
Incorrect print speed
While less direct, excessively high print speeds can sometimes contribute to over-extrusion, especially if the hotend struggles to melt the filament fast enough, leading to inconsistent flow or pressure build-up. Conversely, very slow speeds can also allow more material to ooze out if not properly managed.
Z-offset issues
An incorrect Z-offset, particularly one that’s too low (nozzle too close to the bed), can cause the first layer to be squished excessively. This effectively forces more material into a smaller space, mimicking over-extrusion and leading to an “elephant’s foot” effect.
Partially clogged nozzle
A partially clogged nozzle might seem counter-intuitive as a cause for over-extrusion. However, a restriction can cause pressure to build up behind the clog. When the restriction finally gives way, a surge of material can be released, creating blobs or inconsistencies. Furthermore, a non-uniform nozzle bore can also lead to uneven extrusion.
Inaccurate E-steps calibration
The E-steps (extruder steps per millimeter) setting tells your printer’s extruder motor how many steps it needs to take to push a specific length of filament. If this value is too high, the extruder will push more filament than commanded, leading to systemic over-extrusion regardless of other settings.
A step-by-step guide to diagnosing and fixing over-extrusion
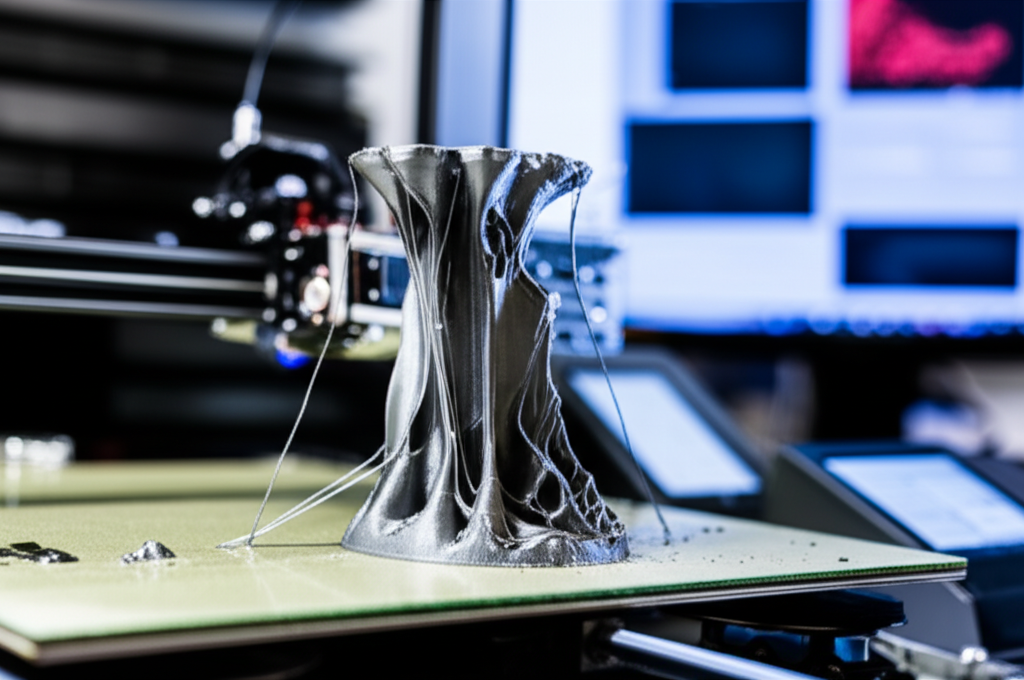
Addressing over-extrusion requires a systematic approach. Tackle these potential causes one by one, testing after each adjustment, to pinpoint and resolve the issue effectively.
Step 1: Visual inspection and symptom identification
Before diving into calibration, carefully observe your prints. Are they consistently blobby? Do parts not fit together? Is there excessive stringing? Documenting the specific symptoms will help you prioritize which calibration steps to focus on first.
Step 2: Calibrate E-steps (extruder steps per millimeter)
This is arguably the most fundamental calibration for extrusion accuracy. It ensures your extruder motor is pushing the correct amount of filament. This should ideally be done once per printer, unless you change the extruder hardware.
- Mark the filament: Heat your hotend to printing temperature. Load filament and mark a point 120mm from the entry point of your extruder.
- Extrude filament: Command your printer to extrude 100mm of filament (e.g., via your printer’s menu or a G-code command like
G1 E100 F100). - Measure remaining filament: After extrusion, measure the distance from the extruder entry point to your mark.
- Calculate new E-steps: If 20mm remains (meaning 100mm was extruded), your E-steps are likely accurate. If, for example, 25mm remains (meaning only 95mm was extruded), your E-steps are too low. Use the formula:
(Current E-steps * Expected Extrusion) / Actual Extrusion = New E-steps. For example, if current E-steps are 93, and you extruded 95mm instead of 100mm:(93 * 100) / 95 = 97.89. - Update firmware/settings: Apply the new E-steps value to your printer’s firmware (Marlin:
M92 E[new_value]thenM500to save) or through your slicer’s custom G-code settings if your printer doesn’t save E-steps.
Step 3: Calibrate flow rate (extrusion multiplier)
Once E-steps are dialed in, the flow rate (often called ‘extrusion multiplier’ in slicers) fine-tunes the actual volume of plastic. This value can vary slightly between different filament types and brands.
- Print a single-wall calibration cube: Design or download a simple 20x20x20mm cube with no infill, no top/bottom layers, and a single perimeter wall thickness set to your nozzle diameter (e.g., 0.4mm).
- Measure wall thickness: After printing, use calipers to measure the thickness of the printed wall in several places.
- Calculate new flow rate: If your nozzle is 0.4mm, and your wall measures 0.48mm, you’re over-extruding. Use the formula:
(Desired Wall Thickness / Actual Wall Thickness) * Current Flow Rate = New Flow Rate. For example, if current flow is 100%:(0.4 / 0.48) * 100 = 83.3%. - Adjust in slicer: Input this new percentage into your slicer’s flow rate or extrusion multiplier setting. Print another cube to verify.
Step 4: Verify filament diameter
It’s surprising how often filament diameter can vary, even within the same spool. Regularly check your filament.
- Measure filament: Use digital calipers to measure your filament diameter at several points along a few meters of the spool.
- Average and update: Calculate the average diameter and input this precise value into your slicer’s filament settings. This is crucial for the slicer to accurately calculate the volume of plastic to extrude.
Step 5: Optimize print temperature
While less direct than flow rate, an incorrect temperature can contribute to over-extrusion by making the filament too fluid.
- Print a temperature tower: This G-code generated print changes temperature at different heights, allowing you to visually assess optimal print quality, including minimal stringing and good layer adhesion.
- Identify optimal temperature: Choose the lowest temperature that still produces good layer adhesion and surface finish without signs of under-extrusion or excessive stringing.
- Update slicer: Adjust your slicer’s print temperature settings accordingly.
Step 6: Adjust print speed
While not a primary cause, print speed can influence how over-extrusion manifests.
- Experiment with speed: If you’re seeing minor over-extrusion artifacts, try slightly reducing your print speed, especially for outer perimeters. This can give the hotend more time to melt and extrude material consistently.
- Monitor results: Observe if slower speeds reduce blobs or improve surface finish.
Step 7: Check and adjust Z-offset
A properly set Z-offset is critical for the first layer and overall print quality.
- Print a first layer test: Print a large, single-layer square or circle.
- Observe adhesion and squish: The first layer should be squished just enough to adhere well without showing excessive ripples or ridges (signs of being too close) or gaps between lines (signs of being too far).
- Adjust Z-offset: Adjust your Z-offset incrementally (e.g., 0.02mm at a time) until the first layer is perfect. A Z-offset that’s too low will force excess material, causing the ‘elephant’s foot’ effect and contributing to over-extrusion symptoms on the base.
Step 8: Inspect and clean the nozzle
A partially clogged or worn nozzle can cause erratic extrusion and contribute to over-extrusion artifacts.
- Visual inspection: Check the nozzle tip for any visible debris or signs of wear (e.g., a widened or non-circular opening).
- Perform a cold pull: If you suspect a partial clog, a cold pull (also known as an atomic pull) can effectively remove burnt filament or debris from the nozzle.
- Consider replacement: If the nozzle is old, worn, or severely clogged, replacing it with a new one is often the simplest and most effective solution.
Maintaining optimal print quality
Once you’ve tackled the immediate over-extrusion issues, ongoing maintenance and good practices will help keep your prints pristine:
- Regular calibration checks: Periodically re-check your E-steps and flow rate, especially when introducing new filament types or after significant hardware changes.
- Dry filament storage: Moist filament can cause inconsistent extrusion, bubbles, and poor print quality. Always store filament in a dry environment.
- Use quality filament: Inconsistent filament diameter from cheap brands can lead to constant extrusion issues. Investing in good quality filament often saves headaches down the line.
- Keep your printer clean: Dust and debris can lead to clogs or affect sensor readings.
Over-extrusion is a common hurdle in 3D printing, but it’s far from an insurmountable one. By systematically diagnosing the symptoms and methodically working through the calibration steps outlined above, you can effectively eliminate these frustrating 3D print defects. Patience and careful observation are key to achieving consistent print quality issues resolution. Master extruder calibration, and you’ll be well on your way to producing professional-grade prints with smooth surfaces and accurate dimensions, free from unsightly blobs or brittle sections, ensuring crisp layer lines and perfect part geometry.
Frequently asked questions
Does over-extrusion always require recalibrating E-steps, or can I just lower the flow rate in my slicer?
You should calibrate E-steps first, then adjust flow rate. E-steps are a hardware calibration that tells your extruder motor how many steps to push a specific length of filament; if this value is wrong, your printer will systematically over-extrude regardless of slicer settings. Only after E-steps are accurate should you fine-tune the flow rate (extrusion multiplier) per filament, as explained in the article’s step-by-step guide.
Can a partially clogged nozzle really cause over-extrusion, not just under-extrusion?
Yes. While a clog often causes under-extrusion, a partial clog can create pressure buildup behind the restriction. When that pressure suddenly releases, a surge of material exits the nozzle, causing blobs and inconsistent extrusion. The article also notes that a non-uniform nozzle bore from wear can lead to uneven extrusion that mimics over-extrusion symptoms.
How do I tell if my print’s “elephant’s foot” is from over-extrusion or a Z-offset that’s too low?
Both can cause elephant’s foot, but the article advises checking Z-offset first by printing a single-layer test square. If the first layer shows excessive ripples or ridges (too much squish), adjust Z-offset upward incrementally. If the first layer looks good but the base still flares, the likely cause is over-extrusion from incorrect flow rate or E-steps, so proceed with those calibrations.