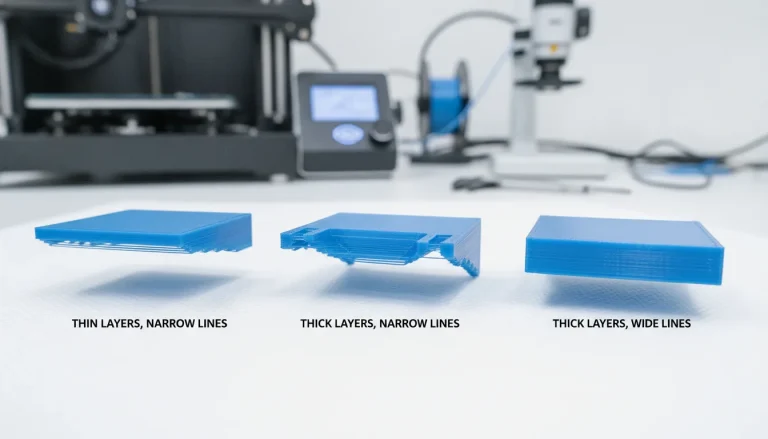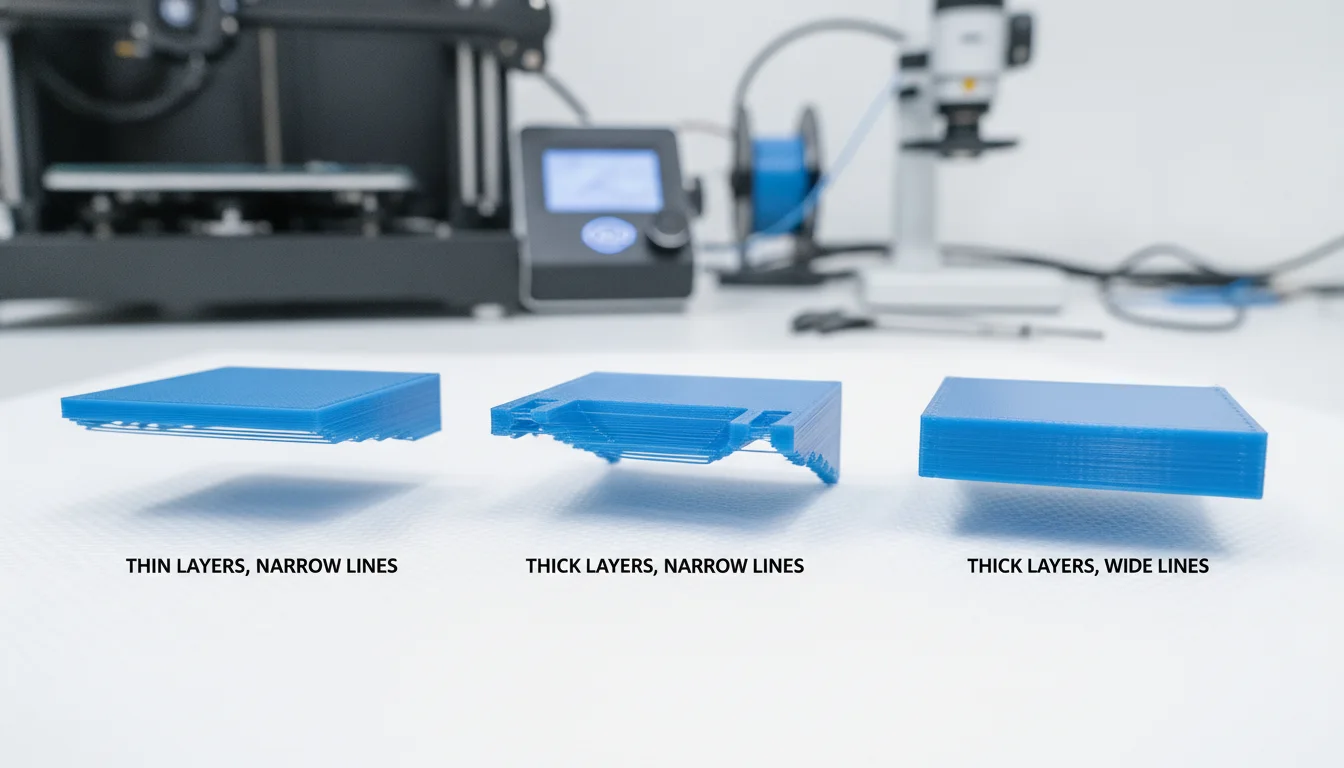
Achieving pristine overhangs in Fused Deposition Modeling (FDM) 3D printing is often considered a hallmark of advanced mastery. While basic settings like print speed and temperature are crucial, a deeper dive into how layer height and line width interact with these challenging geometries can unlock significantly improved overhang quality. These two seemingly fundamental slicer advanced settings are far more interconnected and influential than many users initially realize, directly shaping the structural integrity and aesthetic finish of your prints.
Understanding the fundamentals: layer height and line width

A retro-styled turntable and add-on speaker system with concrete and wood enclosure options. Currently running on Kickstarter.
Before dissecting their impact on overhangs, it’s essential to grasp the individual roles of layer height and line width.
Layer height: the vertical dimension of detail
Layer height refers to the thickness of each individual layer of filament deposited by the nozzle. It’s a primary determinant of print resolution, influencing both the visual smoothness of curved surfaces and the overall print time. A smaller layer height (e.g., 0.1mm) typically results in finer detail and smoother transitions between layers, often at the expense of longer print times. Conversely, a larger layer height (e.g., 0.3mm) generally speeds up printing but introduces more visible layer lines, potentially reducing surface fidelity.
Line width: the horizontal dimension of strength and coverage
Line width, also known as extrusion width, dictates the width of the extruded plastic line as it’s laid down. While often set automatically by the slicer to be slightly larger than the nozzle diameter (e.g., 0.48mm for a 0.4mm nozzle), it’s a highly tunable setting. A wider line generally translates to stronger parts due to increased material bonding and better infill coverage. However, excessively wide lines can lead to over-extrusion artifacts, while lines too narrow can result in poor adhesion and weak prints.
The overhang challenge in FDM 3D printing
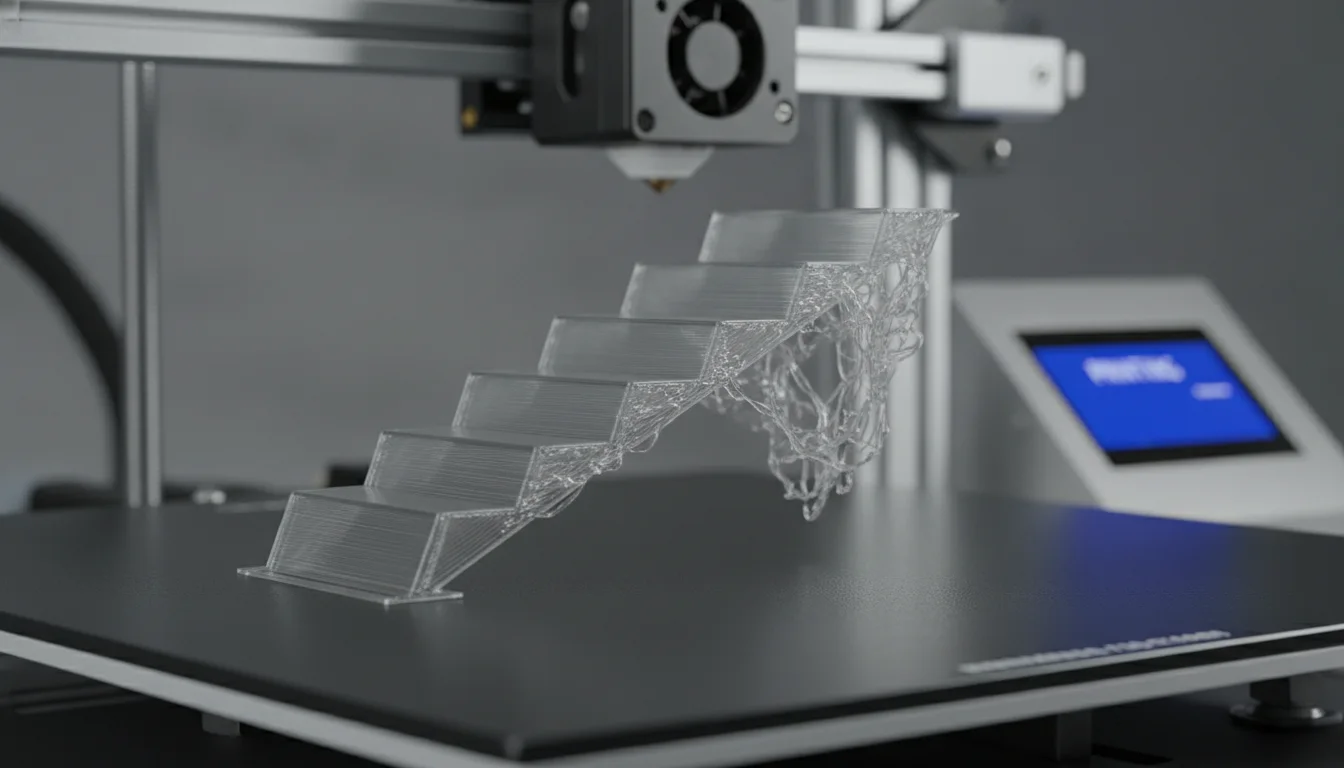
Overhangs are sections of a 3D print that extend outwards without direct support from the layer below. Gravity is the primary adversary here; as molten plastic is extruded into thin air, it tends to sag before it can cool and solidify. The angle of the overhang dictates the severity of this challenge. Mild overhangs (e.g., 45 degrees) are often manageable, while steep overhangs (e.g., 70 degrees or more) typically require careful optimization or dedicated support structures to prevent deformation, curling, or complete failure.
How layer height influences overhang performance

The choice of layer height has a profound, albeit sometimes counterintuitive, effect on overhang quality.
-
Smaller layer heights (thinner layers):
- Increased support overlap: When a new layer is printed over an overhang, a thinner layer means a smaller portion of the new layer is unsupported. This effectively increases the percentage of the new layer that rests on the previous, solidified layer, providing more stable footing.
- Faster cooling per layer: Thinner layers contain less material, allowing them to cool and solidify more rapidly. This reduces the time available for gravity to cause sagging before the plastic hardens.
- Reduced “stair-stepping”: While not directly about sag, smaller layers create finer steps on angled surfaces, making the overhang appear smoother and less prone to visible imperfections.
- Potential for increased print time: A drawback of smaller layer heights is the significantly longer print duration, which must be weighed against the desired quality.
-
Larger layer heights (thicker layers):
- Reduced support overlap: A thicker layer means a larger portion of the newly extruded material for an overhang will be deposited into thin air, increasing the likelihood of sagging.
- Slower cooling per layer: More material per layer means it takes longer to cool and solidify, giving gravity more time to pull the molten plastic downwards.
- Increased “stair-stepping”: Thicker layers result in more pronounced steps on angled surfaces, which can exacerbate the visual impact of any sagging.
- Faster print time: The primary advantage is quicker prints, suitable for functional prototypes where aesthetic overhang quality is not paramount.
In general, for optimal overhang quality, a smaller layer height is often preferred, as it provides more frequent anchor points and allows for quicker solidification of each successive layer.
How line width influences overhang performance
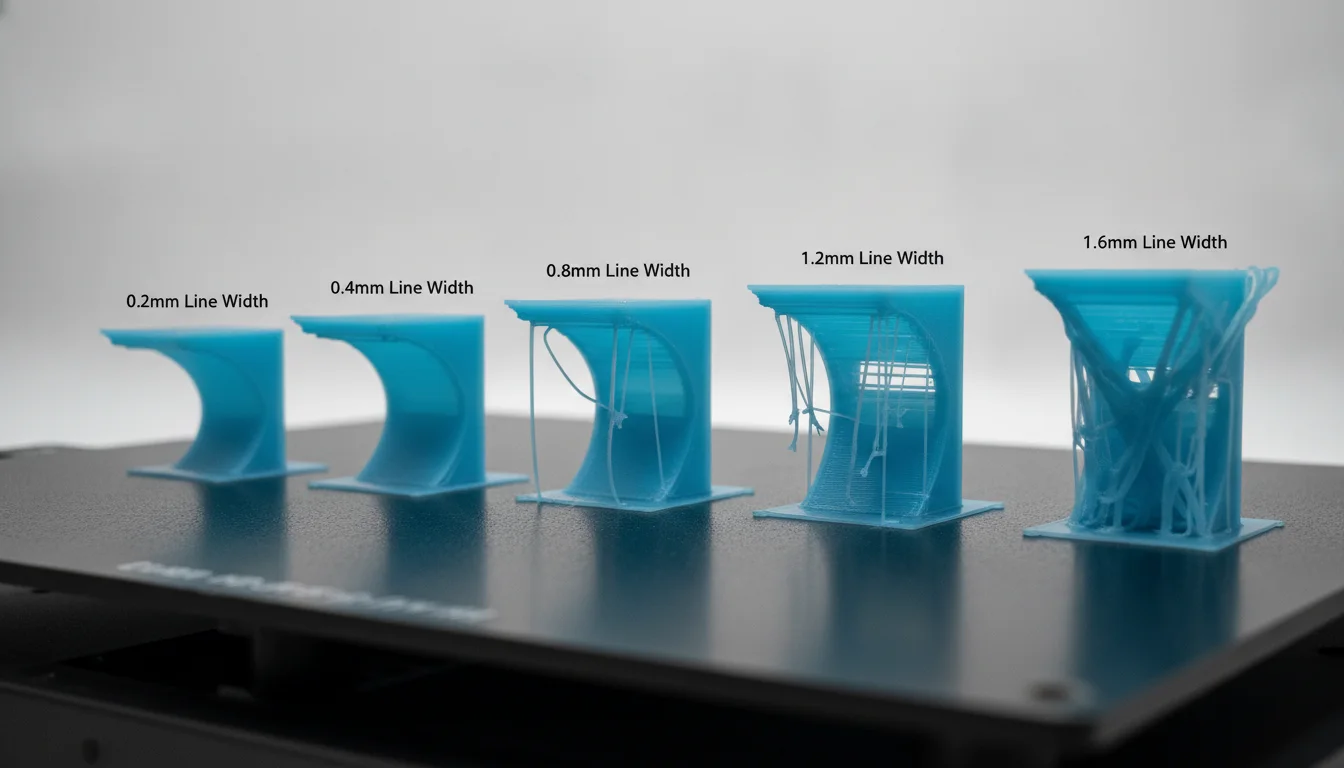
The impact of line width on overhangs is equally critical and often overlooked.
-
Wider line widths:
- Increased surface area for adhesion: A wider line presents a larger contact area for the subsequent layer to adhere to, which can be beneficial for stability, particularly on less extreme overhangs.
- Bridging capability: When an overhang effectively becomes a short bridge, a wider line can span small gaps more effectively due to its increased material volume and surface tension.
- Potential for excessive sag: If the line is too wide, especially relative to the layer height, the sheer volume of unsupported material can overcome surface tension and cooling, leading to more pronounced sagging and poor definition.
- Risk of “blobbing”: Overly wide lines can cause material buildup on the edge of an overhang, resulting in unsightly blobs or poor dimensional accuracy.
-
Narrower line widths:
- Reduced material volume: Less material means less weight for gravity to act upon, potentially reducing sag on very steep overhangs.
- Finer detail: Can contribute to sharper edges and finer detail on complex overhang geometries.
- Reduced adhesion and strength: The trade-off is often weaker layer adhesion and overall print strength due to less material bonding. This can make the overhang structure more fragile.
- Increased print time: Printing with narrower lines often requires more passes to cover the same area, extending print duration.
The optimal line width for overhangs is often a delicate balance. It needs to be wide enough to provide good adhesion and some bridging capability but not so wide that it sags excessively or creates artifacts. Many users find a line width slightly larger than the nozzle diameter (e.g., 105-120% of nozzle diameter) to be a good starting point for general printing, including overhangs.
The synergy: layer height, line width, and advanced slicer settings
The true mastery of overhangs comes from understanding the interplay between layer height and line width, often in conjunction with other slicer advanced settings.
Optimal ratios and cooling considerations
A common guideline suggests that the layer height should ideally be a percentage of your nozzle diameter, typically ranging from 25% to 75%. For overhangs, a lower percentage (e.g., 0.12mm layer height with a 0.4mm nozzle, or 30%) often yields better results. This provides a good balance between vertical resolution and the ability of each layer to solidify quickly.
Coupled with this, adequate cooling is paramount. Most slicers offer specific settings for cooling overhangs, such as increasing fan speed only for these sections or slowing down print speed significantly. The goal is to maximize the time the plastic has to cool while minimizing the time it spends unsupported.
Key advanced settings to explore:
- Overhang fan speed: Consider increasing fan speed to 100% specifically for overhangs to accelerate cooling.
- Minimum layer time: Ensuring each layer has sufficient time to cool before the next one is deposited can prevent heat buildup and sagging.
- Print speed for overhangs: Reducing print speed for external perimeters and specific overhang sections allows for more cooling time and precise material deposition.
- Infill overlap: Adjusting how much infill overlaps with perimeters can sometimes offer better support for the outer shell, subtly improving overhang stability.
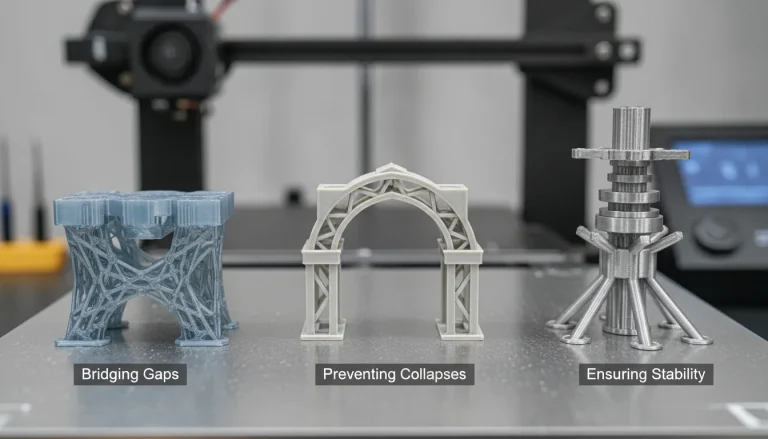
- Support structures: For very steep or complex overhangs, supports remain the most reliable solution, but optimizing layer height and line width can often reduce the need for them or make them easier to remove.
Practical tips and experimentation for better overhangs
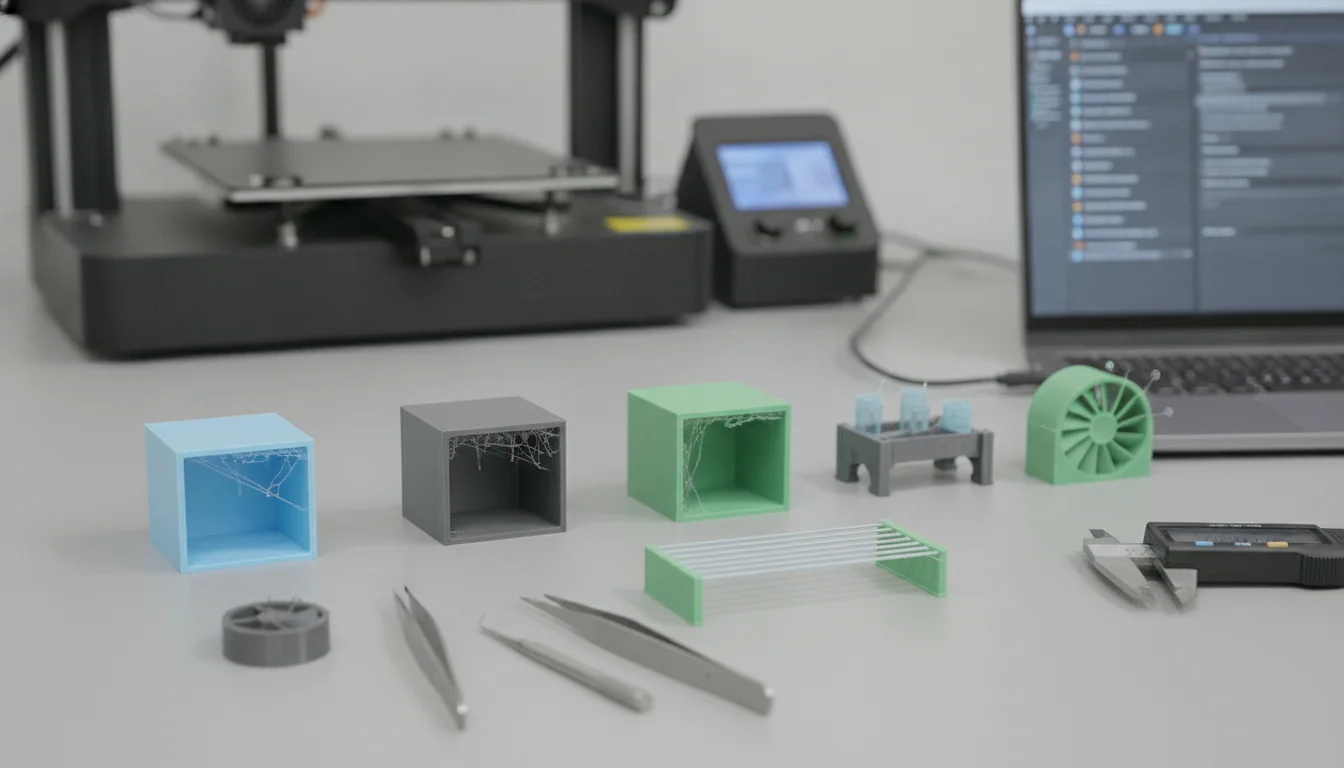
Achieving superior overhang quality is rarely a one-size-fits-all endeavor. Different filaments, printers, and models will respond uniquely to various settings. Here are some 3D printing tips for fine-tuning your approach:
- Calibration prints: Utilize dedicated overhang test models (e.g., a fan-shaped overhang test) to systematically evaluate the effects of changing layer height, line width, and cooling settings.
- One variable at a time: When experimenting, change only one setting at a time to clearly identify its isolated impact.
- Observe and analyze: Pay close attention to how the plastic behaves during overhang sections. Is it sagging, curling, or adhering poorly? This visual feedback is invaluable for diagnosis.
- Filament properties: Different materials have varying cooling requirements and melt viscosities. PLA generally handles overhangs better than ABS or PETG due to its faster cooling and higher viscosity, but each material requires specific tuning.
- Nozzle condition: A worn or partially clogged nozzle can significantly degrade overhang quality, regardless of your slicer settings. Regular maintenance is key.
Conclusion

Mastering overhangs goes far beyond simply enabling supports. By delving into the nuanced relationship between layer height and line width, alongside strategic use of other slicer advanced settings, you can dramatically enhance the overhang quality of your 3D prints. There isn’t a single magic bullet; rather, it’s about understanding the principles of cooling, adhesion, and material deposition, and then carefully calibrating your printer to achieve the desired balance between print resolution, strength, and aesthetic finish. Embrace experimentation, and you’ll soon be printing complex geometries with confidence and precision.
Frequently asked questions
Does lowering print speed alone fix overhangs, or do I need to change layer height and line width too?
Lowering print speed helps by giving each layer more time to cool, but it does not address the fundamental geometry of how much of the new layer is unsupported. Reducing layer height gives each layer a smaller unsupported portion to sag from, while adjusting line width changes the material volume and adhesion surface. For the best results, combine slower overhang speed with a smaller layer height (e.g., 0.12mm with a 0.4mm nozzle) and a line width around 105–120% of nozzle diameter.
Will printing with a 0.6mm nozzle automatically make overhangs worse than with a 0.4mm nozzle?
Not necessarily—the key factor is the ratio of layer height and line width to nozzle diameter, not the nozzle size itself. A 0.6mm nozzle printing with a 0.18mm layer height (30% of nozzle diameter) and a line width of 0.66mm (110%) can produce overhangs as good as a 0.4mm nozzle at 0.12mm layer height. However, the larger line width means more material volume per line, so you must ensure adequate cooling and slower overhang speeds to prevent sagging.
If my overhangs look rough on the bottom side but not the top, should I increase or decrease line width?
Rough bottom-side overhangs usually indicate sagging, which means the line is too wide relative to the cooling capacity—the excess material droops before solidifying. Try reducing your line width to around 100–105% of nozzle diameter (e.g., 0.40–0.42mm for a 0.4mm nozzle) to lower the material volume per line. Also confirm your part cooling fan is at 100% for overhang sections and that your minimum layer time is long enough to let each layer harden fully.