The journey from a digital design to a tangible 3D print is often seen as complete once the printer finishes its job. However, the truth is that the post-processing phase is just as critical, if not more so, in determining the final quality and aesthetic appeal of your creation. It’s where the raw print is transformed into a polished product, but it’s also a minefield of potential 3D print post-processing errors that can quickly turn success into frustration. Many enthusiasts and professionals alike stumble during this crucial stage, making common mistakes that compromise their hard work. Understanding these pitfalls is the first step towards achieving flawless results and avoiding the disappointment of a damaged or subpar print.
Avoid these common mistakes in initial 3D print post-processing
1. Improper support removal
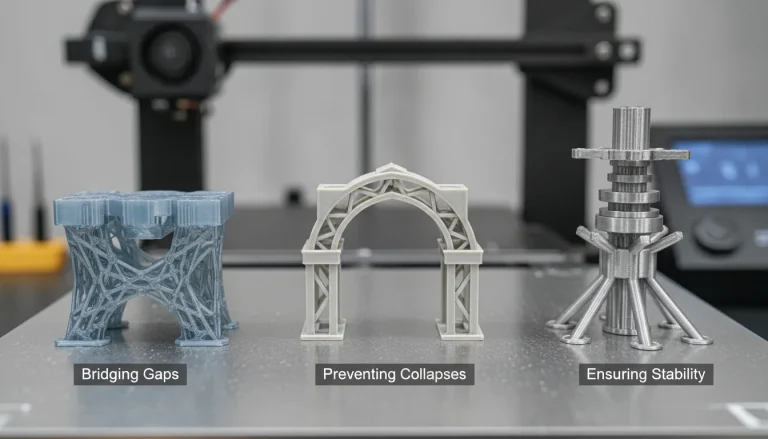
One of the most frequent challenges in 3D printing involves the removal of support structures. These are essential for printing complex geometries but can be a nightmare if not handled correctly. Aggressive or hasty removal is a leading cause of damaging prints, leading to unsightly scars, gouges, or even broken features. The key to successful troubleshooting support removal lies in patience and the right tools.
- Technique matters: For FDM prints, supports are often easier to remove when the print is slightly warm. Use flush cutters, spatulas, or needle-nose pliers. Always cut away from the print and apply pressure in a direction that minimizes stress on the model’s features.
- Resin print considerations: For resin prints, supports are typically removed after curing, though some prefer to remove them while the print is still “green” (uncured) for easier breaking. If removing green, be extremely careful as the material is very brittle. After curing, a heat gun can slightly soften supports for easier detachment.
- Finishing touches: Small nubs or rough patches can be carefully sanded with fine-grit sandpaper or trimmed with a hobby knife.
2. Over-curing resin prints
While curing is a vital step for resin prints to achieve their full strength and hardness, over-curing is a significant source of 3D print post-processing errors. Excessive UV exposure can lead to prints becoming brittle, discolored (often yellowish), or developing cracks over time. It can also make subsequent sanding or detailing much harder as the material becomes excessively rigid.
- Optimal curing times: Always refer to your resin manufacturer’s recommendations for curing times, as these vary widely.
- Controlled exposure: Use a dedicated UV curing station with a rotating turntable for even exposure. If using natural sunlight, monitor the time closely and rotate the print.
- Test, test, test: Perform small test prints to dial in the perfect curing duration for your specific resin and curing setup.
3. Aggressive sanding or filing
Post-processing often involves smoothing surfaces and removing layer lines, which typically means sanding or filing. However, being too aggressive with these tools can quickly lead to damaging prints beyond repair. Applying too much pressure, using too coarse a grit, or focusing on one spot for too long can create flat spots, divots, or even wear through thin walls.
- Gradual approach: Start with a moderately coarse grit (e.g., 200-300 for FDM, 400-600 for resin) and gradually move to finer grits (up to 1000-2000) for a smooth finish.
- Light and even pressure: Use light, consistent pressure and move the abrasive tool in circular motions or along the contours of the print to avoid creating flat spots.
- Wet sanding: For a smoother finish and to prevent dust buildup (especially important for resin prints), wet sanding is highly recommended.
4. Rushing the cleaning process
Proper cleaning is paramount, especially for resin prints, to remove uncured resin residue. Rushing this step or performing it inadequately can lead to several print cleanup issues, including sticky surfaces, failed paint adhesion, or even skin irritation from uncured resin. For FDM prints, neglecting to remove all small bits of filament or stringing can also lead to an unprofessional finish.
- Thorough washing: For resin prints, use isopropyl alcohol (IPA) or a specialized resin cleaner. Agitate the print, either manually or in an ultrasonic cleaner, ensuring all surfaces are exposed. Rinse thoroughly.
- Multiple washes: Often, a single wash isn’t enough. Consider a two-stage wash: a first bath to remove the bulk of the resin, followed by a cleaner, second bath.
- Drying: Ensure prints are completely dry before curing or further processing. IPA can leave a white residue if allowed to dry on the print.
5. Neglecting safety precautions
While not directly a print error, overlooking safety during post-processing can lead to personal injury or health hazards, which in turn can impact your ability to produce quality prints. Handling uncured resins, fine dust from sanding, or sharp tools without proper protection is a serious oversight and a common source of 3D print post-processing errors related to workflow interruption or injury.
- Personal protective equipment (PPE): Always wear nitrile gloves when handling uncured resin. Safety glasses are crucial when cutting supports or sanding to protect against flying debris. A respirator or dust mask is essential when sanding, especially resin, to avoid inhaling fine particles.
- Ventilation: Work in a well-ventilated area, particularly when dealing with resin fumes or sanding dust.
- Proper disposal: Dispose of uncured resin, contaminated IPA, and resin-soaked paper towels according to local regulations. Never pour uncured resin down the drain.
6. Incorrect use of tools
The right tools can make or break your post-processing experience, but even with the best equipment, incorrect usage can result in damaging prints. Using a dull blade, applying a heat gun too intensely, or misjudging the leverage needed for support removal are all common slip-ups. Each tool has a specific purpose and technique for optimal results.
- Sharp is safe: Ensure all cutting tools (knives, cutters) are sharp. Dull tools require more force, increasing the risk of slips and damage.
- Heat gun caution: When using a heat gun to soften supports or smooth FDM prints, keep it moving constantly and at a safe distance to avoid melting, warping, or scorching the print.
- Leverage and control: Understand the mechanics of your tools. For instance, when using pliers for support removal, use leverage to snap supports cleanly rather than twisting or tearing the print material.
7. Ignoring environmental factors
Environmental conditions can significantly impact the success of your post-processing, yet they are often overlooked. Factors like temperature, humidity, and even direct sunlight can influence how materials behave during cleaning, curing, and finishing, leading to unexpected 3D print post-processing errors.
- Temperature control: Extreme temperatures can affect resin viscosity during washing and curing. Too cold, and IPA may not clean as effectively; too hot, and resin can cure too quickly or unevenly.
- Humidity: High humidity can sometimes interfere with paint adhesion or cause issues with certain types of fillers or primers.
- UV exposure: For resin prints, ambient UV light (even indirect sunlight) can cause premature or uneven curing during the washing stage, making cleanup difficult and potentially leading to brittle spots. Work in a controlled environment away from direct UV sources until the print is intentionally cured.
Mastering 3D print post-processing is an art form that requires patience, precision, and an understanding of potential pitfalls. By being aware of these common mistakes – from improper support removal and aggressive sanding to neglecting safety and environmental factors – you can significantly improve the quality of your finished prints. Treat each stage with the care it deserves, learn from your experiences, and you’ll be well on your way to consistently producing stunning 3D models free from frustrating post-processing errors.
Frequently asked questions
How do I fix a resin print that turned brittle or yellow after curing?
Brittleness and yellowing are classic signs of over-curing from excessive UV exposure. Once the damage is done, the chemical structure has changed and cannot be reversed. To prevent this in the future, always follow your resin manufacturer’s recommended curing times and use a rotating turntable in a curing station for even, controlled exposure rather than relying on guesswork or direct sunlight.
Is it safe to sand resin prints without a mask?
No. Sanding cured resin creates fine dust particles that can irritate your lungs and skin. Always wear a respirator or dust mask rated for fine particulates, along with safety glasses to protect against flying debris. Work in a well-ventilated area, and consider wet sanding to suppress dust entirely while also achieving a smoother finish.
What should I do if my FDM print has support scars or gouges after removal?
Small scars or nubs left after support removal can be fixed. Carefully trim any protruding bits with a sharp hobby knife, then sand the area with fine-grit sandpaper (start around 300 grit and work up to 1000+). For deeper gouges, apply a thin layer of filler primer or modeling putty, let it dry, then sand smooth to match the surrounding surface before painting.