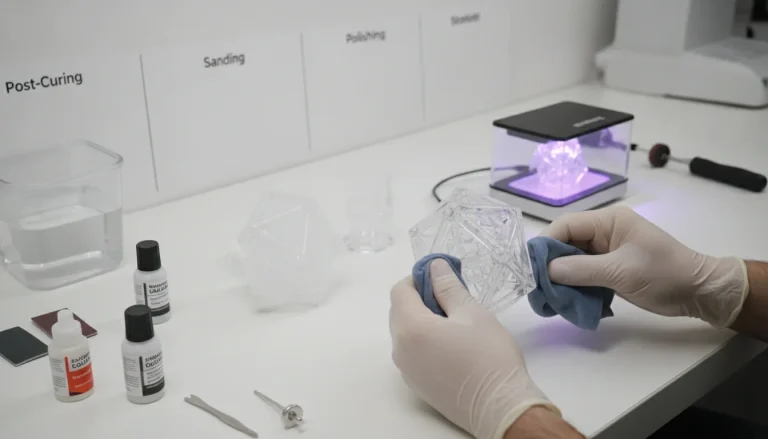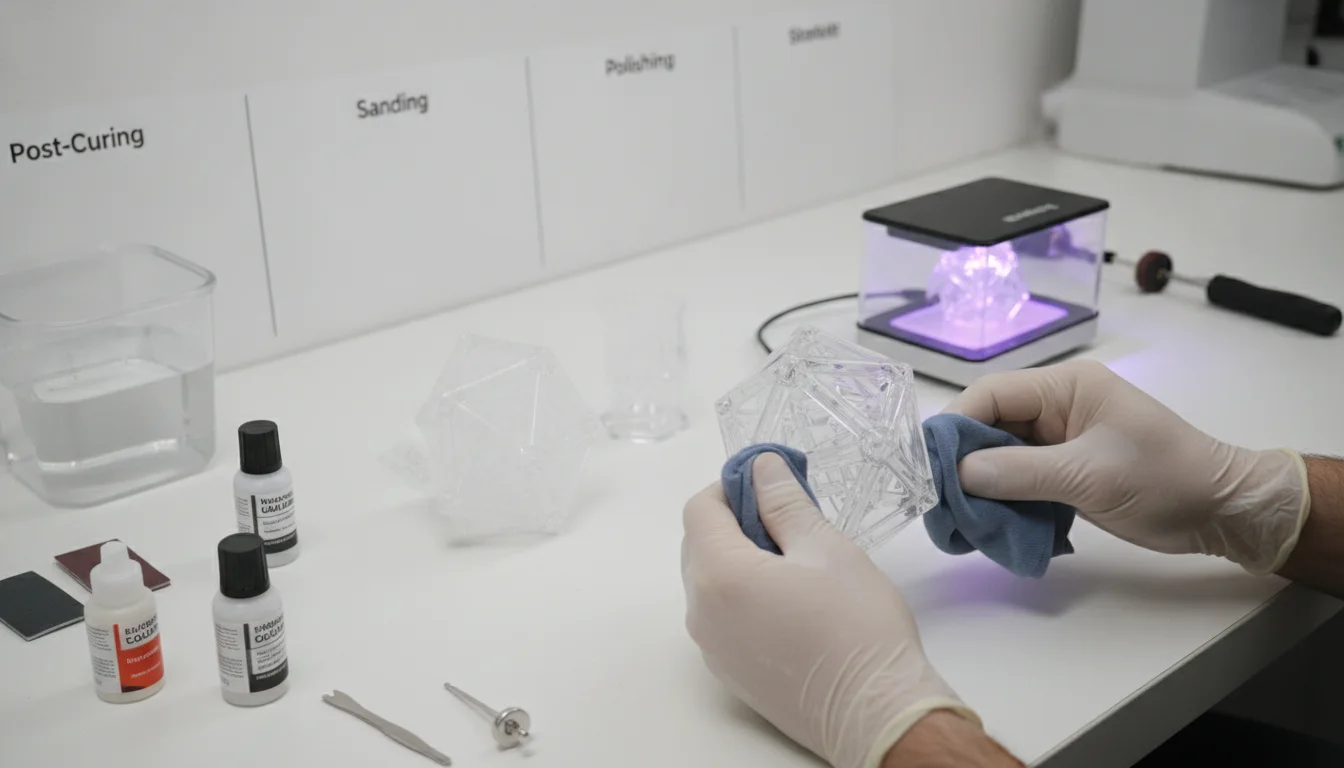
Stereolithography (SLA) 3D printing is renowned for its ability to produce highly detailed and intricate parts with exceptional resolution. However, fresh off the printer, SLA parts often have a slightly tacky surface and visible layer lines, especially when viewed up close. To truly unlock the potential of SLA technology and achieve that coveted mirror-smooth, professional finish, a meticulous post-processing workflow is indispensable. This guide will walk you through each critical step, from initial cleaning and essential post-curing to advanced sanding and polishing techniques, ensuring your resin prints boast unparalleled surface quality.
Understanding the SLA post-processing workflow
Every model we design and test gets uploaded as a free STL – browse the full profile on MakerWorld.
The journey from a raw resin print to a polished masterpiece involves several distinct stages. Each stage plays a crucial role in enhancing not just the aesthetic appeal but also the mechanical properties and longevity of your printed part. Skipping steps or performing them incorrectly can lead to suboptimal results, such as brittle parts, sticky surfaces, or a dull finish. The key to success lies in patience, attention to detail, and the right tools for the job.
Step 1: Initial cleaning and support removal
The very first step after printing is to clean the uncured resin from your print and remove its support structures. This is a critical foundation for all subsequent steps.
- Washing: Carefully remove the print from the build plate. Immerse the print in a bath of isopropyl alcohol (IPA) with a concentration of 90% or higher, or a dedicated resin cleaner. Many users opt for a two-stage wash system: a first bath to remove the bulk of the uncured resin, followed by a second, cleaner bath for a final rinse. Agitation, either manual or using an automated wash station, significantly improves cleaning efficiency. Ensure all visible uncured resin is removed, paying close attention to crevices and intricate details.
- Drying: After washing, allow the print to air dry completely. You can use compressed air to speed up the process and remove IPA from hard-to-reach areas. A print that isn’t fully dry before post-curing can develop a cloudy or sticky surface.
- Support Removal: While the print is still slightly flexible (before full post-curing), carefully remove the support structures. Using flush cutters or a hobby knife, snip the supports as close to the model surface as possible. For delicate features, consider heating the supports slightly with a heat gun to make them more pliable, reducing the risk of damaging the print. Removing supports before full curing often leaves smaller, easier-to-manage nubs.
- Safety Note: Always wear appropriate personal protective equipment (PPE), including nitrile gloves and safety glasses, when handling uncured resin and IPA. Work in a well-ventilated area.
Step 2: Post-curing for optimal properties
Post-curing is arguably the most vital step in SLA post-processing. It involves exposing the cleaned print to ultraviolet (UV) light, which fully polymerizes the resin, enhancing its mechanical strength, hardness, and heat resistance. Without proper UV curing, prints remain soft, brittle, and potentially toxic due to residual uncured resin.
- Why Post-Curing is Crucial:
- Mechanical Strength: Fully cured resin is significantly stronger and less brittle than partially cured resin.
- Dimensional Stability: Post-curing helps to stabilize the print’s dimensions, reducing the likelihood of warping or deformation over time.
- Surface Hardness: A properly cured surface is more resistant to scratches and impacts.
- Biocompatibility (for specific resins): Some resins require specific post-curing parameters to achieve biocompatibility for medical or dental applications.
- Methods of UV Curing:
- Dedicated UV Curing Stations: These are purpose-built units, often featuring multiple UV lamps and a rotating turntable to ensure even exposure. Commercial curing stations offer controlled environments, consistent results, and often integrated heating elements to optimize the curing process. While an upfront investment, they provide reliability and convenience.
- DIY UV Curing Chambers: Many hobbyists construct their own curing stations using UV LED strips or lamps (e.g., nail curing lamps) inside a reflective enclosure (like a cardboard box lined with aluminum foil). A solar-powered turntable can further enhance even exposure. These options are generally more cost-effective but may require more experimentation to achieve consistent results.
- Sunlight Curing: For smaller, less critical parts, direct sunlight can be used. However, UV intensity varies greatly with weather, time of day, and season, making it less consistent and often slower than dedicated UV sources.
- Curing Time and Temperature:
- Resin-Specific Parameters: Always consult the resin manufacturer’s recommendations for optimal curing times and temperatures. These can vary significantly between different resin types (e.g., standard, tough, flexible, clear).
- Temperature: Curing at slightly elevated temperatures (e.g., 40-60°C) can accelerate the polymerization process and improve final part properties for many resins. Some commercial curing stations include heating elements.
- Even Exposure: Ensure all surfaces of the print receive adequate UV exposure. Rotating the print during curing is essential.
- Impact on Surface Quality: While post-curing primarily affects mechanical properties, it also locks in the surface features. Any remaining layer lines or imperfections will be permanently set, making subsequent sanding and polishing crucial for achieving a smooth finish.
Step 3: Preparing the surface: Sanding and wet-sanding
Once your print is fully cured, the real work for achieving a mirror-smooth finish begins: surface preparation. This involves meticulously removing layer lines, support nubs, and other imperfections through sanding. This is where patience truly pays off.
- Why Sanding is Necessary:
- Removes Layer Lines: Even with high-resolution SLA prints, microscopic layer lines are often present. Sanding systematically removes these.
- Eliminates Support Marks: Support attachment points, even if carefully removed, often leave small nubs or divots that need to be smoothed out.
- Creates a Uniform Surface: Sanding provides a consistent base for polishing compounds to work effectively, preventing uneven shine.
- Gradual Grit Progression: The key to effective sanding is to start with a coarser grit to remove major imperfections, then progressively move to finer grits to remove the sanding marks left by the previous grit.
- Coarse Grits (e.g., 200-400): Use these for initial shaping, removing prominent support marks, and tackling significant layer lines. Be careful not to over-sand, especially on delicate features.
- Medium Grits (e.g., 600-1000): These grits refine the surface, smoothing out the marks from the coarser sandpaper.
- Fine Grits (e.g., 1200-2000): At this stage, you’re preparing the surface for polishing. The goal is to achieve a uniformly matte, smooth texture with no visible scratches.
- Very Fine Grits (e.g., 2500-5000+): For truly exceptional smoothness, you can continue with ultra-fine grits before moving to polishing.
- Wet-Sanding Benefits:
- Reduces Clogging: Water helps to flush away sanding debris, preventing sandpaper from clogging and maintaining its abrasive effectiveness.
- Minimizes Heat Buildup: Wet-sanding keeps the print cool, preventing potential deformation or melting of the resin, especially with powered tools.
- Smoother Finish: The lubricant action of water helps achieve a finer, more consistent finish.
- Reduces Dust: Significantly cuts down on airborne resin dust, which is a respiratory irritant.
- Techniques and Tips for Smooth Resin Prints:
- Consistent Pressure: Apply even, consistent pressure across the sanding area.
- Circular or Crosshatch Motion: For best results, sand in small circular motions or use a crosshatch pattern (sanding in one direction, then perpendicular to it with the next grit). This helps identify and remove previous sanding marks.
- Inspect Frequently: After each grit, thoroughly clean and inspect the surface under good light to ensure all marks from the previous grit have been removed before moving to the next.
- Consider Sanding Blocks: For flat surfaces, use a sanding block to ensure even pressure and prevent creating dips or uneven areas.
- Tooling Considerations: Manual sanding is effective for intricate details, but rotary tools (like a Dremel) with sanding attachments can speed up the process for larger, simpler surfaces. Exercise caution with power tools to avoid over-sanding or generating too much heat. Different sanding attachments (discs, drums, cones) offer versatility, but choose carefully based on the part’s geometry.
Step 4: Polishing for a mirror finish
With the surface perfectly smooth from sanding, it’s time to bring out the shine. Polishing compounds use progressively finer abrasives to remove microscopic scratches, resulting in a glossy, reflective surface.
- Polishing Compounds:
- Abrasive Compounds: These contain very fine abrasive particles that further smooth the surface. They come in various grades, from coarse to ultra-fine. Jewelers’ rouge, plastic polishes, and automotive rubbing compounds are common choices.
- Non-Abrasive Waxes/Sealants: While not strictly polishing, these can enhance shine and offer a protective layer after abrasive polishing.
- Tools for Polishing:
- Rotary Tools (e.g., Dremel with Buffing Wheels): These are highly effective for achieving a high gloss quickly. Use felt or cotton buffing wheels. Start with a lower speed to avoid overheating and “burning” the resin, which can cause discoloration or melting. Gradually increase speed as you gain experience.
- Buffing Wheels (Bench Grinder Attachment): For larger parts, a dedicated bench grinder with a cloth buffing wheel can be very efficient.
- Microfiber Cloths: For manual polishing or applying final touches, high-quality microfiber cloths are excellent.
- Cotton Swabs/Pads: Useful for intricate details or small areas.
- Techniques for Achieving High Gloss:
- Apply Compound Sparingly: A small amount of polishing compound goes a long way. Apply it directly to the buffing wheel or the print surface.
- Even Pressure, Consistent Movement: Move the print or the polishing tool continuously to prevent localized heat buildup. Apply light to medium pressure.
- Work in Sections: Polish small sections at a time, cleaning off residue before moving on.
- Progressive Polishing: If using multiple grades of polishing compound, follow the same progressive approach as with sanding, moving from coarser to finer compounds.
- Cleanliness: Keep your polishing tools and cloths clean to avoid introducing scratches from embedded debris.
- Considerations for Different Resins:
- Clear Resins: Achieving a truly transparent, glass-like finish on clear resins requires exceptional attention to detail in sanding and polishing. Any internal bubbles or surface imperfections will be magnified.
- Colored Resins: Colored resins generally polish well, though very dark colors might show swirl marks more readily if not polished perfectly.
- Flexible Resins: These can be more challenging to sand and polish due to their inherent flexibility. They might require different techniques or specialized compounds.
Step 5: Optional coatings and clear coats
For an extra layer of protection, enhanced durability, or an even deeper shine, applying a final coating can be beneficial. This step is optional but highly recommended for prints that will see handling or require specific aesthetic properties.
- When to Use Coatings:
- Enhanced Durability: Protects against scratches, UV degradation, and wear.
- Deeper Shine: Can provide a ‘wet look’ or a more uniform gloss than polishing alone.
- UV Resistance: Some coatings offer additional UV protection, preventing yellowing over time, especially for clear or light-colored prints.
- Specific Finishes: Can be used to achieve satin or matte finishes if desired, rather than high gloss.
- Types of Coatings:
- Clear Acrylic Sprays: Easy to apply, available in various finishes (gloss, satin, matte). Look for those designed for plastics or models. Multiple thin coats are better than one thick coat.
- UV-Resistant Clear Coats: Specifically formulated to protect against UV yellowing, ideal for clear resin prints.
- Epoxy Resins: A thin layer of clear epoxy can provide a very durable, high-gloss finish, similar to a clear coat on a car. This method requires careful mixing and application to avoid bubbles and drips.
- Automotive Clear Coats: High-quality automotive clear coats can offer exceptional durability and shine, but may require specialized equipment (spray gun) and proper ventilation.
- Application Tips:
- Clean Surface: Ensure the print is absolutely free of dust, fingerprints, or polishing residue before applying any coating.
- Ventilation: Work in a well-ventilated area or outdoors.
- Thin, Even Coats: Apply several thin, even coats rather than one thick one to prevent drips, runs, and uneven drying.
- Drying Time: Allow adequate drying time between coats and before handling the finished part.
Troubleshooting common issues in SLA post-processing
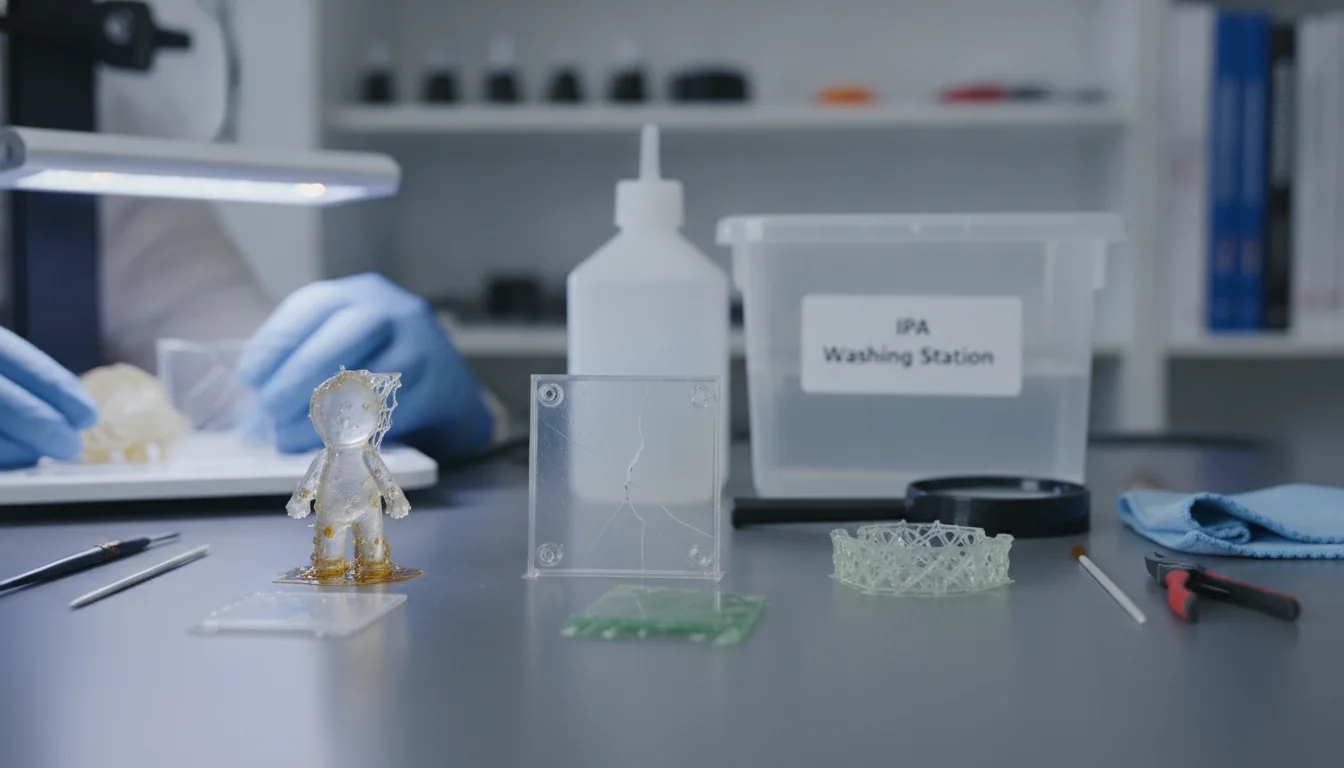
Even with careful execution, issues can arise. Here’s how to tackle some common problems:
- Sticky or Tacky Surface:
- Cause: Incomplete washing, insufficient drying, or under-curing.
- Solution: Rewash thoroughly with fresh IPA, ensure complete drying, and extend post-curing time or increase UV intensity.
- Cloudiness or White Residue:
- Cause: Water contamination in IPA, insufficient rinsing, or IPA drying too quickly on the surface.
- Solution: Use fresh, clean IPA. Ensure prints are fully dry before curing. Some users rinse with distilled water after IPA to remove any remaining IPA residue before final drying.
- Brittle Prints:
- Cause: Over-curing (especially with some flexible resins), or insufficient post-curing (leading to weak polymerization).
- Solution: Adjust curing times according to resin manufacturer guidelines. Some resins benefit from a slightly shorter cure time to maintain flexibility, while others need full polymerization for strength.
- Visible Scratches After Polishing:
- Cause: Not fully removing marks from the previous sanding grit, or using contaminated polishing tools/cloths.
- Solution: Go back a step in your sanding progression, ensuring all previous marks are gone before moving to finer grits. Clean all tools thoroughly.
Safety first
The world’s first desktop full-color 3D & UV printer. Back the Kickstarter campaign with a refundable $50 deposit for VIP pricing.
Working with SLA resins and chemicals requires adherence to safety protocols:
- Personal Protective Equipment (PPE): Always wear nitrile gloves to avoid skin contact with uncured resin and IPA. Safety glasses are crucial to protect your eyes from splashes.
- Ventilation: Work in a well-ventilated area to minimize exposure to resin fumes and IPA vapors.
- Resin Handling: Avoid direct skin contact. If contact occurs, wash immediately with soap and water. Never pour uncured resin or IPA down the drain. Dispose of waste properly according to local regulations.
- Respirator: When sanding, especially dry sanding, consider wearing a respirator to avoid inhaling fine resin dust, which can be irritating.
Achieving mirror-smooth finishes on SLA prints is a rewarding process that elevates your 3D printed parts from functional prototypes to professional-grade models. While it demands precision and patience, mastering these post-processing techniques – from thorough washing and essential UV curing to meticulous sanding, polishing, and optional coatings – will significantly enhance the aesthetic appeal, durability, and overall quality of your creations. By understanding the nuances of each step and investing in the right tools and techniques, you can consistently produce prints with a surface quality that truly stands out.
Frequently asked questions
Can I skip wet-sanding and just dry-sand my SLA prints?
While you can dry-sand, it is not recommended. Dry sanding generates fine resin dust that is a respiratory irritant, clogs sandpaper much faster, and creates heat buildup that can deform the print. Wet-sanding with water flushes away debris, reduces heat, and produces a smoother finish with less effort.
How do I fix a cloudy or white residue that appears after washing and curing?
This residue is typically caused by water contamination in your isopropyl alcohol (IPA) or IPA drying too quickly on the surface. Use fresh IPA at 90% concentration or higher, ensure the print is fully dry before curing, and consider a final rinse in distilled water after the IPA bath to remove any lingering residue.
Do I need a dedicated UV curing station, or can I just use sunlight?
Sunlight can work for small, non-critical parts, but it is inconsistent because UV intensity varies with weather, time of day, and season. A dedicated UV curing station or a DIY chamber with UV LED strips and a rotating turntable provides controlled, even exposure and reliable results, making it a worthwhile investment for consistent mechanical properties and surface hardness.