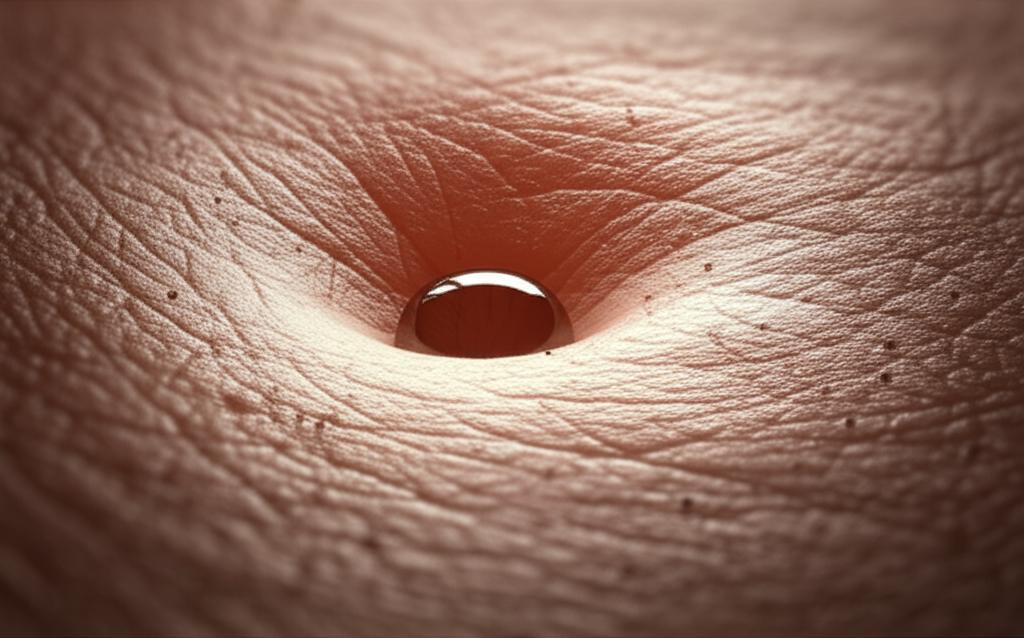
In the realm of 3D character art, the pursuit of realism often hinges on the most minute details. While strong foundational forms and appealing proportions are crucial, it's the subtle nuances of the skin's surface – the delicate network of pores, the intricate dance of wrinkles, and the myriad of tiny imperfections – that truly breathe life into a digital sculpt. Achieving realistic skin sculpting requires not just artistic skill, but a methodical approach to micro-detail 3D work.
This tutorial delves into advanced micro-sculpting techniques, primarily focusing on tools and workflows common in software like ZBrush, to elevate your character faces from merely good to truly hyper-realistic. We'll explore how to craft convincing ZBrush skin texture, master advanced sculpting wrinkles, and infuse your models with authentic character face details.
Understanding skin anatomy for sculpting
Before diving into the digital clay, a fundamental understanding of skin anatomy is paramount. Skin isn't a uniform surface; it's a complex organ with varying thickness, elasticity, and features across the face. Observing real-world references is non-negotiable. Pay attention to:
- Pore Distribution: Pores are not evenly spread. They are typically larger and more concentrated in the T-zone (forehead, nose, chin) and gradually become finer towards the cheeks and temples. Their size and depth also vary with age and skin type.
- Wrinkle Types:
- Expression Lines (Dynamic): These appear with muscle movement (e.g., crow's feet, frown lines, forehead furrows) and can become static over time.
- Static Wrinkles: Caused by age, sun exposure, and gravity (e.g., nasolabial folds, marionette lines). They are present even when the face is at rest.
- Compression Wrinkles: Formed when skin is compressed, often seen around the eyes or mouth when squinting or pursing lips.
- Skin Texture Variations: Beyond pores and wrinkles, observe subtle bumps, oiliness, dryness, and the delicate 'peach fuzz' (vellus hair) that covers much of the face.
Essential tools and brushes for micro-detailing

While many sculpting applications offer similar functionalities, ZBrush stands out for its robust suite of brushes and alpha management, making it a go-to for fine detail work. Here are some indispensable tools:
- Standard Brush: Your workhorse. When combined with various alphas, it's perfect for laying down pores, subtle bumps, and fine lines. Use it with a low Z Intensity.
- Dam_Standard Brush: Excellent for carving sharp, thin lines and creases, making it ideal for defining wrinkles and subtle skin folds. Experiment with its intensity for varying depths.
- Orb_Cracks (or similar custom crack brushes): Fantastic for creating organic, branching patterns found in more complex wrinkles or cracked skin.
- Clay Buildup / Clay: While primarily for primary and secondary forms, these can be used with very low intensity and small brush sizes to subtly build up or soften areas around pores and wrinkles, mimicking fat pads or skin tension.
- Alpha Library: A diverse collection of skin alphas (pore patterns, wrinkle maps, subtle noise) is critical. You can find these online, create your own from photos, or sculpt them manually.
- NoiseMaker/Surface Noise: A powerful ZBrush feature for adding procedural, non-destructive surface texture, great for a base layer of skin grain or subtle irregularities.
Step-by-step micro-sculpting process
The key to realistic results is a layered approach, building details from broad strokes to the finest imperfections.
1. Establishing primary forms and underlying structure
Before any micro-detail, ensure your base mesh has strong, anatomically correct primary forms. This includes the skull structure, major muscle groups, and fat pads. Think about the overall silhouette and volume. A solid foundation is crucial; no amount of fine detail can salvage a poorly constructed base.
2. Defining secondary forms: Major wrinkles and folds
Once your primary forms are established, move to defining the larger, more prominent wrinkles and skin folds. These are often the result of muscle action and underlying structure.
- Use the Dam_Standard brush with a moderate Z Intensity to sketch in major creases like nasolabial folds, forehead lines, and the basic structure of crow's feet.
- Focus on the directionality of these wrinkles. They often follow the lines of muscle contraction or skin compression.
- Don't make them too sharp initially. Use the Smooth brush with a very low intensity to subtly blend and soften their edges, making them feel like natural skin folds rather than cuts.
- Consider the tension and compression of the skin. Where the skin bunches, wrinkles form; where it stretches, they flatten.
3. Introducing tertiary details: Fine lines and subtle imperfections
This stage is about adding the myriad of smaller lines that contribute significantly to age, character, and realism.
- Switch to a lower Z Intensity for your Dam_Standard brush.
- Sculpt finer lines around the eyes, mouth, and forehead. These are often less deep and more numerous than secondary wrinkles.
- Utilize brushes like Orb_Cracks or custom crack alphas to create subtle, branching patterns, particularly in areas like the outer corners of the eyes or across the cheeks where skin might show subtle sun damage or age.
- Vary the length and depth of these lines. Not all wrinkles are created equal.
- Reference photos showing faces in various expressions are invaluable here, helping you understand how these lines form and dissipate.
4. Sculpting realistic skin pores
Pores are arguably the most challenging micro-detail to get right, as their distribution and variation are key to authenticity.
- Prepare your surface: Ensure your mesh has sufficient subdivision levels to hold these tiny details.
- Base pore texture: Start with a subtle, overall pore texture. You can use Surface Noise with a small, fine alpha to lay down a foundational layer of skin grain. Alternatively, use the Standard brush with a suitable pore alpha (set to DragRect or DragDot) at a very low Z Intensity.
- Varying distribution and size: This is critical.
- Use a larger pore alpha with a slightly higher Z Intensity in areas like the nose, inner cheeks, and forehead (T-zone).
- Switch to smaller, finer pore alphas with very low intensity for areas like the outer cheeks, temples, and eyelids.
- Don't make them perfectly uniform. Randomness is your friend. Rotate your alphas slightly, vary pressure if using a pen tablet.
5. Adding surface texture and imperfections
This final layer of detail elevates realism by acknowledging that no skin is perfect.
- Subtle bumps and irregularities: Use the Standard brush with a small, soft alpha (or even just the default dot alpha) at a very low Z Intensity to add tiny, almost imperceptible bumps and depressions across the skin. This breaks up any remaining uniform areas.
- Vellus hair (peach fuzz): While often handled with texturing or grooming tools, you can suggest the presence of vellus hair through extremely subtle, almost invisible directional strokes or tiny, elongated bumps in areas like the cheeks and forehead.
- Veins and capillaries: For very thin skin areas (e.g., temples, eyelids), use the Dam_Standard brush with a very low intensity to sculpt extremely fine, winding lines suggesting underlying veins.
- Character-specific details: Add moles, freckles, subtle scars, or other unique marks that define your character. These small details contribute immensely to personality and believability.
- Soften harshness: Use the Smooth brush sparingly and with very low intensity to soften any overly sharp details, ensuring a natural, organic feel.
6. Iteration and refinement
Sculpting realistic skin is rarely a linear process. It involves constant iteration and critical evaluation.
- Step back: Periodically zoom out and view your model from a distance to assess the overall impact of your details.
- Different lighting: View your sculpt under various lighting conditions. Details that look good in one light might disappear or become too prominent in another.
- Mirroring: Flip your model horizontally to catch imbalances or unnatural patterns you might have missed.
- Adjust intensity: Don't be afraid to go back and adjust the intensity of certain details. Sometimes a detail might be too subtle, other times too exaggerated.
- Blend and feather: Ensure that different types of details (pores, wrinkles, bumps) blend seamlessly into each other, avoiding sharp transitions.
Tips for achieving hyper-realism

- High-quality references are gold: Don't just look at beauty shots. Study unposed, natural photos of real people, paying attention to how light interacts with their skin and how details appear in different lighting. Video references can also be incredibly helpful for understanding dynamic wrinkles.
- Layering is key: Build up details gradually, from broad forms to the finest pores. Avoid trying to sculpt everything at once.
- Vary brush intensity and size: A slight variation in pressure or Z Intensity can make a huge difference in the organic feel of your details. Don't be afraid to use the same brush for different effects by adjusting its settings.
- Understand subsurface scattering (SSS): While primarily a rendering phenomenon, knowing how SSS works (light penetrating and scattering within the skin) will inform how you sculpt the subtle forms and translucency that make skin look soft and alive.
- Practice, practice, practice: Like any skill, micro-sculpting improves with dedicated practice and keen observation.
Achieving truly hyper-realistic skin detail is a journey of patience, observation, and meticulous execution. By understanding the underlying anatomy, mastering your tools, and employing a layered approach to micro-sculpting, you can transform your 3D characters, imbuing them with an unparalleled level of realism and emotional depth. Remember, it's the sum of these tiny, carefully crafted imperfections that ultimately creates a believable and captivating digital human.


