Achieving a truly professional look for your 3D printed objects often goes beyond the printing process itself. While modern 3D printers are capable of incredible detail, layer lines, support marks, and minor imperfections are almost inevitable. This is where post-processing, specifically sanding grit progression, becomes an invaluable skill. Far from being a mere chore, a thoughtful approach to sanding can transform a raw print into a polished masterpiece, ready for painting, coating, or display. This guide delves into the nuances of preparing your 3D prints for that coveted, smooth final finish, ensuring every project truly shines.
Understanding sanding grit progression

At its core, sanding grit progression is a systematic approach to refining a surface by moving from coarser to progressively finer abrasives. Think of it like a staircase: you wouldn't jump from the ground floor to the top without traversing the steps in between. Each step, or grit, serves a specific purpose, removing the scratches left by the previous, coarser grit, and gradually creating a smoother, more uniform surface. Rushing this process or skipping grits can lead to visible scratches, an uneven texture, and a disappointing end result.
The "why" behind the progression
The primary goal of this methodical approach is to eliminate visible layer lines and other surface blemishes inherent in 3D printing, achieving superior 3D print smoothing. When you start with a coarse grit, you're aggressively removing material and major imperfections. This leaves deep scratches. If you immediately jump to a very fine grit, that fine paper will struggle to remove those deep scratches, leading to excessive effort, clogged sandpaper, and often, an unsatisfactory finish where the coarser scratches remain visible, albeit dulled. By gradually increasing the grit, each subsequent sandpaper removes the scratches left by its predecessor, culminating in a surface that is incredibly smooth to the touch and visually flawless, ideal for any subsequent surface preparation like priming or painting.
Decoding sandpaper grits: What the numbers mean

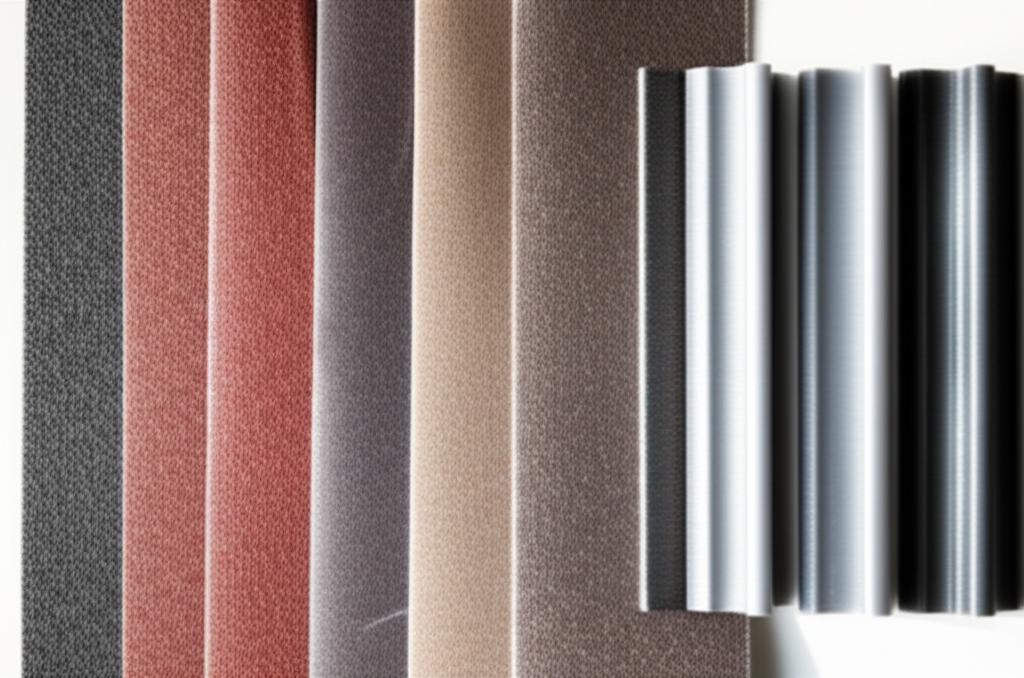
Sandpaper grits are categorized by a number, typically printed on the back of the paper. This number indicates the size of the abrasive particles. Generally, the lower the number, the coarser the grit (larger particles), and the higher the number, the finer the grit (smaller particles).
- Coarse grits (e.g., 60-180): Designed for aggressive material removal, shaping, and tackling significant imperfections like stubborn support marks or severe layer lines.
- Medium grits (e.g., 220-400): Ideal for refining the surface after coarse sanding, removing the deeper scratches, and beginning the smoothing process.
- Fine grits (e.g., 600-1000): Used for further smoothing and preparing the surface for finer stages. These grits start to create a noticeably smoother feel.
- Very fine/High grits (e.g., 1200-3000+): Essential for achieving a truly polished, sometimes even mirror-like, finish. These are often used with wet sanding techniques.
Initial steps: Surface preparation and safety
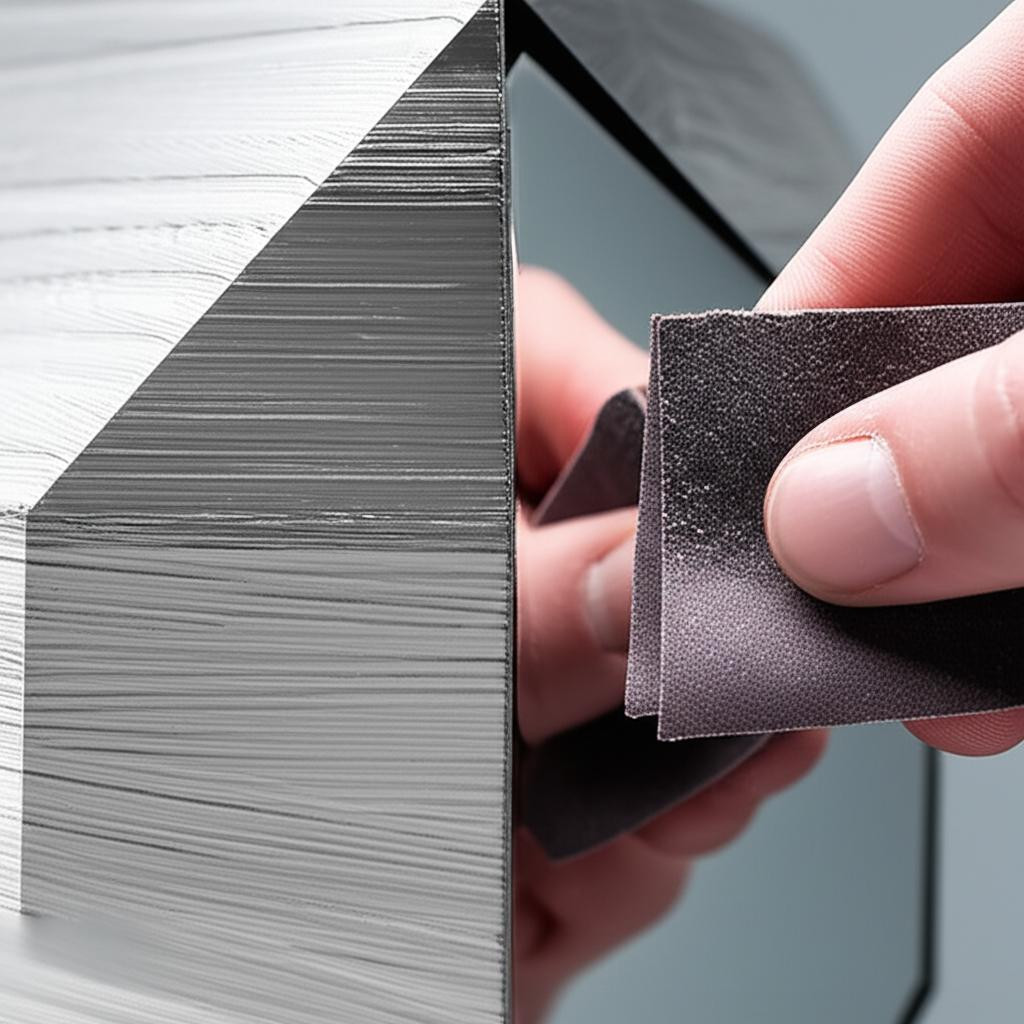
Before you even pick up sandpaper, a little preparation goes a long way. Ensure your print is clean and free of dust or debris. If there are any large, easily removable support structures or blobs, consider using a hobby knife or flush cutters to carefully trim them away, reducing the amount of work for your coarser sandpaper. Always prioritize safety: wear appropriate personal protective equipment (PPE), including a dust mask to avoid inhaling fine plastic particles, and safety glasses to protect your eyes.
The sanding grit progression in practice
The exact grit sequence will vary depending on the initial quality of your print and your desired final finish. However, a common and effective progression typically looks like this:
Step 1: Coarse grits (e.g., 80-180 grit)
This is where the heavy lifting happens. Start with a relatively coarse grit, such as 100 or 120, if your print has significant layer lines or stubborn support remnants. The goal here is to aggressively remove material until the major imperfections are gone and the surface feels relatively uniform, albeit rough. Apply consistent, moderate pressure. Work in small sections and change your sanding direction periodically to identify and remove previous scratch patterns. If you start with too fine a grit here, you'll be sanding forever with little progress.
Step 2: Medium grits (e.g., 220-400 grit)
Once the coarse scratches are uniform and the major imperfections are gone, move to a medium grit like 220 or 320. This stage is crucial for removing the deeper scratches left by the coarse sandpaper. Focus on creating a more refined, even texture. At this point, you should start to feel the surface becoming noticeably smoother. Again, change your sanding direction to ensure you're effectively eliminating the previous grit's marks. For optimal 3D print smoothing, resist the urge to skip this step.
Step 3: Fine grits (e.g., 600-1000 grit)
As you transition to fine grits like 600 or 800, you're entering the realm of true surface preparation for high-quality finishes. The goal is to eliminate the scratches from the medium grits and further smooth the surface. Many hobbyists find that 600 or 800 grit is sufficient if the part is going to be primed and painted, as the primer will fill in the microscopic scratches. However, for a truly glass-like finish or for translucent prints, you'll need to go even higher.
Step 4: Very fine and high grits (e.g., 1200-3000+ grit)
This is where the magic happens for an ultra-smooth or polished look. For these grits, particularly anything above 1000, wet sanding is highly recommended. Wet sanding involves using water (sometimes with a drop of soap) as a lubricant. This helps to carry away plastic dust, prevents sandpaper from clogging, reduces heat buildup, and yields a much smoother finish. Using high grit sandpaper with water will transform the surface, making it incredibly smooth and often giving it a subtle sheen. For resin prints, or if you're aiming for a high-gloss, clear finish, you might even progress to micro-mesh pads or polishing compounds after 3000 grit or higher.
Tools and techniques for effective sanding
While manual sanding is often sufficient for smaller prints and intricate details, various tools can enhance your sanding grit progression:
- Sanding blocks: These provide a flat, firm surface, ensuring even pressure and preventing dips or uneven sanding on flat areas.
- Sanding sticks/files: Ideal for reaching into tight corners, crevices, or detailed areas. You can also make your own by gluing sandpaper to craft sticks.
- Rotary tools (e.g., Dremel): With various sanding attachments, these can speed up the process, especially for coarse sanding and removing support material. However, they require a delicate touch to avoid removing too much material or creating divots due to excessive heat or pressure.
- Orbital sanders: For very large, flat prints, an orbital sander can be a time-saver, but again, caution is advised due to the risk of heat buildup and over-sanding.
- Wet sanding: As mentioned, using water with finer grits significantly improves the finish by lubricating the surface and flushing away debris.
When considering tools, weigh the initial investment and learning curve against the time saved and the quality of finish desired. Manual sanding offers unparalleled control and precision, while power tools can accelerate work on larger, less intricate surfaces.
Key considerations for different materials

The type of 3D printing material can influence your sanding grit progression strategy:
- PLA (Polylactic Acid): Tends to be softer and can melt or gum up with excessive friction. Use lighter pressure and consider wet sanding earlier in the progression to dissipate heat.
- ABS (Acrylonitrile Butadiene Styrene): Harder than PLA and can withstand more aggressive sanding. It also responds well to vapor smoothing with acetone, which can reduce the need for extensive sanding.
- PETG (Polyethylene Terephthalate Glycol): A bit tougher and more flexible than PLA, it sands well but can also generate heat. Wet sanding is beneficial.
- Resin (SLA/DLP/LCD): Resin prints often have finer layer lines, meaning you might start with a finer grit (e.g., 400-600) compared to FDM prints. They polish exceptionally well with high grit sandpaper and wet sanding. Always cure resin prints thoroughly before sanding, and wear a respirator and gloves.
Tips for success and common pitfalls
- Patience is paramount: Don't rush the process. Each grit needs to do its job thoroughly before moving on.
- Cleanliness: Regularly clean your print and sandpaper. Clogged sandpaper is ineffective and can create new scratches. Use a brush or compressed air for dry sanding, and rinse thoroughly for wet sanding.
- Consistent pressure: Apply even pressure across the sanding surface to avoid creating uneven spots.
- Change direction: Periodically change your sanding direction (e.g., horizontal, then vertical, then diagonal). This helps reveal and remove scratches left by the previous grit.
- Inspect frequently: Stop and examine your print under good light. Run your fingers over the surface to feel for imperfections.
- Don't skip grits: Skipping grits is the most common mistake and will almost always result in visible scratches, defeating the purpose of the progression.
- Heat management: Especially with power tools or aggressive manual sanding, plastic can melt. Take breaks to allow the print to cool, or use wet sanding.
Conclusion

Mastering sanding grit progression is a transformative skill for anyone serious about 3D printing. It's the difference between a functional prototype and a finished product that truly impresses. By understanding the purpose of each grit, adopting a methodical approach, and paying attention to detail, you can achieve unparalleled 3D print smoothing and a stunning final finish. Remember that the journey through different grits is a systematic removal of progressively finer scratches, leading to an incredibly smooth and professional surface. With practice and patience, you'll consistently elevate your 3D prints from good to exceptional, ready for any application or display.