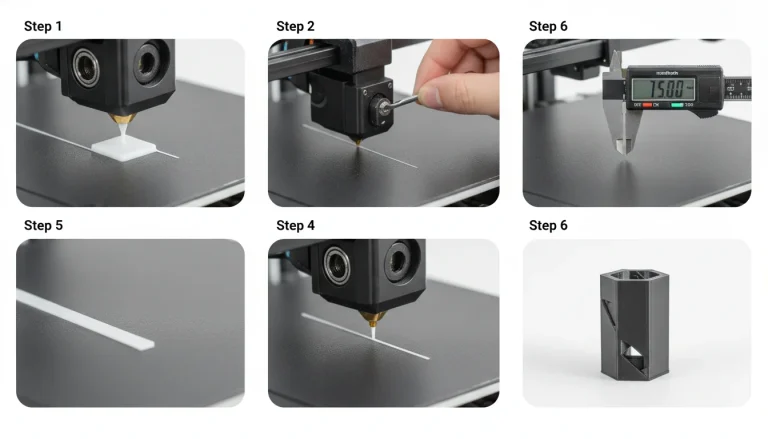
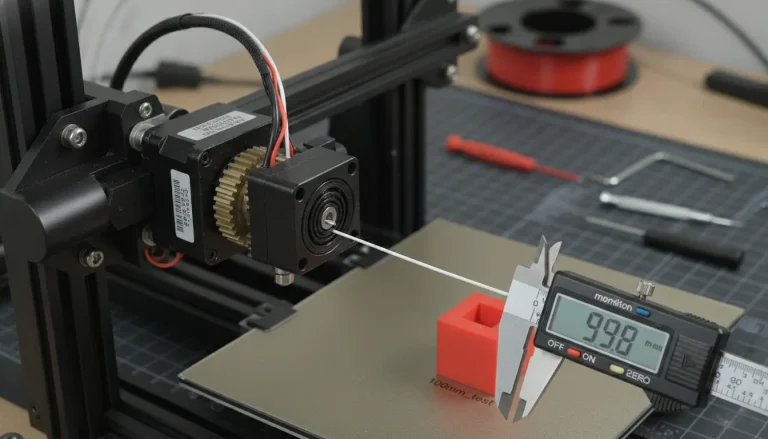
Achieving truly exceptional 3D prints hinges on a multitude of factors, but few are as fundamental and impactful as precise extruder calibration. At the heart of this process lies the accurate setting of your printer’s E-steps, or Extruder Steps Per Millimeter. This seemingly small detail dictates how much filament your printer pushes through the hotend for every commanded millimeter, directly influencing your filament flow, the integrity of your layers, and ultimately, the overall 3D printer accuracy of your final model. Without proper E-steps calibration, you risk issues ranging from under-extrusion (gaps, weak layers) to over-extrusion (blobs, stringing, dimensional inaccuracies), making it an indispensable step for anyone serious about elevating their 3D printing game.
Understanding E-steps: the heart of filament flow
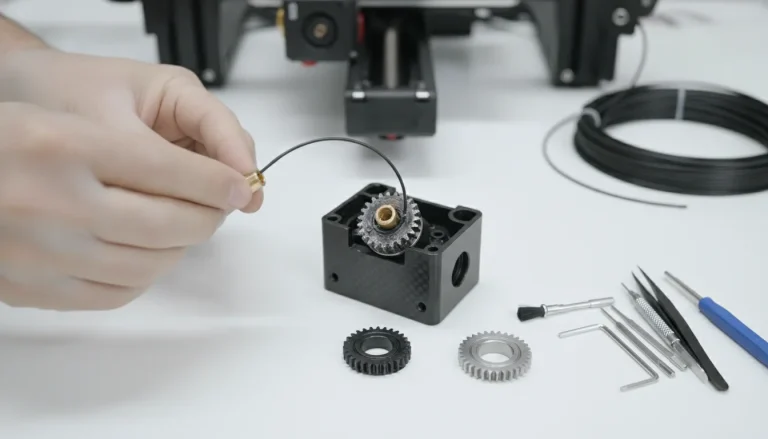
E-steps represent the number of motor steps your extruder motor needs to take to push exactly one millimeter of filament through the hotend. Think of it as the printer’s internal ruler for filament. Each printer, and even each extruder assembly, can have a slightly different E-step value due to variations in motor characteristics, gear ratios, and hob gear diameter. While manufacturers provide a default value, this is often a ballpark figure and rarely perfectly accurate for your specific setup and chosen filament. Calibrating E-steps ensures that when your slicing software tells the printer to extrude 100mm of filament, precisely 100mm is delivered, no more, no less. This direct correlation to perfect extrusion makes it a cornerstone of print quality.
The impact of incorrectly set E-steps is immediately visible in your prints. If your E-steps are too low, your printer will under-extrude, leading to prints that are brittle, have visible gaps between layers, and suffer from poor adhesion. Conversely, if your E-steps are too high, you’ll experience over-extrusion, resulting in excessive plastic being laid down. This manifests as blobs, stringing, dimensional inaccuracies where parts are slightly larger than designed, and a generally messy finish. Over-extrusion can also lead to nozzle clogging and increased wear on your hotend components. By investing the time in proper extruder calibration, you lay the groundwork for consistent, high-quality results, ensuring your printer performs exactly as intended.
Prerequisites for accurate calibration

Before diving into the calibration process, it’s crucial to ensure your printer is in an optimal state. A stable foundation is key to obtaining accurate measurements and reliable results. Here’s what you’ll need:
- A stable, well-maintained printer: Ensure your printer’s hotend and extruder assembly are clean and in good working order. Any clogs or mechanical issues will skew your results.
- Correct nozzle size: Confirm that the nozzle installed on your printer matches the setting in your slicer. A mismatch here can lead to issues that might be mistakenly attributed to E-steps.
- Filament loaded: Have your preferred printing filament loaded and ready. While E-steps are largely independent of filament type, it’s good practice to calibrate with the filament you use most often.
- Measurement tools:
- Digital calipers: Highly recommended for precise measurements. While a standard ruler can be used, calipers offer superior accuracy, which is critical for fine-tuning filament flow.
- Permanent marker: For marking the filament.
- Calculator: For crunching the numbers.
- Access to your printer’s terminal: You’ll need to send G-code commands to your printer. This can be done via a host software like Pronterface, OctoPrint, Repetier-Host, or directly through your printer’s LCD interface if it supports G-code input.
The step-by-step guide to E-steps calibration
This systematic approach will walk you through the process of calculating and setting your new E-step value, paving the way for perfect extrusion.
Step 1: preparing your printer
Begin by heating your hotend to the typical printing temperature for the filament you’re using. This ensures the filament can flow freely and that the extruder isn’t working against cold, stiff plastic. For PLA, this might be 200°C; for PETG, 230°C, and so on. It’s also wise to disable any auto-leveling or compensation systems (like ABL mesh) temporarily, as these can sometimes interfere with precise Z-axis movements during extrusion tests. Next, with the filament loaded, make a clear mark on the filament exactly 120mm from where it enters the extruder body (or a fixed point just before the extruder gears). The extra 20mm beyond the 100mm we plan to extrude acts as a buffer, ensuring you have enough filament to mark accurately and measure any retraction or initial movement.
Step 2: extruding a precise length
Now, we’ll command the printer to extrude a specific length of filament. Connect your printer to your host software (e.g., OctoPrint terminal, Pronterface) and send the following G-code commands:
- M302 S0: This command allows the extruder to move even if the hotend temperature is below the minimum safety threshold. While we’ve already heated the hotend, it’s a good fail-safe.
- G92 E0: This command resets the extruder’s current position to zero. This is crucial for accurate measurement, as it ensures our subsequent extrusion command starts from a known point.
- G1 E100 F100: This is the core command. It instructs the extruder to extrude 100mm of filament (E100) at a slow and controlled feed rate of 100 mm/minute (F100). A slow feed rate minimizes back pressure and ensures the extruder motor doesn’t skip steps, providing the most accurate measurement of its true extrusion capability.
Wait for the printer to complete the extrusion. It will take approximately one minute at the specified feed rate. Do not manually pull or push the filament during this process.
Step 3: measuring and calculating
Once the extrusion is complete, carefully measure the distance from your original 120mm mark to the point where the filament now enters the extruder. Subtract this new measurement from 120mm. The result is the actual length of filament that was extruded. For example, if your original mark was 120mm from the entry point, and after extrusion, the mark is now 25mm from the entry point, then 120mm – 25mm = 95mm was actually extruded. This is your “Actual Length.”
Now, it’s time to calculate your new E-steps value using the following formula:
New E-steps = (Current E-steps * Expected Length) / Actual Length
To find your “Current E-steps,” send the command M503 to your printer. This will display a list of its current settings, including the E-steps value (often found in the M92 line, e.g., M92 E93.0, where 93.0 would be your current E-steps).
Let’s use an example:
- Current E-steps: 93 (from M503)
- Expected Length: 100mm (the amount we commanded the printer to extrude)
- Actual Length: 95mm (what we measured)
New E-steps = (93 * 100) / 95 = 9300 / 95 = 97.89
So, your new E-steps value would be approximately 97.89.
Step 4: updating and saving E-steps
With your new E-steps value calculated, you need to update your printer’s settings. There are two primary methods:
- Via G-code (recommended for most users): Send the following commands to your printer:
- M92 E97.89 (Replace 97.89 with your calculated new E-steps value)
- M500: This command saves the new settings to your printer’s EEPROM (Electrically Erasable Programmable Read-Only Memory), making them persistent even after the printer is turned off and on again. Without M500, your changes will be lost upon reboot.
- Via firmware (for advanced users): If you prefer to hardcode the value or your printer doesn’t support EEPROM saving, you can modify the #define DEFAULT_AXIS_STEPS_PER_UNIT line in your Marlin firmware’s Configuration.h file (specifically the ‘E’ value). After modifying, you’ll need to recompile and flash the firmware to your printer. This method offers a permanent solution but requires more technical expertise and the necessary tools for firmware compilation.
After updating, it’s a good practice to verify the change by sending M503 again and confirming that the E-steps value in the M92 line has been updated. You can also repeat the extrusion test (Steps 1-3) to confirm that 100mm is now extruded accurately. Minor deviations (e.g., 99.8mm or 100.2mm) are generally acceptable, as perfect mechanical precision is elusive, but aim for as close to 100mm as possible.
Refining your extrusion: beyond E-steps

While E-steps calibration is critical, it’s just one piece of the puzzle for achieving truly perfect extrusion. Other factors can influence your final filament flow and 3D printer accuracy.
The role of flow rate calibration
Once your E-steps are precisely calibrated, the next step is often to calibrate your flow rate (sometimes called “extrusion multiplier” in slicers). E-steps calibrate the mechanical movement of your extruder, ensuring the correct length of filament is fed. Flow rate, on the other hand, accounts for the actual volume of plastic coming out of the nozzle, which can be affected by factors like filament diameter inconsistencies and the specific characteristics of your hotend. Flow rate calibration typically involves printing a single-wall cube and measuring the wall thickness, adjusting the flow rate percentage in your slicer until the measured wall thickness matches your nozzle diameter.
Impact of filament diameter variation
Filament is rarely perfectly 1.75mm or 2.85mm along its entire length. Variations, even slight ones, can impact your actual filament flow. While E-steps calibration assumes a nominal diameter, significant deviations can lead to under or over-extrusion. Measuring your filament diameter at several points along its length with calipers and inputting the average into your slicer can significantly improve consistency. Some advanced slicers even allow for per-filament diameter settings, offering a more precise approach than relying solely on the nominal value.
Temperature and speed considerations
The hotend temperature directly affects the viscosity of the molten plastic. Printing too cold can lead to higher resistance, potentially causing the extruder to skip steps or under-extrude, even with perfectly calibrated E-steps. Conversely, too high a temperature can make the plastic too runny, leading to oozing and stringing. Similarly, printing speed plays a role. Pushing filament through the hotend too quickly can exceed the hotend’s melting capacity, leading to under-extrusion or extruder grinding. It’s crucial to find the optimal balance of temperature and speed for each filament type to maintain consistent filament flow and achieve the best possible print quality.
Common pitfalls and troubleshooting
Even with a clear guide, users can encounter issues during extruder calibration. Awareness of these common pitfalls can help in troubleshooting:
- Inaccurate measurements: Using a flimsy ruler or not being precise with your marks can lead to errors. Invest in good digital calipers and take your time.
- Skipping steps or grinding filament: If your extruder motor skips steps or grinds the filament during the 100mm extrusion test, it indicates excessive resistance. This could be due to a partially clogged nozzle, too low a hotend temperature, or excessive tension on the extruder idler. Address these mechanical issues before proceeding with calibration.
- Incorrect G-code commands: Typos in G-code can lead to unexpected behavior or no extrusion at all. Double-check your commands before sending them. Ensure you’re using G92 E0 to reset the extruder position and G1 E100 F100 for the extrusion test.
- Not saving settings: Forgetting the M500 command after setting new E-steps (M92 Exxx.xx) is a common mistake. Your printer will revert to its old settings upon reboot, making your calibration effort futile. Always remember to save to EEPROM.
- Relying solely on E-steps for flow: While crucial, E-steps calibration is about mechanical accuracy. It doesn’t account for filament diameter variations or specific hotend characteristics. Always follow up with flow rate calibration in your slicer for truly perfect extrusion.
When to recalibrate your extruder

E-steps calibration isn’t a one-and-done deal, although it’s a setting that tends to be quite stable. However, certain events warrant a re-evaluation of your E-steps to maintain optimal 3D printer accuracy:
- New printer setup: Always calibrate E-steps on a new printer. Factory defaults are rarely perfect for every unit.
- Replacing the extruder or hotend: Any change to the components responsible for moving or melting the filament (e.g., new motor, new hob gear, different hotend) can alter the effective E-steps.
- Firmware updates: Major firmware updates can sometimes reset EEPROM settings to defaults, or introduce changes that necessitate recalibration.
- Significant changes in filament type or brand: While E-steps are primarily mechanical, some very stiff or very flexible filaments can behave slightly differently, and a slight recalibration might be beneficial, though often flow rate calibration in the slicer is sufficient here.
- Noticeable degradation in print quality: If you start seeing consistent under- or over-extrusion issues that weren’t present before, E-steps calibration should be one of the first troubleshooting steps.
In conclusion, extruder calibration, specifically the accurate setting of E-steps, is a foundational practice for anyone seeking to master their 3D printer. It’s a precise, methodical process that directly impacts filament flow, layer adhesion, and the overall dimensional accuracy of your prints. By following this guide, you equip yourself with the knowledge and steps necessary to move beyond common printing frustrations and achieve consistently high-quality, perfect extrusion, unlocking the full potential of your 3D printer and elevating your creations to a new level of precision and detail.
Frequently asked questions
Can I calibrate E-steps without a computer or host software?
Yes, if your printer’s LCD screen supports G-code input directly, you can send the M302 S0, G92 E0, and G1 E100 F100 commands through the printer’s control interface. If your firmware does not support direct terminal input via the screen, you will need host software like OctoPrint, Pronterface, or Repetier-Host connected via USB.
Do I need to recalibrate E-steps when switching between PLA and PETG?
E-steps are a mechanical calibration of your extruder motor and gears, so they are largely independent of filament type. You do not need to recalibrate E-steps when switching materials. However, you should always heat the hotend to the appropriate printing temperature for your filament before running the extrusion test, as cold filament can cause the extruder to skip steps and give inaccurate results.
My extruder skips steps or grinds the filament during the 100mm test. What should I do?
This indicates excessive resistance in the filament path. First, verify your hotend is at the correct printing temperature for your filament. Then, check for a partial clog by attempting a cold pull or replacing the nozzle. Also, ensure your extruder idler tension is not too tight, as excessive pressure can deform the filament and cause grinding. Resolve these mechanical issues before repeating the calibration.